Setting up a ‘PXE Network Boot Server’ for Multiple Linux Distribution Installations in RHEL/CentOS 7
PXE Server – Preboot eXecution Environment – instructs a client computer to boot, run or install an operating system directly form a network interface, eliminating the need to burn a CD/DVD or use a physical medium, or, can ease the job of installing Linux distributions on your network infrastructure on multiple machines the same time.

Setting PXE Network Boot in RHEL/CentOS 7
Requirements
- CentOS 7 Minimal Installation Procedure
- RHEL 7 Minimal Installation Procedure
- Configure Static IP Address in RHEL/CentOS 7
- Remove Unwanted Services in RHEL/CentOS 7
- Install NTP Server to Set Correct System Time in RHEL/CentOS 7
Which provides DNS and DHCP services, Syslinux package which provides bootloaders for network booting, TFTP-Server, which makes bootable images available to be downloaded via network using Trivial File Transfer Protocol (TFTP) and VSFTPD Server which will host the local mounted mirrored DVD image – which will act as an official RHEL/CentOS 7 mirror installation repository from where the installer will extract its required packages.
Step 1: Install and configure DNSMASQ Server
1. No need to remind you that is absolutely demanding that one of your network card interface, in case your server poses more NICs, must be configured with a static IP address from the same IP range that belongs to the network segment that will provide PXE services.So, after you have configured your static IP Address, updated your system and performed other initial settings, use the following command to install DNSMASQ daemon.
# yum install dnsmasq

Install dnsmasq Package
First make sure you backup this file in case you need to review it later and, then, create a new blank configuration file using your favorite text editor by issuing the following commands.
# mv /etc/dnsmasq.conf  /etc/dnsmasq.conf.backup
# nano /etc/dnsmasq.conf
3. Now, copy and paste the following configurations on dnsmasq.conf file and assure that you change the below explained statements to match your network settings accordingly.
interface=eno16777736,lo
#bind-interfaces
domain=centos7.lan
# DHCP range-leases
dhcp-range= eno16777736,192.168.1.3,192.168.1.253,255.255.255.0,1h
# PXE
dhcp-boot=pxelinux.0,pxeserver,192.168.1.20
# Gateway
dhcp-option=3,192.168.1.1
# DNS
dhcp-option=6,92.168.1.1, 8.8.8.8
server=8.8.4.4
# Broadcast Address
dhcp-option=28,10.0.0.255
# NTP Server
dhcp-option=42,0.0.0.0

pxe-prompt="Press F8 for menu.", 60
pxe-service=x86PC, "Install CentOS 7 from network server 192.168.1.20", pxelinux
enable-tftp
tftp-root=/var/lib/tftpboot

Dnsmasq Configuration
- interface – Interfaces that the server should listen and provide services.
- bind-interfaces – Uncomment to bind only on this interface.
- domain – Replace it with your domain name.
- dhcp-range – Replace it with IP range defined by your network mask on this segment.
- dhcp-boot – Replace the IP statement with your interface IP Address.
- dhcp-option=3,192.168.1.1 – Replace the IP Address with your network segment Gateway.
- dhcp-option=6,92.168.1.1 – Replace the IP Address with your DNS Server IP – several DNS IPs can be defined.
- server=8.8.4.4 – Put your DNS forwarders IPs Addresses.
- dhcp-option=28,10.0.0.255 – Replace the IP Address with network broadcast address –optionally.
- dhcp-option=42,0.0.0.0 – Put your network time servers – optionally (0.0.0.0 Address is for self-reference).
- pxe-prompt – Leave it as default – means to hit F8 key for entering menu 60 with seconds wait time..
- pxe=service – Use x86PC for 32-bit/64-bit architectures and enter a menu description prompt under string quotes. Other values types can be: PC98, IA64_EFI, Alpha, Arc_x86, Intel_Lean_Client, IA32_EFI, BC_EFI, Xscale_EFI and X86-64_EFI.
- enable-tftp – Enables the build-in TFTP server.
- tftp-root – Use /var/lib/tftpboot – the location for all netbooting files.
Step 2: Install SYSLINUX Bootloaders
4. After you have edited and saved DNSMASQ main configuration file, go ahead and install Syslinx PXE bootloader package by issuing the following command.# yum install syslinux

Install Syslinux Bootloaders
# ls /usr/share/syslinux

Syslinux Files
Step 3: Install TFTP-Server and Populate it with SYSLINUX Bootloaders
6. Now, let’s move to next step and install TFTP-Server and, then, copy all bootloders files provided by Syslinux package from the above listed location to /var/lib/tftpboot path by issuing the following commands.# yum install tftp-server # cp -r /usr/share/syslinux/* /var/lib/tftpboot

Install TFTP Server
Step 4: Setup PXE Server Configuration File
7. Typically the PXE Server reads its configuration from a group of specific files (GUID files – first, MAC files – next, Default file – last) hosted in a folder called pxelinux.cfg, which must be located in the directory specified in tftp-root statement from DNSMASQ main configuration file.Create the required directory pxelinux.cfg and populate it with a default file by issuing the following commands.
# mkdir /var/lib/tftpboot/pxelinux.cfg
# touch /var/lib/tftpboot/pxelinux.cfg/default
8. Now it’s time to edit PXE Server configuration file with valid Linux distributions installation options. Also note that all paths used in this file must be relative to the /var/lib/tftpboot directory.
Below you can see an example configuration file that you can use it, but modify the installation images (kernel and initrd files), protocols (FTP, HTTP, HTTPS, NFS) and IPs to reflect your network installation source repositories and paths accordingly.
# nano /var/lib/tftpboot/pxelinux.cfg/defaultAdd the following whole excerpt to the file.
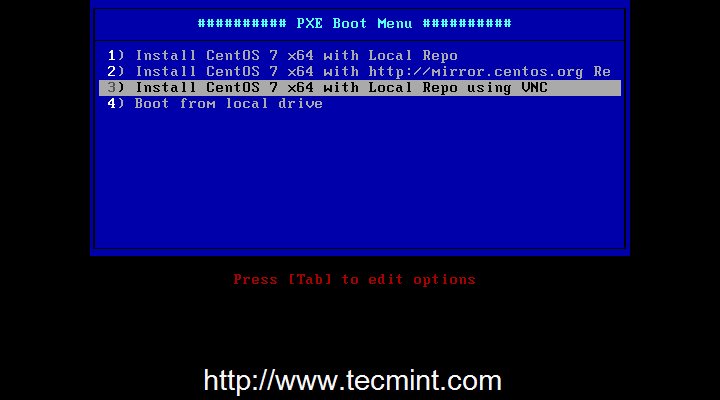
default menu.c32
prompt 0
timeout 300
ONTIMEOUT local

menu title ########## PXE Boot Menu ##########

label 1
menu label ^1) Install CentOS 7 x64 with Local Repo
kernel centos7/vmlinuz
append initrd=centos7/initrd.img method=ftp://192.168.1.20/pub devfs=nomount

label 2
menu label ^2) Install CentOS 7 x64 with http://mirror.centos.org Repo
kernel centos7/vmlinuz
append initrd=centos7/initrd.img method=http://mirror.centos.org/centos/7/os/x86_64/ devfs=nomount ip=dhcp

label 3
menu label ^3) Install CentOS 7 x64 with Local Repo using VNC
kernel centos7/vmlinuz
append  initrd=centos7/initrd.img method=ftp://192.168.1.20/pub devfs=nomount inst.vnc inst.vncpassword=password

label 4
menu label ^4) Boot from local drive

Configure PXE Server
Also menu label 3 specifies that the client installation should be done from a remote location via VNC (here replace VNC password with a strong password) in case you install on a headless client and the menu label 2 specifies as
installation sources a CentOS 7 official Internet mirror (this case requires an Internet connection available on client through DHCP and NAT).
Important: As you see in the above configuration, we’ve used CentOS 7 for demonstration purpose, but you can also define RHEL 7 images, and following whole instructions and configurations are based on CentOS 7 only, so be careful while choosing distribution.
Step 5: Add CentOS 7 Boot Images to PXE Server
9. For this step CentOS kernel and initrd files are required. To get those files you need the CentOS 7 DVD ISO Image. So, go ahead and download CentOS DVD Image, put it in your DVD drive and mount the image to /mnt system path by issuing the below command.The reason for using the DVD and not a Minimal CD Image is the fact that later this DVD content would be used to create the
locally installer repositories for FTP sources.
# mount -o loop /dev/cdrom  /mnt
# ls /mnt

Mount CentOS DVD
# wget http://mirrors.xservers.ro/centos/7.0.1406/isos/x86_64/CentOS-7.0-1406-x86_64-DVD.iso
# mount -o loop /path/to/centos-dvd.iso  /mnt
10. After the DVD content is made available, create the centos7 directory and copy CentOS 7 bootable kernel and initrd images from the DVD mounted location to centos7 folder structure.
# mkdir /var/lib/tftpboot/centos7
# cp /mnt/images/pxeboot/vmlinuz  /var/lib/tftpboot/centos7
# cp /mnt/images/pxeboot/initrd.img  /var/lib/tftpboot/centos7

Copy CentOS Bootable Files
Step 6: Create CentOS 7 Local Mirror Installation Source
11. Although you can setup Installation Source Mirrors via a variety of protocols such as HTTP, HTTPS or NFS, for this guide, I have chosen FTP protocol because is very reliable and easy to setup with the help of vsftpd server.Further install vsftpd daemon, copy all DVD mounted content to vsftpd default server path (/var/ftp/pub) – this can take a while depending on your system resources and append readable permissions to this path by issuing the following commands.
# yum install vsftpd
# cp -r /mnt/*  /var/ftp/pub/
# chmod -R 755 /var/ftp/pub

Install Vsftpd Server

Copy Files to FTP Path

Set Permissions on FTP Path
Step 7: Start and Enable Daemons System-Wide
12. Now that the PXE server configuration is finally finished, start DNSMASQ and VSFTPD servers, verify their status and enable it system-wide, to automatically start after every system reboot, by running the below commands.# systemctl start dnsmasq # systemctl status dnsmasq # systemctl start vsftpd # systemctl status vsftpd # systemctl enable dnsmasq # systemctl enable vsftpd

Start Dnsmasq Service

Start Vsftpd Service
Step 8: Open Firewall and Test FTP Installation Source
13. To get a list of all ports that needs to be open on your Firewall in order for client machines to reach and boot from PXE server, run netstat command and add CentOS 7 Firewalld rules accordingly to dnsmasq and vsftpd listening ports.# netstat -tulpn # firewall-cmd --add-service=ftp --permanent ## Port 21 # firewall-cmd --add-service=dns --permanent ## Port 53 # firewall-cmd --add-service=dhcp --permanent ## Port 67 # firewall-cmd --add-port=69/udp --permanent ## Port for TFTP # firewall-cmd --add-port=4011/udp --permanent ## Port for ProxyDHCP # firewall-cmd --reload ## Apply rules

Check Listening Ports

Open Ports in Firewall
FTP protocol followed by /pub network location on URL filed and the result should be as presented in the below screenshot.
ftp://192.168.1.20/pub

Access FTP Files via Browser
# tailf /var/log/messages

Check PXE Logs for Errors
# umount /mnt
Step 9: Configure Clients to Boot from Network
17. Now your clients can boot and install CentOS 7 on their machines by configuring Network Boot as primary boot device from their systems BIOS or by hitting a specified key during BIOS POST operations as specified in motherboard manual.In order to choose network booting. After first PXE prompt appears, press F8 key to enter presentation and then hit Enter key to proceed forward to PXE menu.

PXE Network Boot

PXE Network OS Boot
Please note down that using variant 2 from this menu requires an active Internet connection on the target client. Also, on below
screenshots you can see an example of a client remote installation via VNC.
PXE Menu

Remote Linux Installation via VNC
Remote Installation of CentOS
Requirements
- CentOS 7.0 DVD ISO
CentOS 7.0 Installation Process
1. After downloading the last version of CentOS using above links or using official CentOS download page. Burn it to a DVD or create a bootable USB stick using LiveUSB Creator called Unetbootin.2. After you have created the installer bootable media, place your DVD/USB into your system appropriate drive, start the computer, select your bootable unit and the first CentOS 7 prompt should appear. At the prompt choose Install CentOS 7 and press [Enter] key.
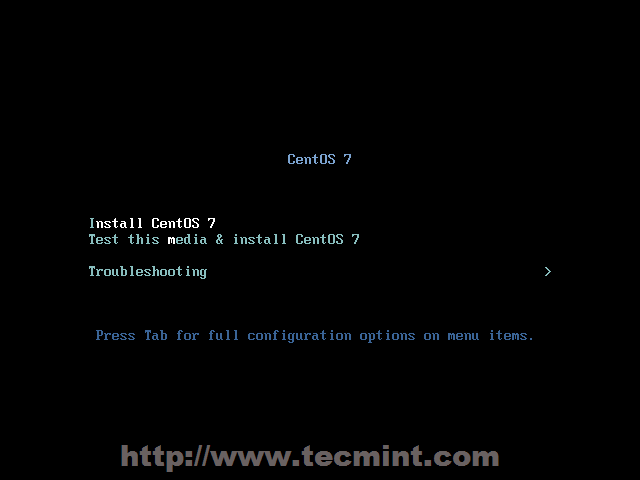
CentOS 7 Boot Menu

CentOS Installer Loading
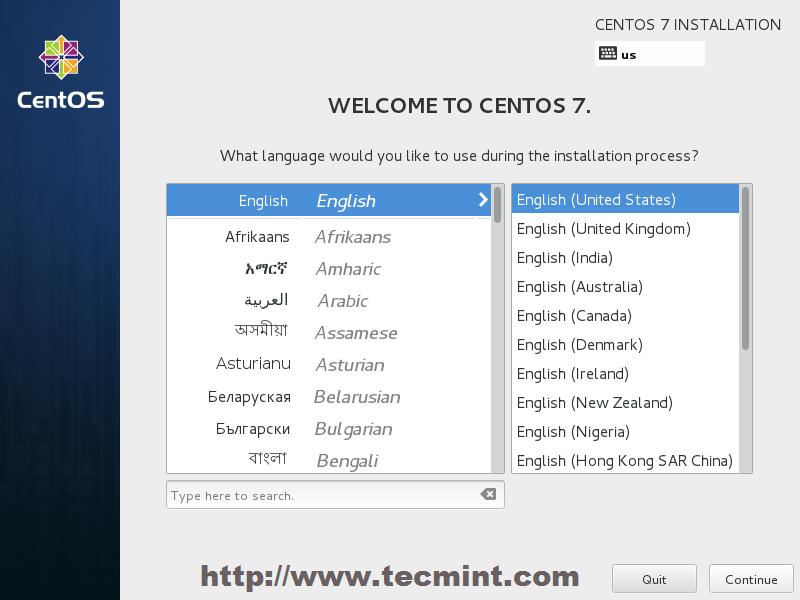
Select Installation Process Language
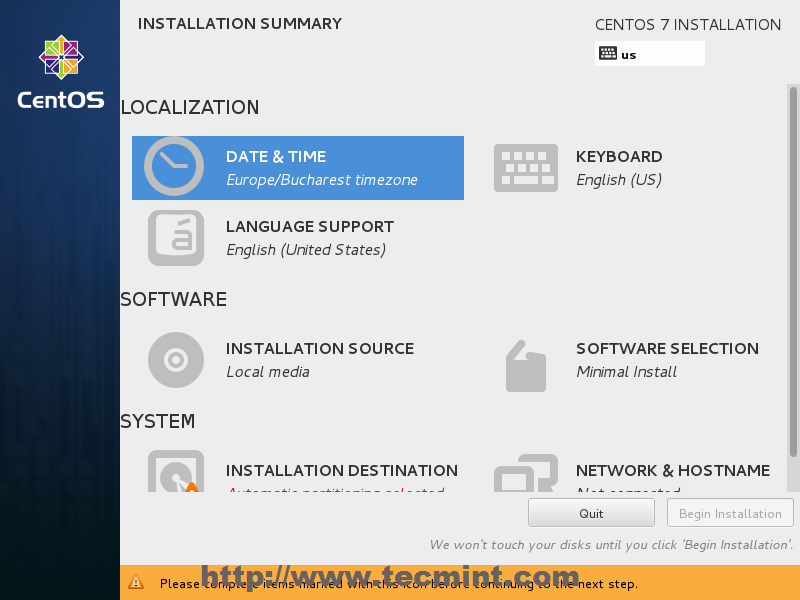
Select Date & Time and Location
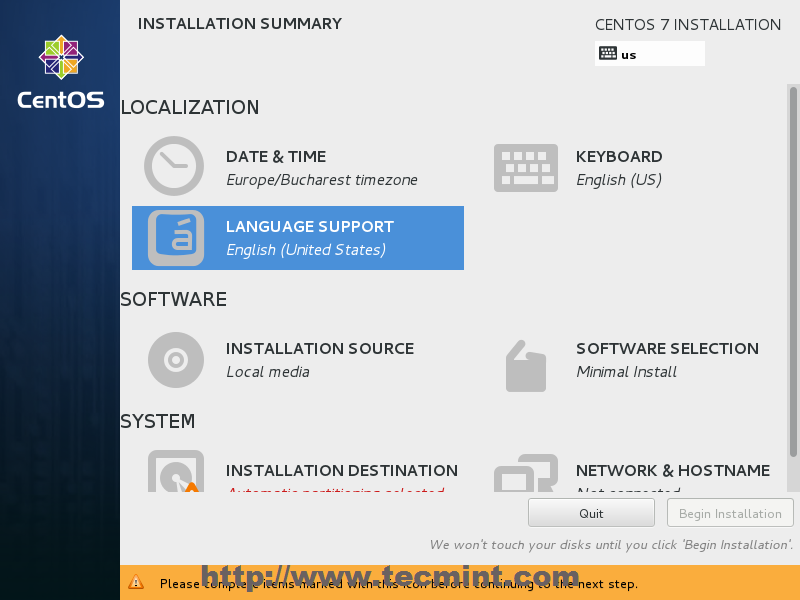
Select Language and Keyboard
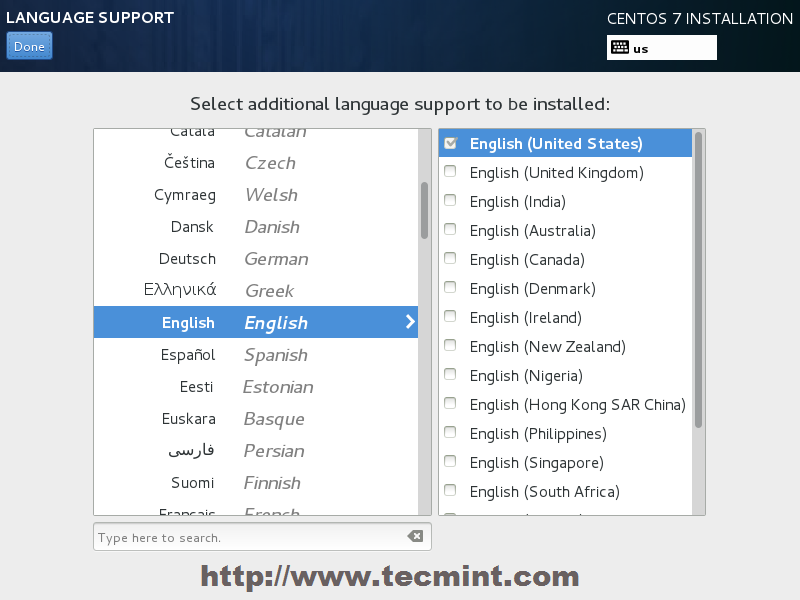
Select English Language
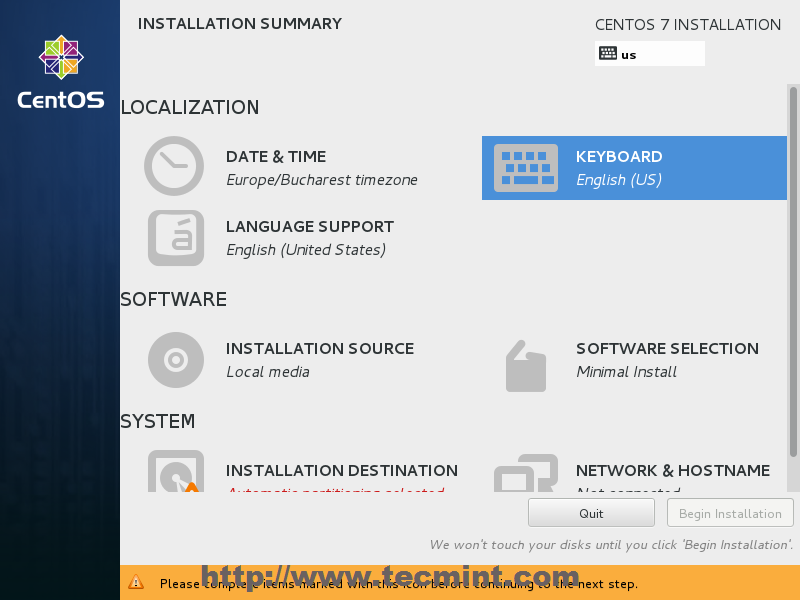
Choose Keyboard Layout
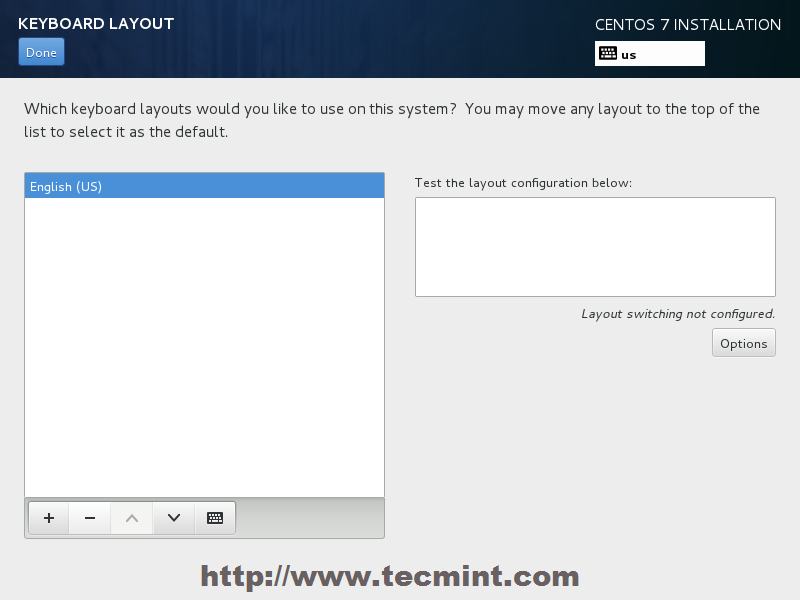
Choose English Keyboard
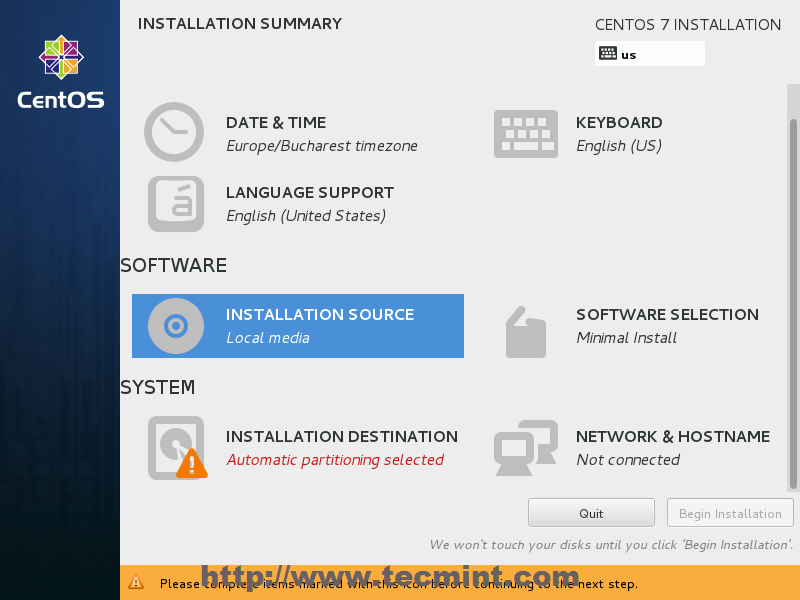
Choose Installation Sources
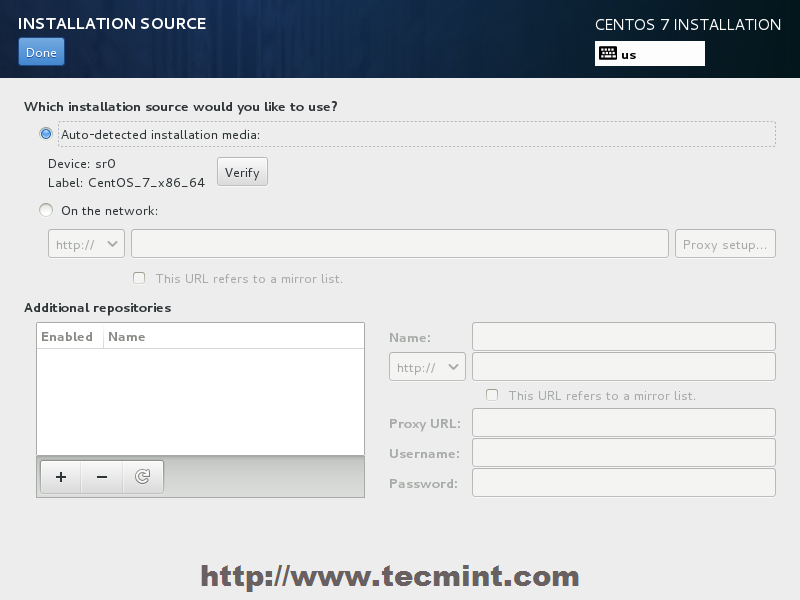
Auto Detect Installation Type
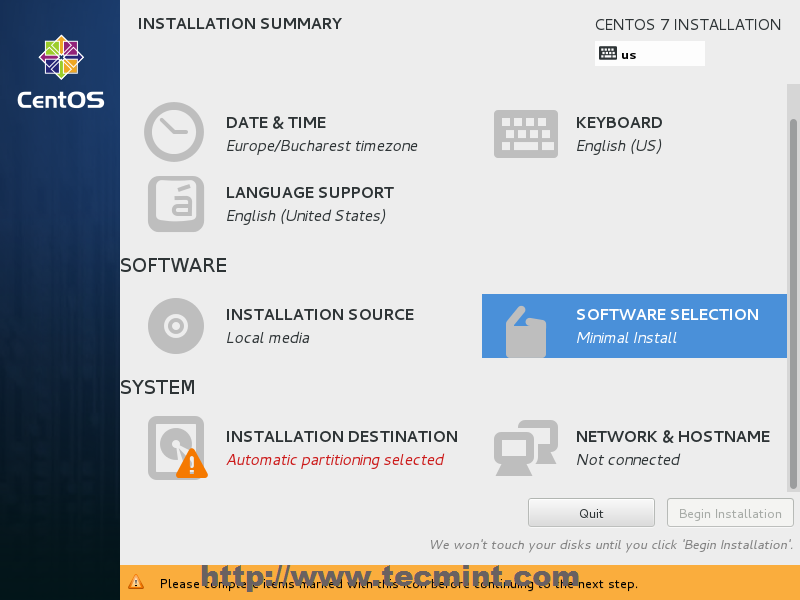
Software Selection
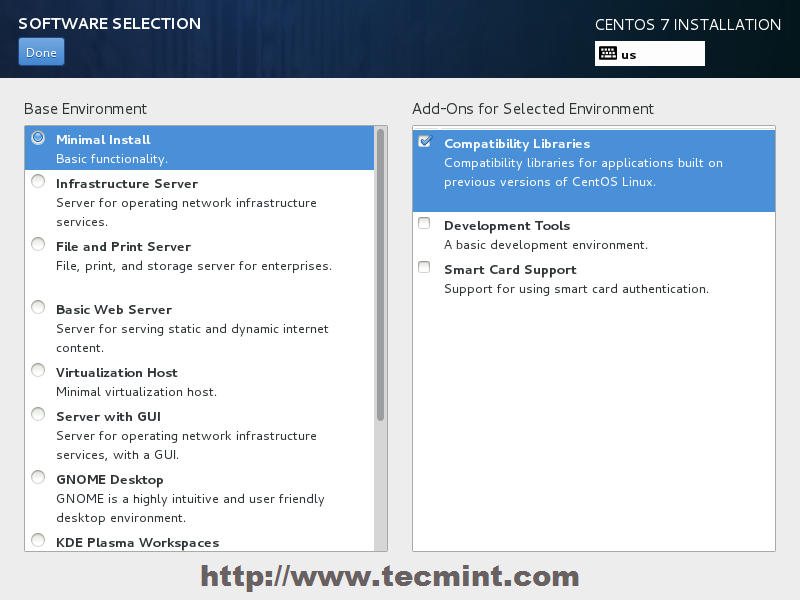
Select CentOS 7 Minimal Install
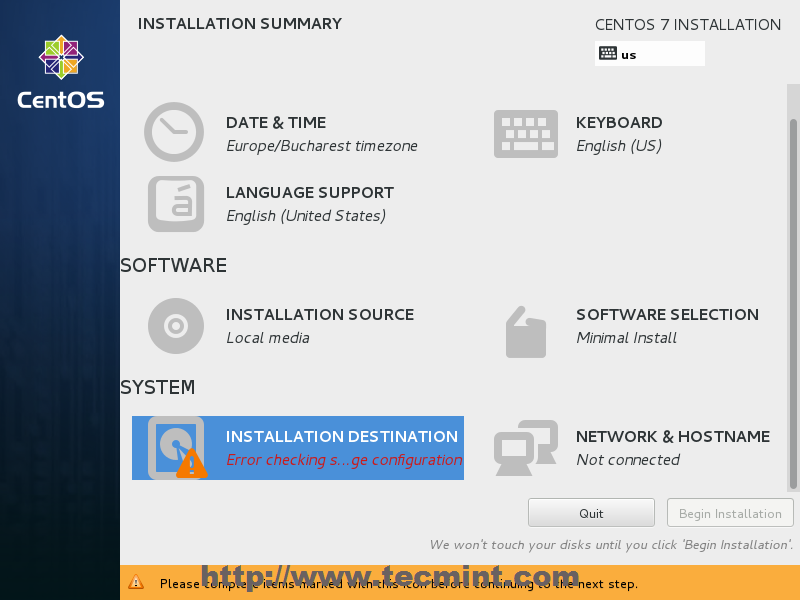
Choose Installation Destination
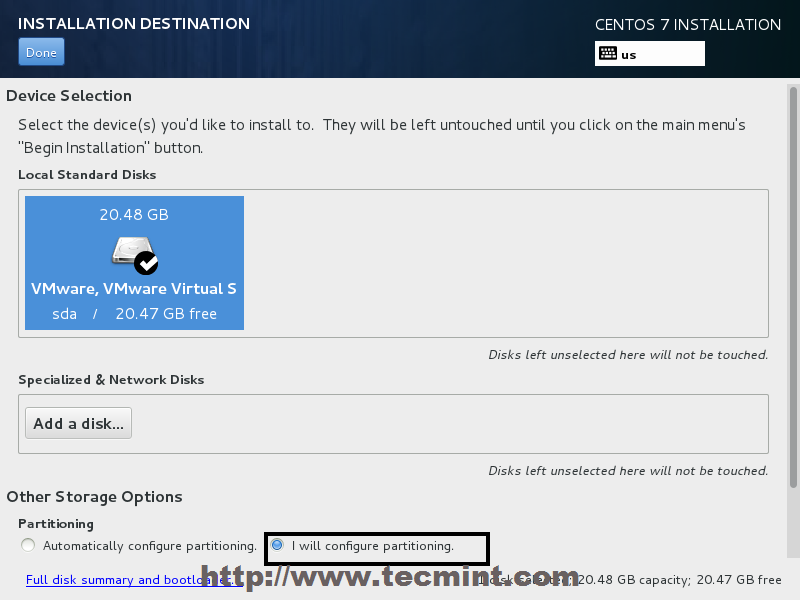
Installation Device Selection
- /boot – Non LVM
- /(root) – LVM
- Swap – LVM
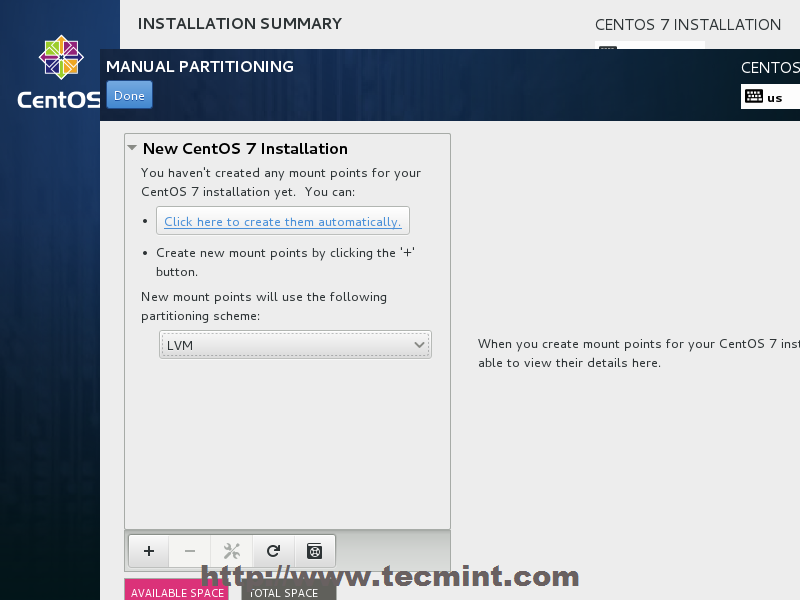
Select LVM Partition Type
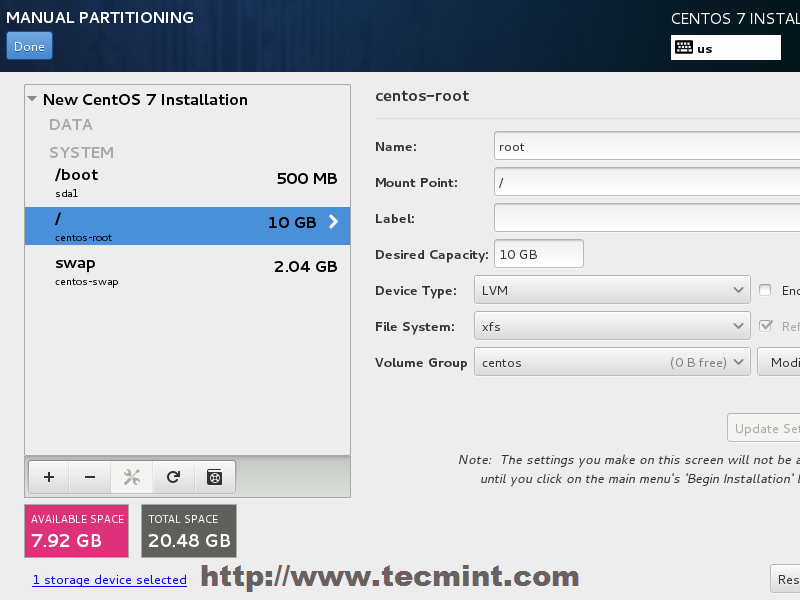
Create Partitions
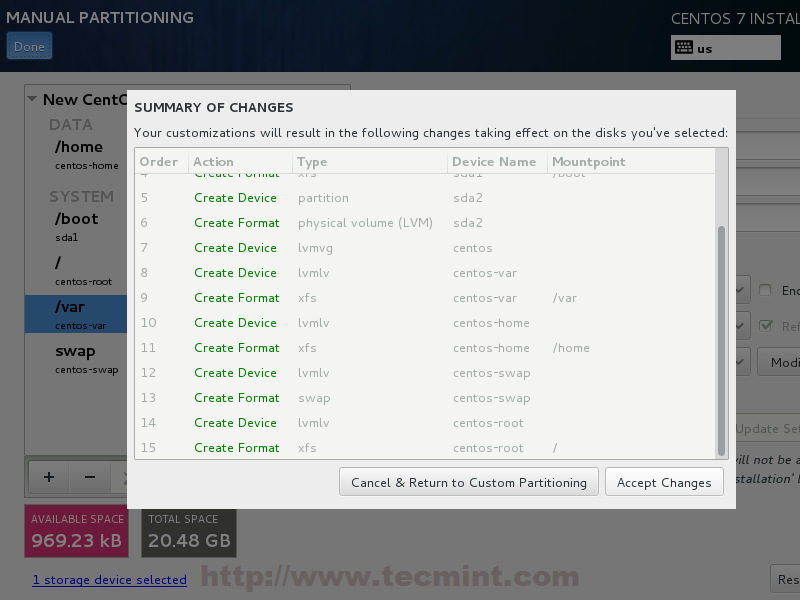
Summary of Partition Changes
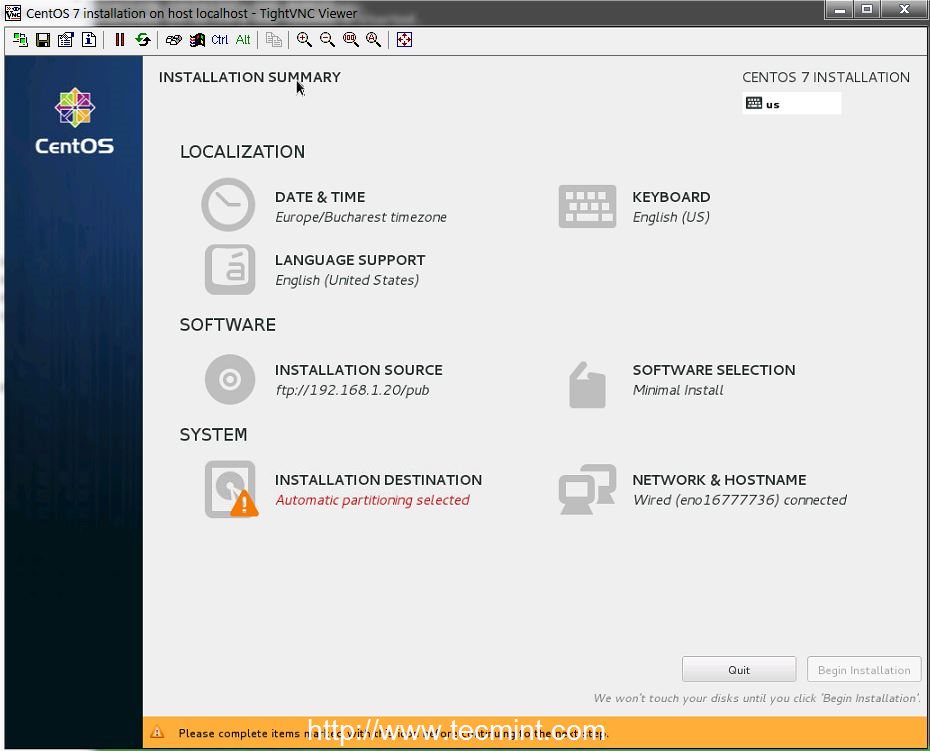
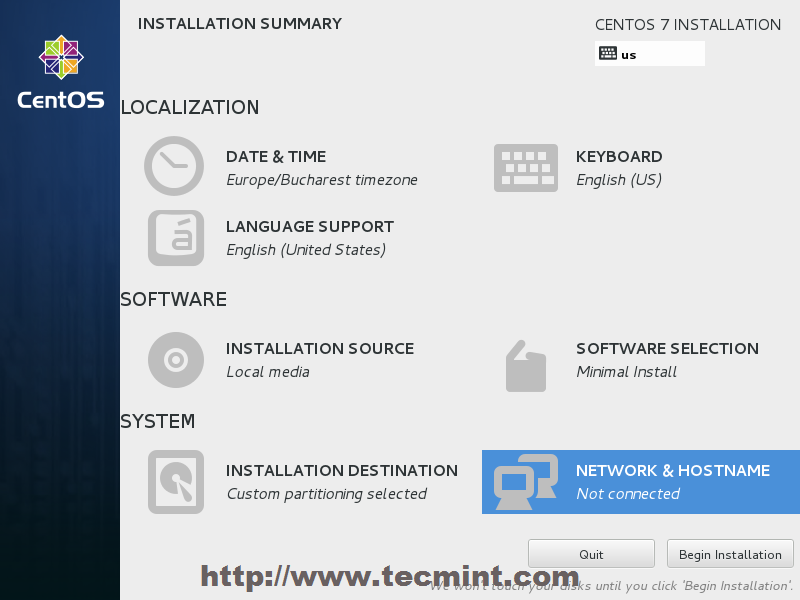
12. The next step is to set your system hostname and enable networking. Click on Network & Hostname label and type your system FQDN (Fully Qualified Domain Name) on Hostname filed, then enable your Network interface, switching the top Ethernet button to ON.
If you have a functional DHCP server on you network then it will automatically configure all your network setting for enabled NIC, which should appear under your active interface.
Set System Hostname
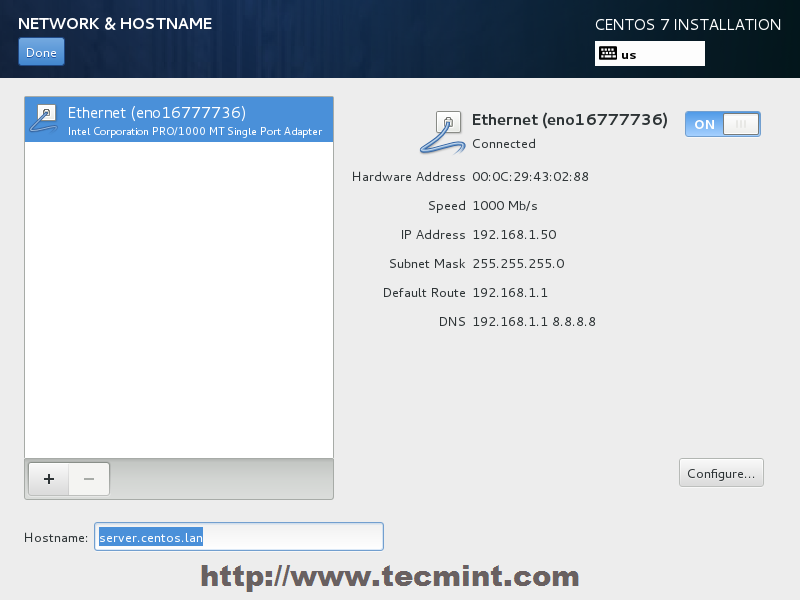
Enable Ethernet Interface
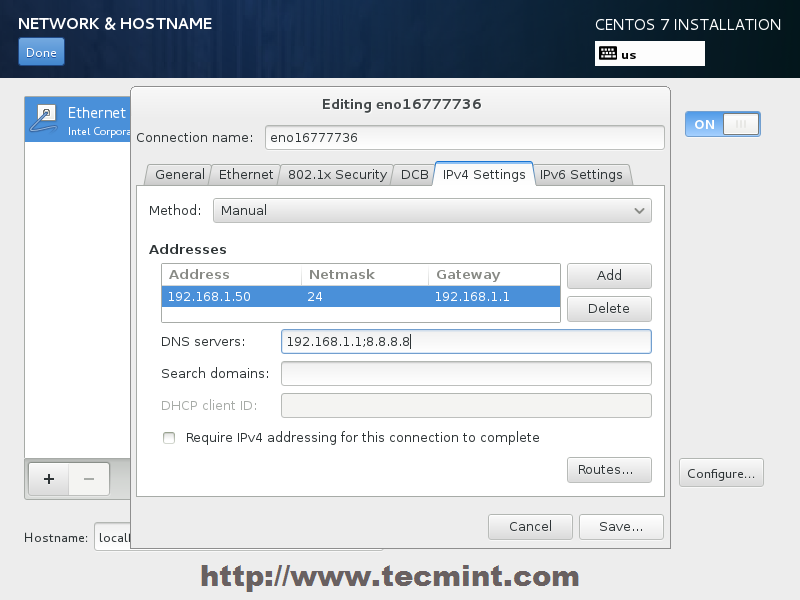
Enter Network Settings
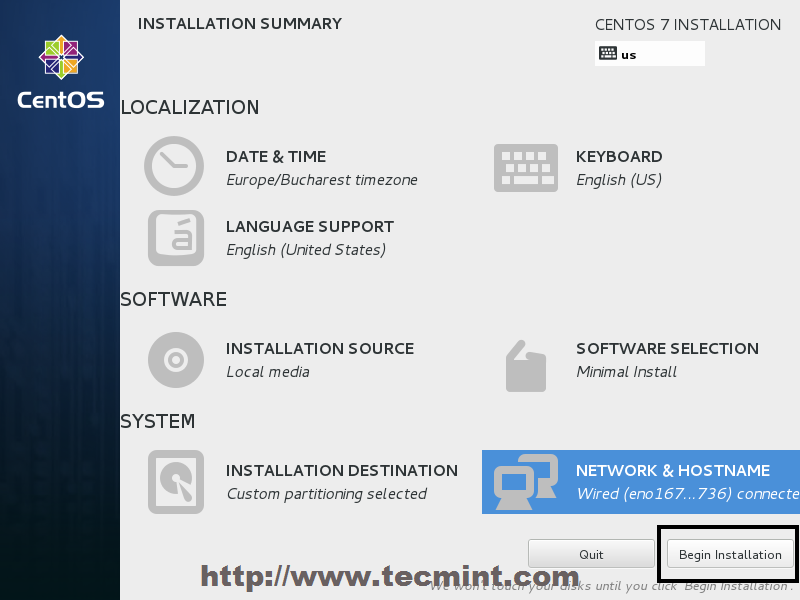
Click on Begin Installation
Select Root Password
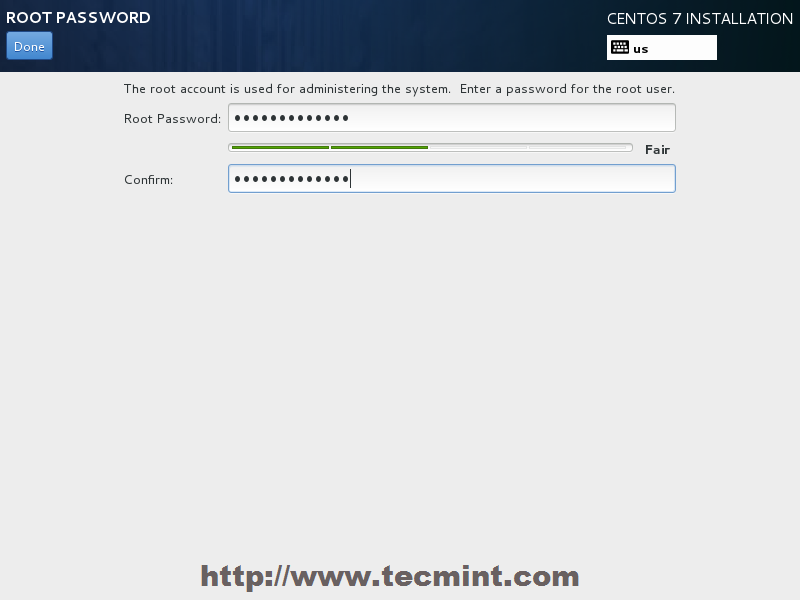
Enter Root Password
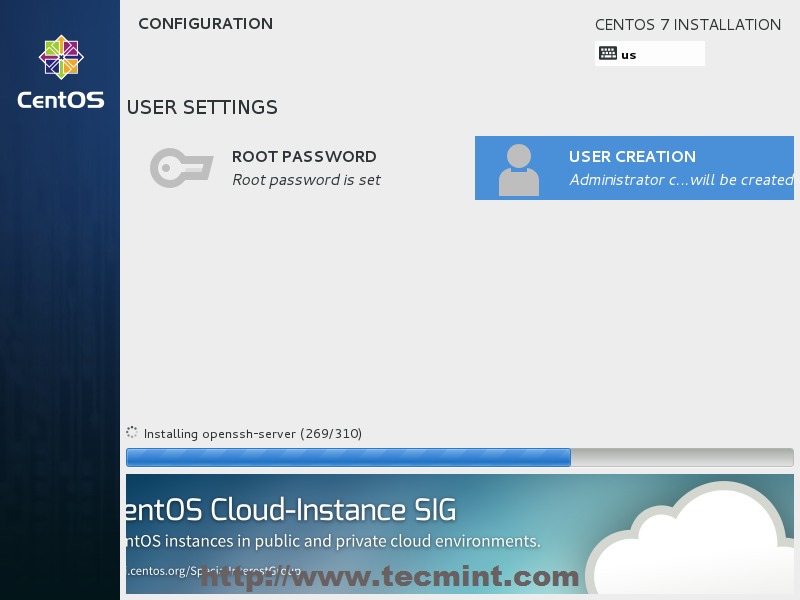
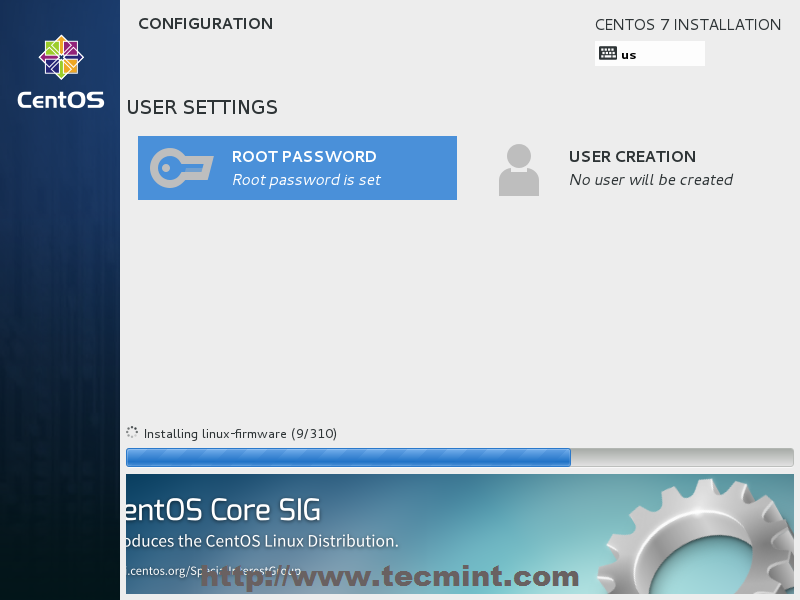
CentOS 7 Installation Process
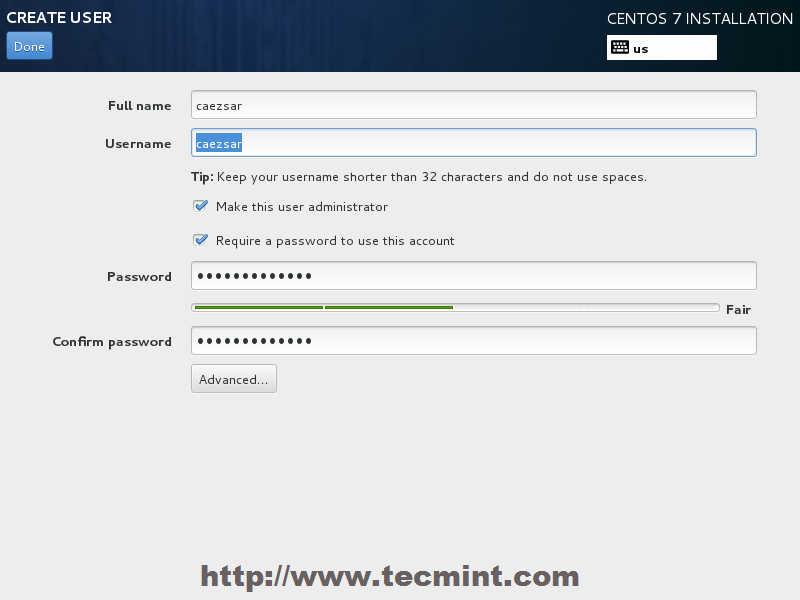
User Creation and Set Password
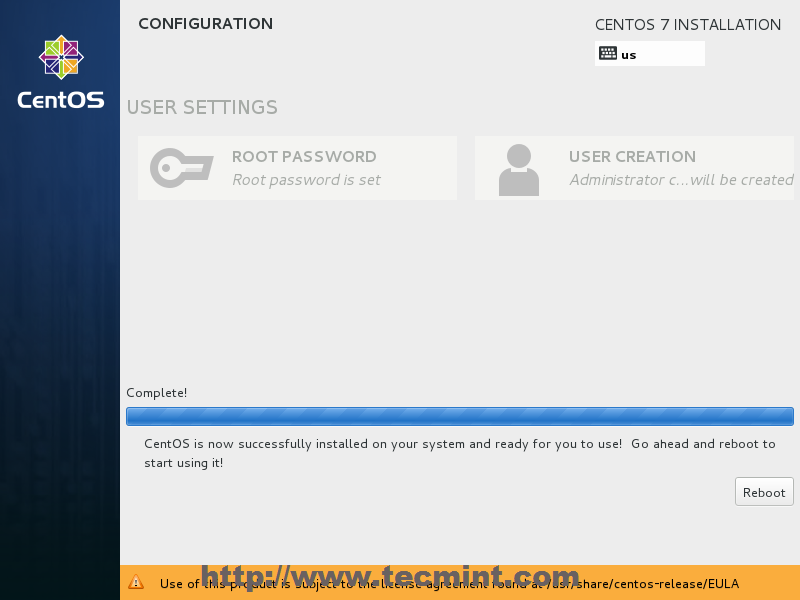
CentOS 7 Installation Complete
Disable and Remove Unwanted Services on RHEL/CentOS 7 Minimal Installation
RHEL/CentOS 7 minimal installation for servers comes with some default pre-installed services, such as Postfix Mail Transfer Agent daemon, Avahi mdns daemon (multicast Domain Name System) and Chrony service, which is responsible to maintain system clock.
Remove Services in CentOS 7
Requirements
If you are planning to use your newly installed RHEL/CentOS 7 to host, let’s say, a small website which runs on Apache or Nginx, or to provide network services like DNS, DHCP, PXE boot, FTP server, etc or other services that don’t require to run Postifx MTA daemon, Chrony or Avahi daemon, then why we should keep all these unnecessary daemons installed or even running on your server.The main external services that your server truly requires to run after you perform a minimal installation would be just a SSH daemon, in order to allow remote logins on system, and, in some cases, NTP service, to accurately synchronize your server internal clock with external NTP servers.
Disable/Remove Postfix MTA, Avahi and Chrony Services
# yum upgrade
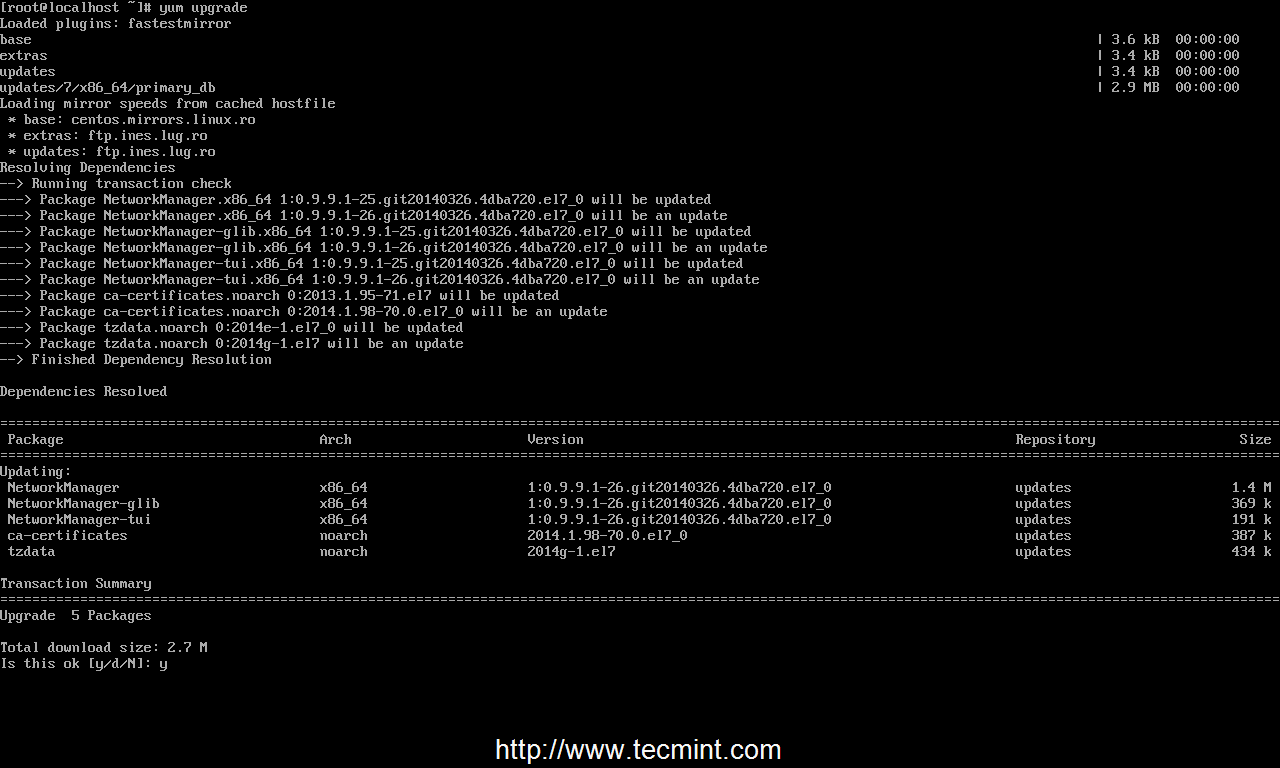
Upgrade System
but good ifconfig command), nano text editor, wget and curl for URL transfers, lsof (to list your open files) and bash-completion, which auto completes typed commands.
# yum install nano bash-completion net-tools wget curl lsof
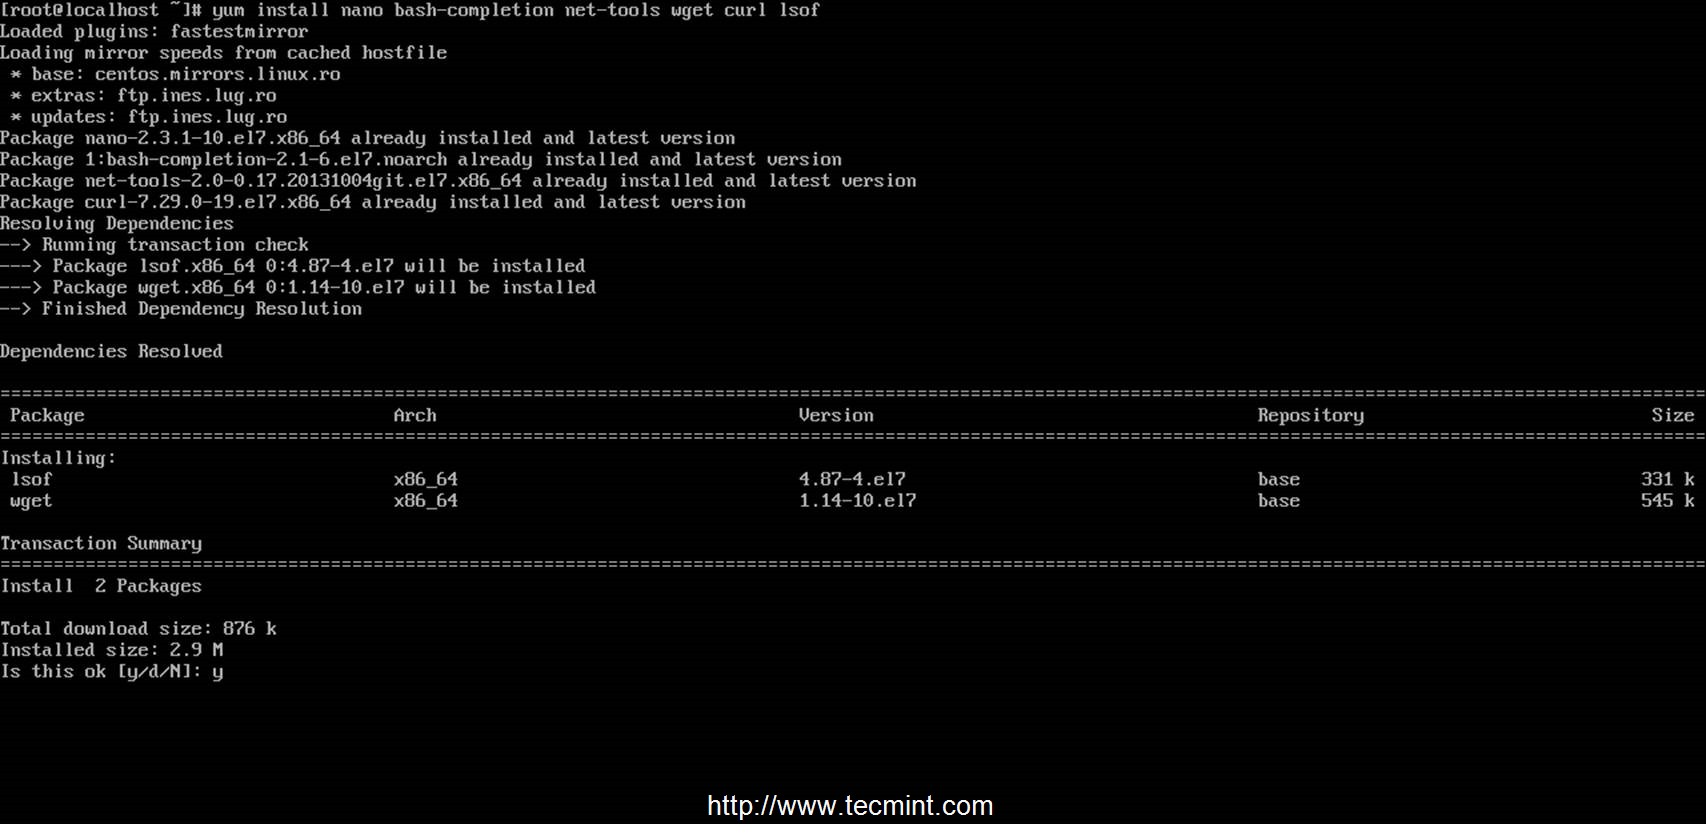
Install System Utilities
# netstat -tulpn   ## To output numerical service sockets

# netstat -tulp       ## To output literal service sockets
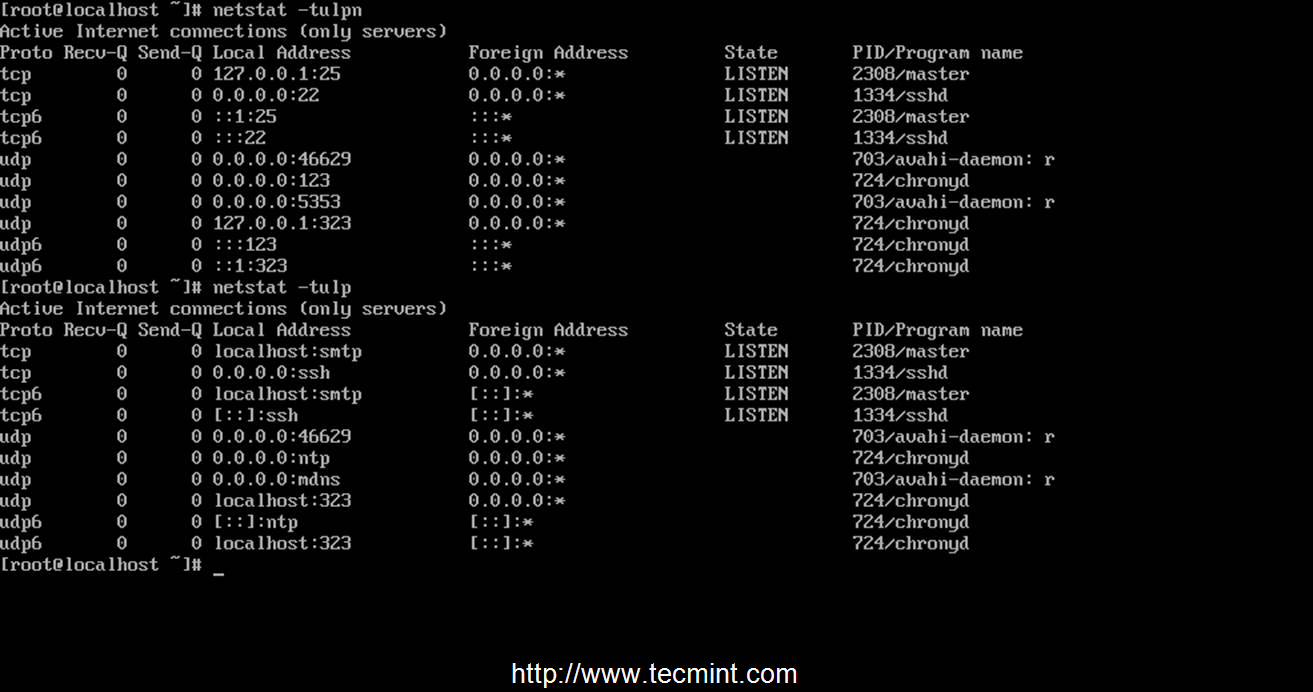
List Enabled Services
# systemctl stop postfix
# yum remove postfix
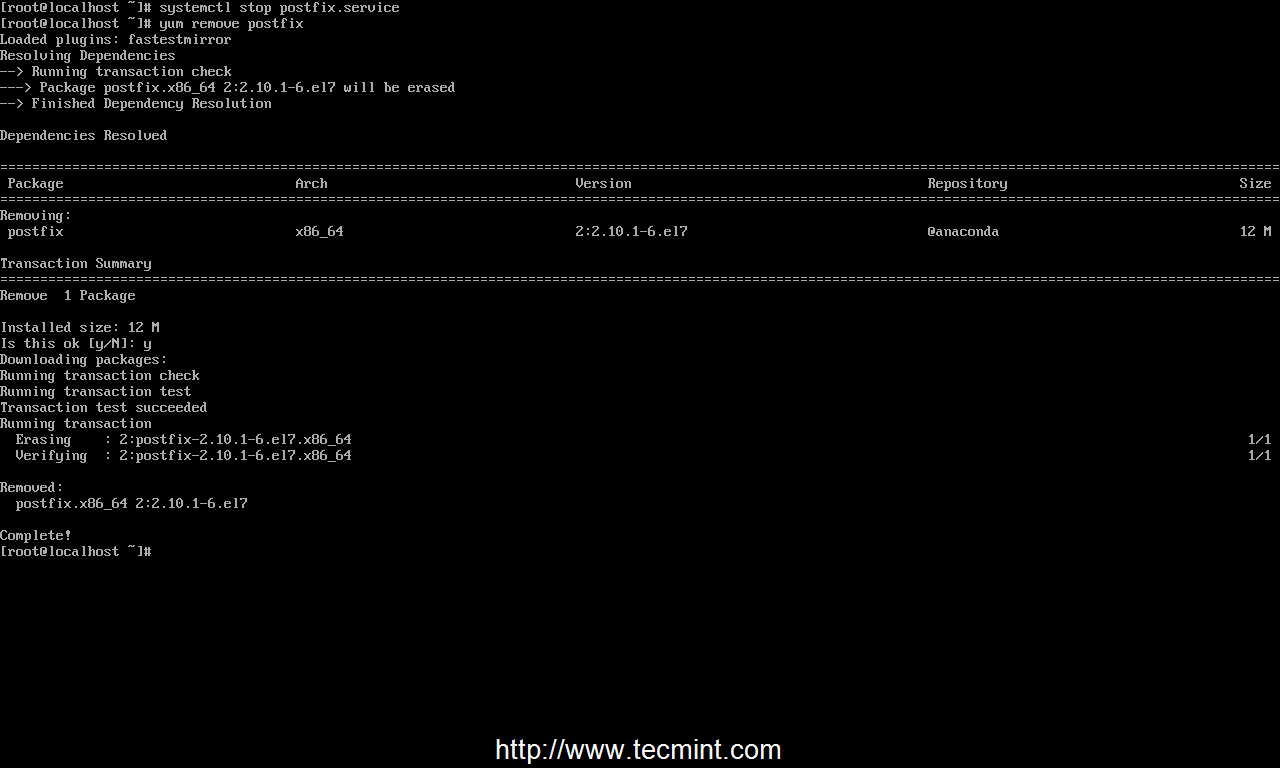
Remove Postfix Service
# systemctl stop chronyd
# yum remove chrony
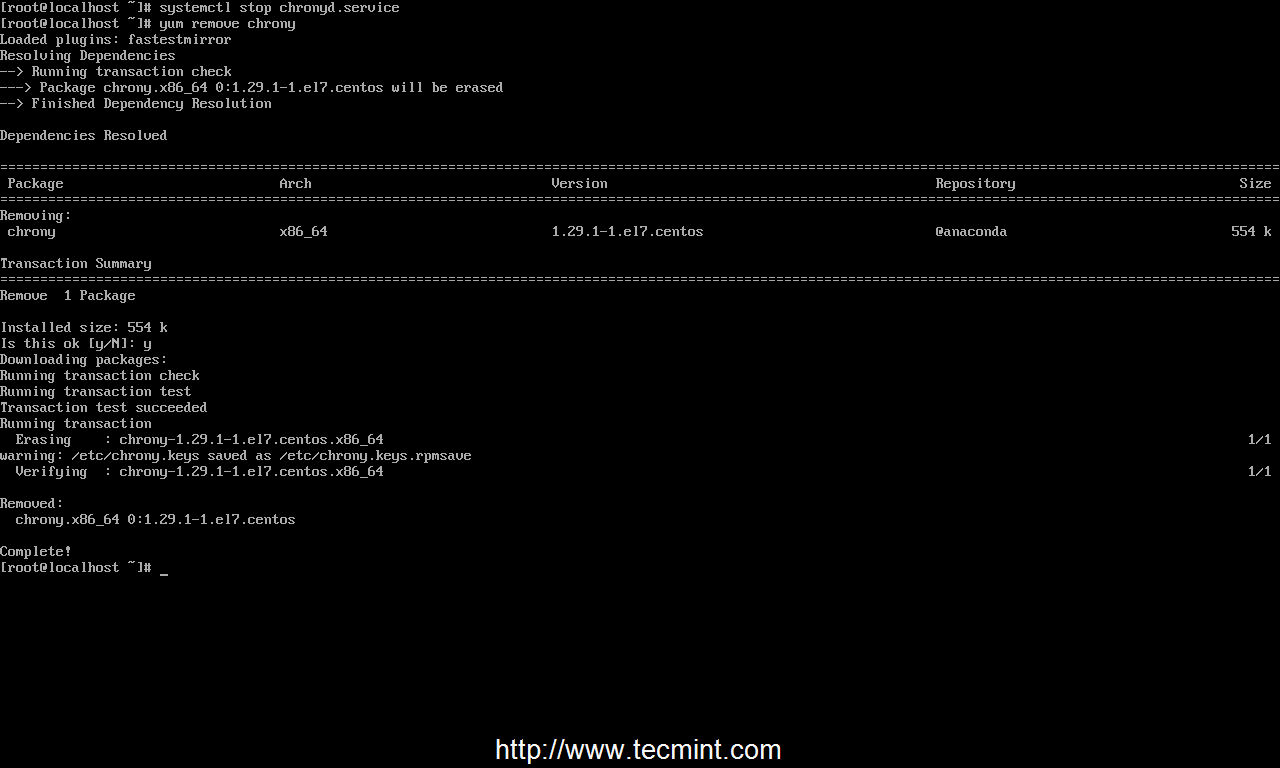
Remove Chronyd Service
So, pay extra attention to this step. If you really need automatic network configuration provided by Network Manager or you need to edit your interfaces
through nmtui network and interface utility, then you should only stop and disable Avahi daemon and perform no removal at all.
If you still want to completely remove this service then you must manually edit network configuration files located in /etc/sysconfig/network-scripts/ifcfg-interface_name, then start and enable networking service.
Issue the following commands to remove Avahi mdns daemon. Caution: Do not attempt to remove Avahi daemon if you connected through SSH.
# systemctl stop avahi-daemon.socket avahi-daemon.service
# systemctl disable avahi-daemon.socket avahi-daemon.service
--------- Stop here if you don't want removal ---------

# yum remove avahi-autoipd avahi-libs avahi
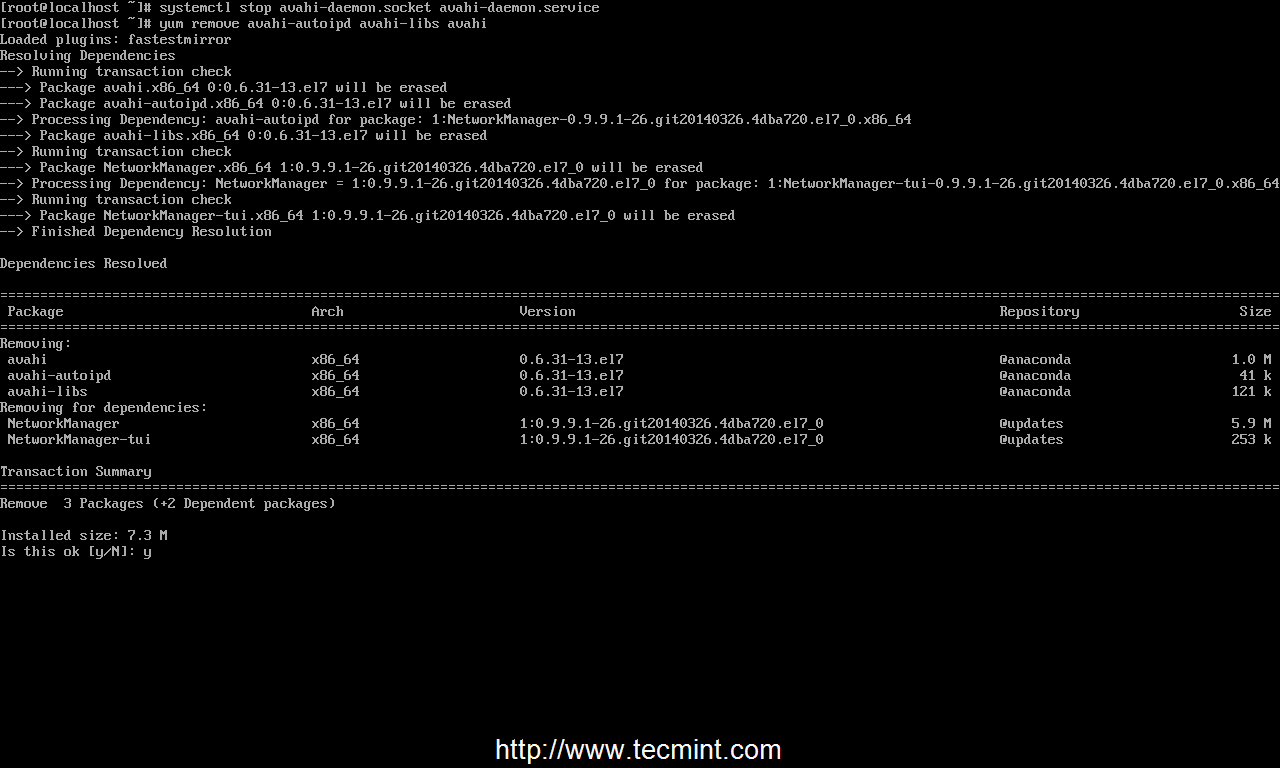
Remove Avahi Daemon
To edit your NIC to use IPv6 and static IP Address, go to /etc/sysconfig/network-scripts/ path, open NIC interface file (usually the first card is named ifcfg-eno1677776 and is already configured by Network Manager) and use the following excerpt as a guide in case your
network interface has no configuration.
IPV6INIT=no
IPV6_AUTOCONF=yes
BOOTPROTO=none
DEVICE=eno16777736
ONBOOT=yes
UUID=c3f0dc21-d2eb-48eb-aadf-10a520b13df0
TYPE=Ethernet
#DEFROUTE=no
IPV4_FAILURE_FATAL=no
IPV6_DEFROUTE=no
IPV6_FAILURE_FATAL=no
NAME="System eno16777736"
IPV6_PEERDNS=yes
IPV6_PEERROUTES=yes
HWADDR=00:0C:29:E2:06:E9
                IPADDR=192.168.1.25
                NETMASK=255.255.255.0
                GATEWAY=192.168.1.1
                DNS1=192.168.1.1
                DNS2=8.8.8.8
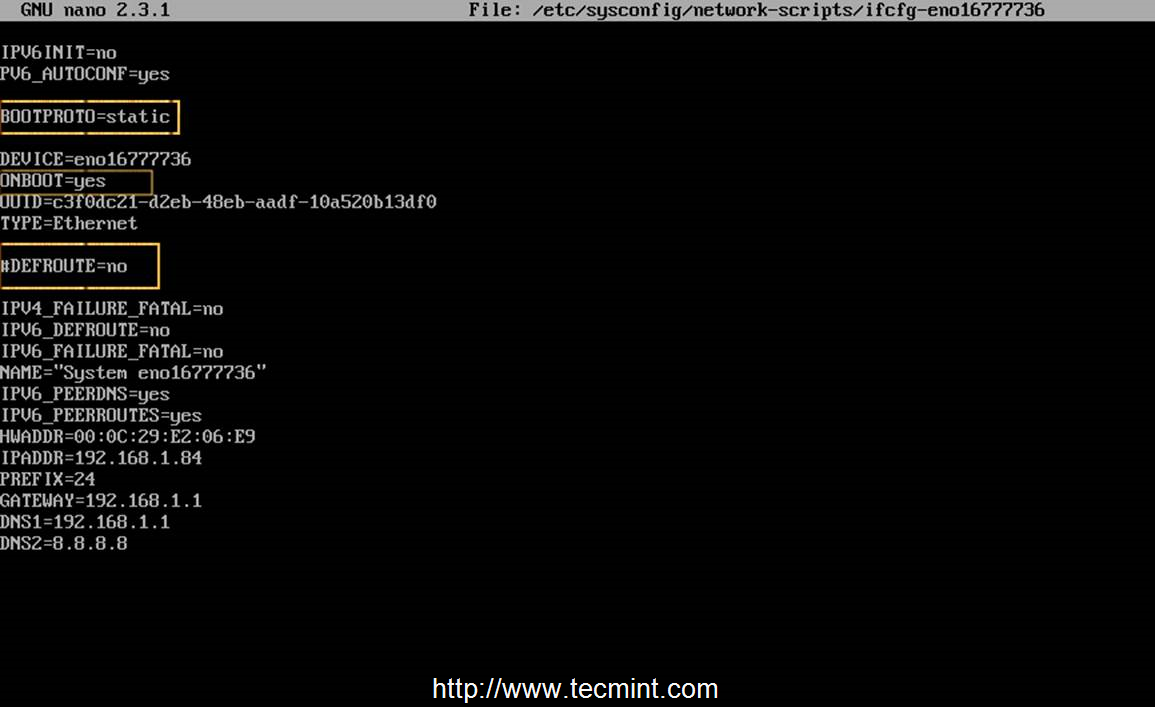
Configure Network Interface
- BOOTPROTO – Set to none or static – for static IP Address.
- ONBOOT – Set to yes – to bring up your interface after reboot.
- DEFROUTE – Statement commented with a # or completely removed – do not use default route (If you use it here you should add “DEFROUTE: no” to all network interfaces, not used as the default route).
IPV6INIT=no
IPV6_AUTOCONF=yes
BOOTPROTO=dhcp
DEVICE=eno16777736
ONBOOT=yes
UUID=c3f0dc21-d2eb-48eb-aadf-10a520b13df0
TYPE=Ethernet
##DEFROUTE=no
IPV4_FAILURE_FATAL=no
IPV6_DEFROUTE=no
IPV6_FAILURE_FATAL=no
NAME="System eno16777736"
IPV6_PEERDNS=yes
IPV6_PEERROUTES=yes
HWADDR=00:0C:29:E2:06:E9
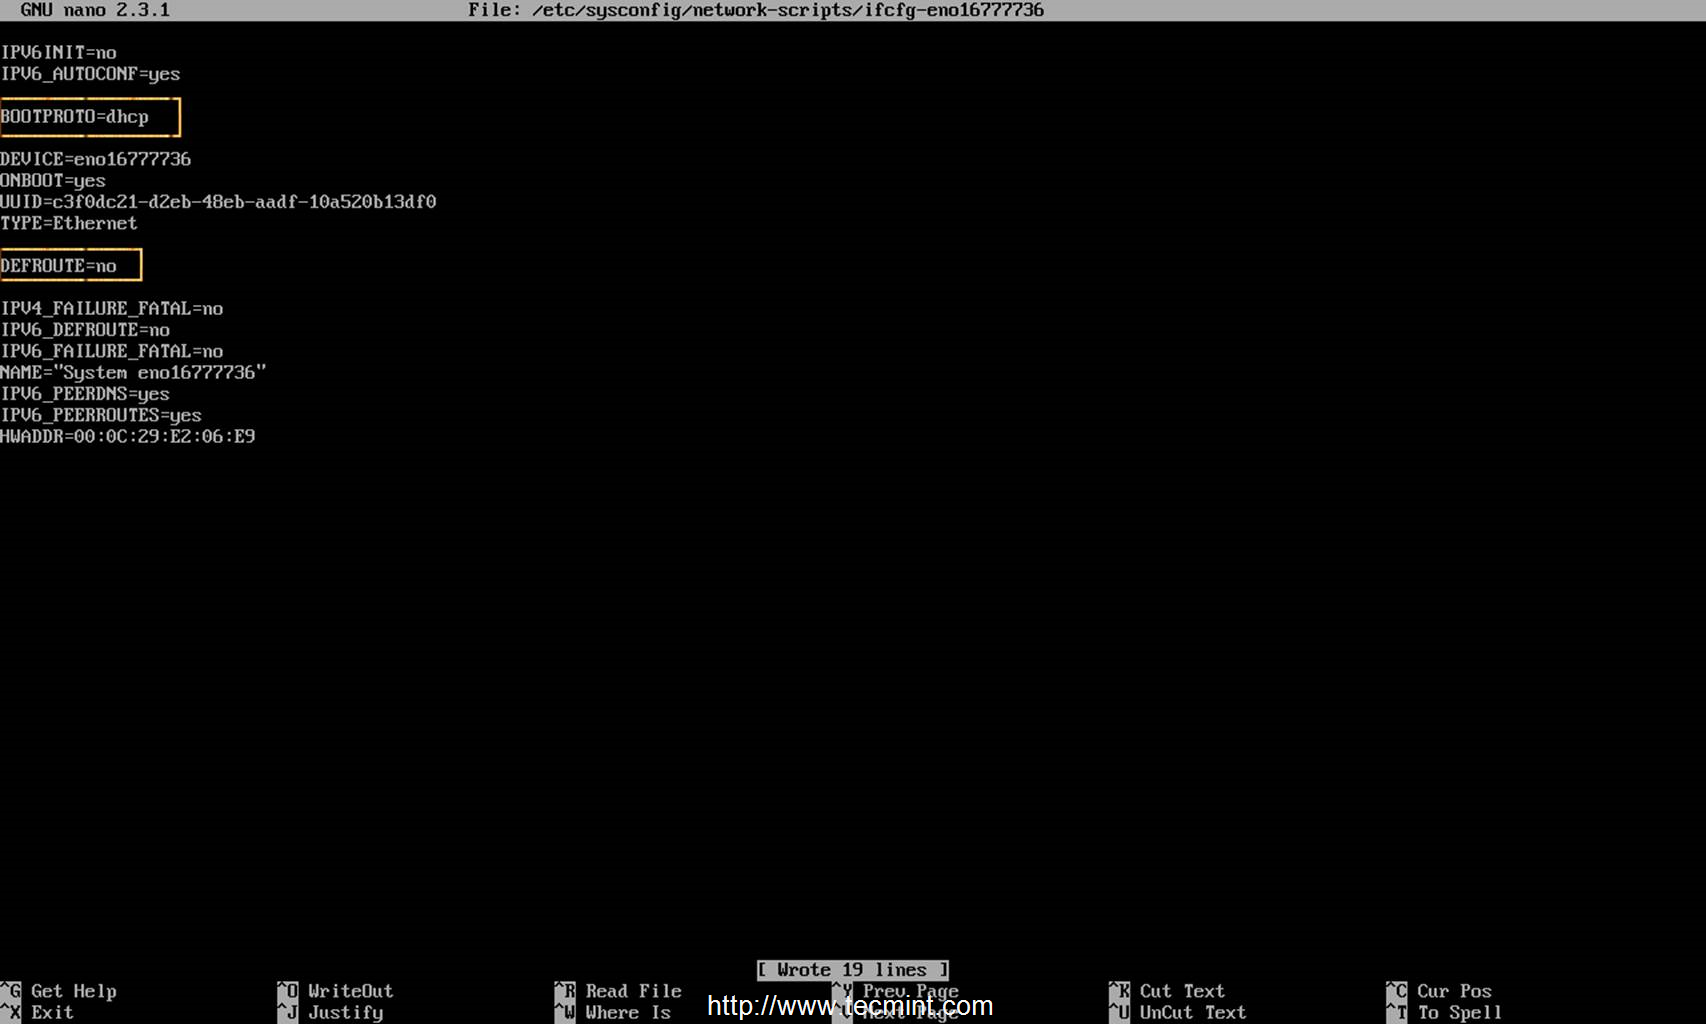
Configure DHCP Interface
9. In order to apply the new configurations for your network interfaces you must restart network service. After you restart network daemon use ifconfig
or ip addr show command to get your interface settings and try to ping a domain name to see if network is functional.
# service network restart ## Use this command before systemctl
# chkconfig network on
# systemctl restart network
# ifconfig
# ping domain.tld
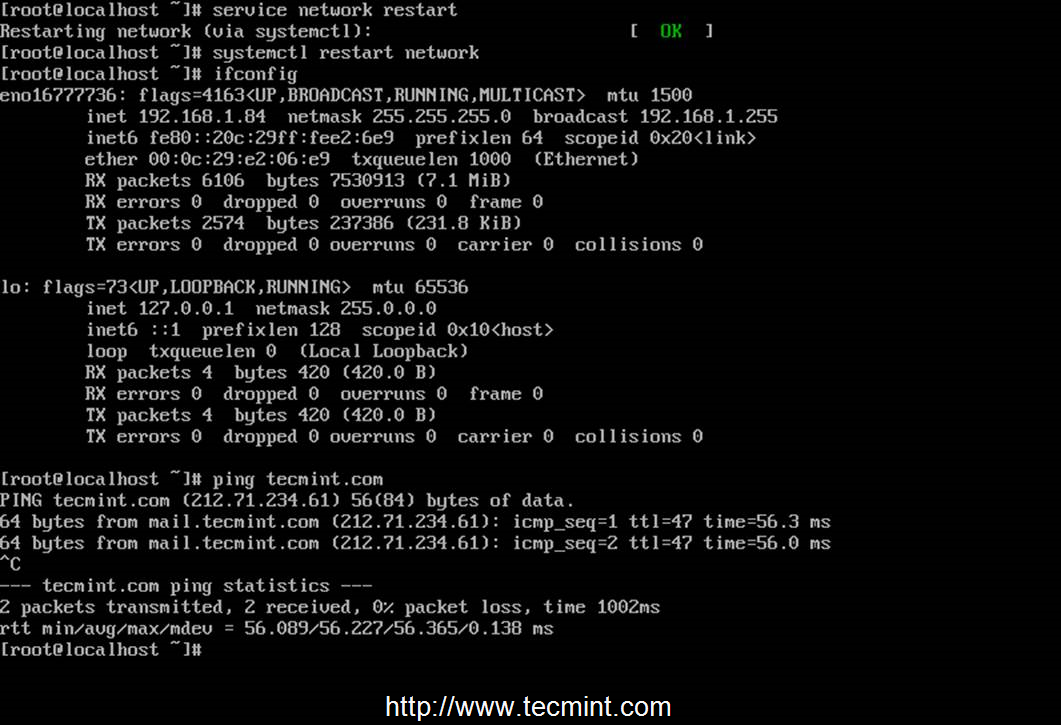
Confirm Network Settings
# hostnamectl set-hostname FQDN_system_name
# hostnamectl status
# hostname
# hostname -s    ## Short name
# hostname -f    ## FQDN name
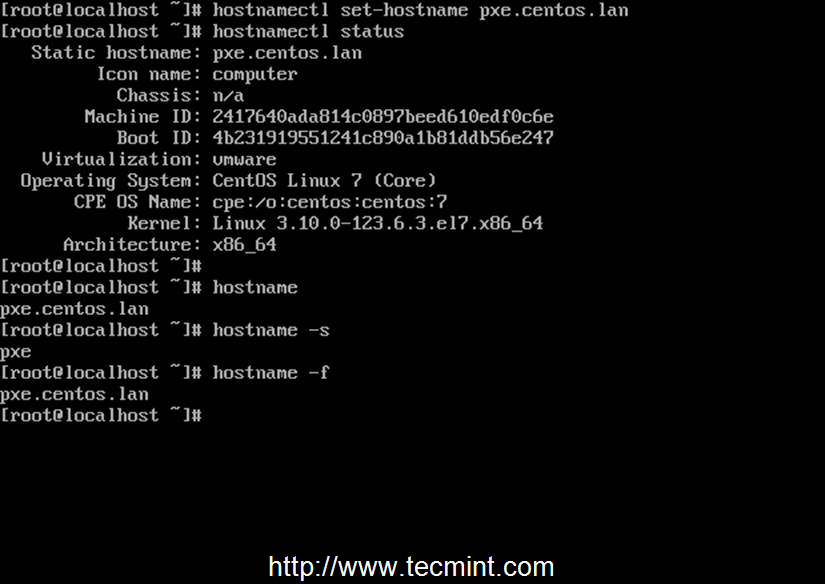
Setup System Hostname
# netstat -tulpn
# netstat -tulp
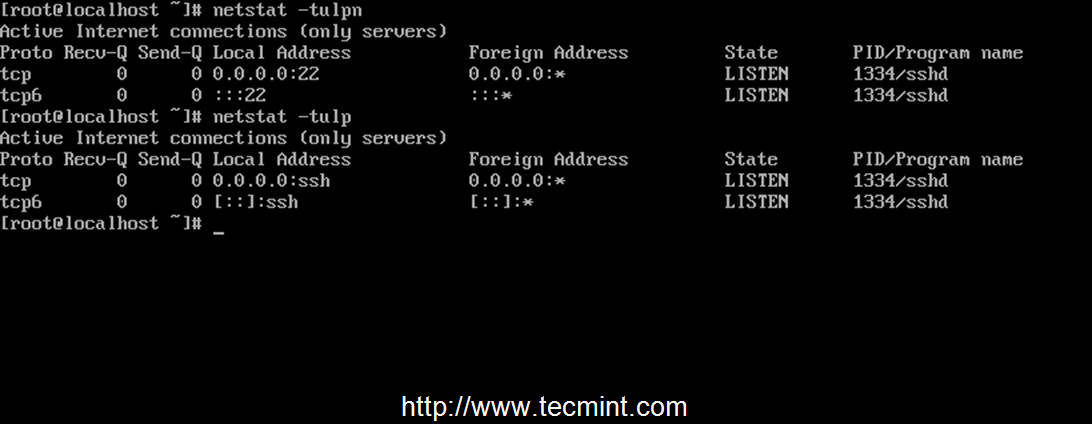
Verify Running Services
# netstat -tulpn
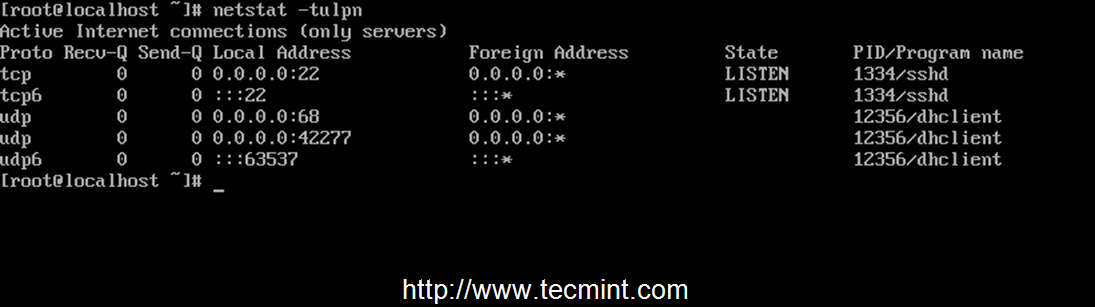
Verify DHCP Service
# ss -tulpn

ss Command to Check Network
Free command to display RAM and HDD statistics and top command to see a top of the most used system resources.
# free -h
# df -h
# top

Check System Boot Time
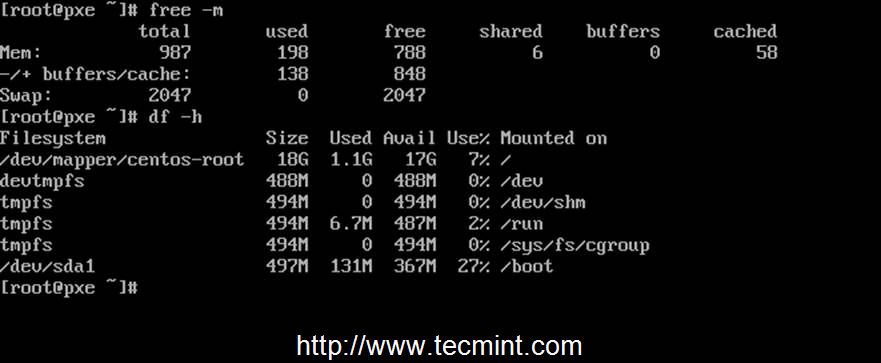
Check Memory and Disk Usage
Setting Up “NTP (Network Time Protocol) Server” in RHEL/CentOS 7
Network Time Protocol – NTP- is a protocol which runs
over port 123 UDP at Transport Layer and allows computers to synchronize
time over networks for an accurate time. While time is passing by,
computers internal clocks tend to drift which can lead to inconsistent
time issues, especially on servers and clients logs files or if you want
to replicate servers resources or databases.


2. After the server is installed, first go to official NTP Public Pool Time Servers, choose your Continent area where the server physically is located, then search for your Country location and a list of NTP servers should appear.

3. Then open NTP daemon main configuration file for editing, comment the default list of Public Servers from pool.ntp.org project and replace it with the list provided for your country like in the screenshot below.

4. Further, you need to allow clients from your
networks to synchronize time with this server. To accomplish this, add
the following line to NTP configuration file, where restrict statement controls, what network is allowed to query and sync time – replace network IPs accordingly.
5. If you need additional information for troubleshooting in case there are problems with your NTP daemon add a log file statement which will record all NTP server issues into one dedicated log file.

6. After you have edited the file with all configuration explained above save and close ntp.conf file. Your final configuration should look like in the screenshot below.


8. After you have opened Firewall port 123, start
NTP server and make sure you enable it system-wide. Use the following
commands to manage the service.


10. If you want to query and synchronize against a pool of your choice use ntpdate command, followed by the server or servers addresses, as suggested in the following command line example.


That’s all! Setting up a local NTP Server on your network ensures
that all your servers and clients have the same time set in case of an
Internet connectivity failure and they all are synchronized with each
other.

NTP Server Installation in CentOS and RHEL 7
Requirements:
Additional Requirements:
- Register and Enbale RHEL 7 Subscription for Updates
- Configure Static IP Address on CentOS/Rhel 7
- Disable and Remove Unwanted Services in CentOS/RHEL 7
Step 1: Install and configure NTP daemon
1. NTP server package is provided by default from official CentOS /RHEL 7 repositories and can be installed by issuing the following command.# yum install ntp
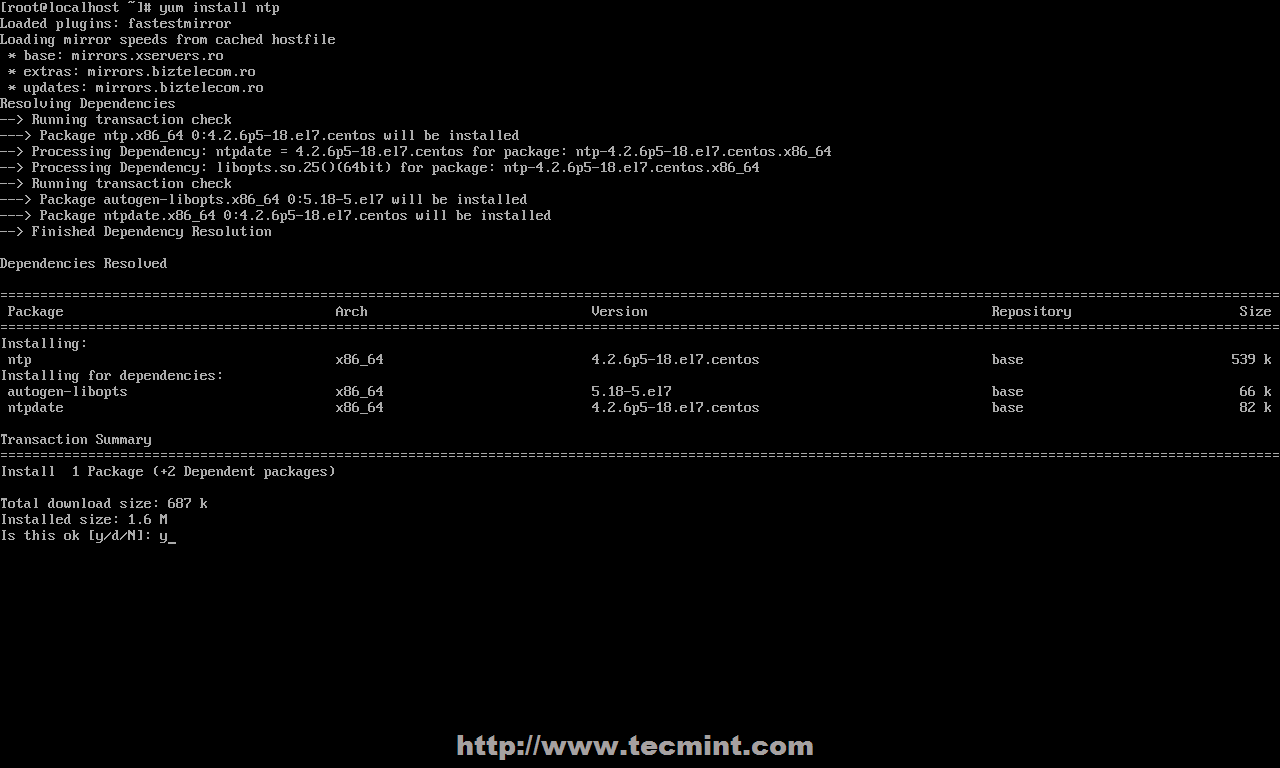
Install NTP Server

NTP Pool Server

Configure NTP Server
restrict 192.168.1.0 netmask 255.255.255.0 nomodify notrapThe nomodify notrap statements suggest that your clients are not allowed to configure the server or be used as peers for time sync.
5. If you need additional information for troubleshooting in case there are problems with your NTP daemon add a log file statement which will record all NTP server issues into one dedicated log file.
logfile /var/log/ntp.log

Enable NTP Logs

NTP Server Configuration
Step 2: Add Firewall Rules and Start NTP Daemon
7. NTP service uses UDP port 123 on OSI transport layer (layer 4). It is designed particularly to resist the effects of variable latency (jitter). To open this port on RHEL/CentOS 7 run the following commands against Firewalld service.# firewall-cmd --add-service=ntp --permanent # firewall-cmd --reload

Open NTP Port in Firewall
# systemctl start ntpd
# systemctl enable ntpd
# systemctl status ntpd

Start NTP Service
Step 3: Verify Server Time Sync
9. After NTP daemon has been started, wait a few minutes for the server to synchronize time with its pool list servers, then run the following commands to verify NTP peers synchronization status and your system time.# ntpq -p # date -R

Verify NTP Time Sync
# ntpdate -q 0.ro.pool.ntp.org 1.ro.pool.ntp.org

Synchronize NTP Time
Step 4: Setup Windows NTP Client
11. If your windows machine is not a part of a Domain Controller you can configure Windows to synchronize time with your NTP server by going to Time from the right side of Taskbar -> Change Date and Time Settings -> Internet Time tab -> Change Settings -> Check Synchronize with an Internet time server -> put your server’s IP or FQDN on Server filed -> Update now -> OK.
Synchronize Windows Time with NTP
Setting Up Prerequisites to ‘Install Windows 7’ over ‘PXE Network Boot Server’ on RHEL/CentOS 7 – Part 1
Continuing the series of tutorials regarding RHEL/CentOS 7 PXE Network Boot Server Environment, where so far I have only discussed integrating and installing Linux distributions over PXE Server.
Configure PXE Server to Install Windows
Requirements
- Install PXE Network Boot Server for Multiple OS Installations in RHEL/CentOS 7
- A Samba fully accessed directory share setup on PXE Server machine.
- A computer with Windows 7 operating system installed.
- Windows Automated Installation Kit (AIK) installed on Windows 7 computer.
- Both Windows 7 32-bit/64-bit DVD ISO Images.
The first part will cover the configurations needed to setup the environment on RHEL/CentOS 7 PXE Server premises, by installing and configuring a Samba fully accessed shared directory with no authentication needed, where both Windows 7 system architecture images will be deployed, and, also, editing PXE Server default configuration file with the options needed to boot WinPE ISO Image in order to manually proceed with Windows installation process.
The next steps that should be made on the client-side in order to boot, access and install Windows 7 over network.
Step 1: Install and Setup Samba Share on PXE Server
1. On the first step, login to PXE Server with root account and setup a fully accessed Samba share, where Windows 7 DVD installation sources will be deployed. Install Samba daemon by issuing the following command.# yum install samba samba-common samba-winbind
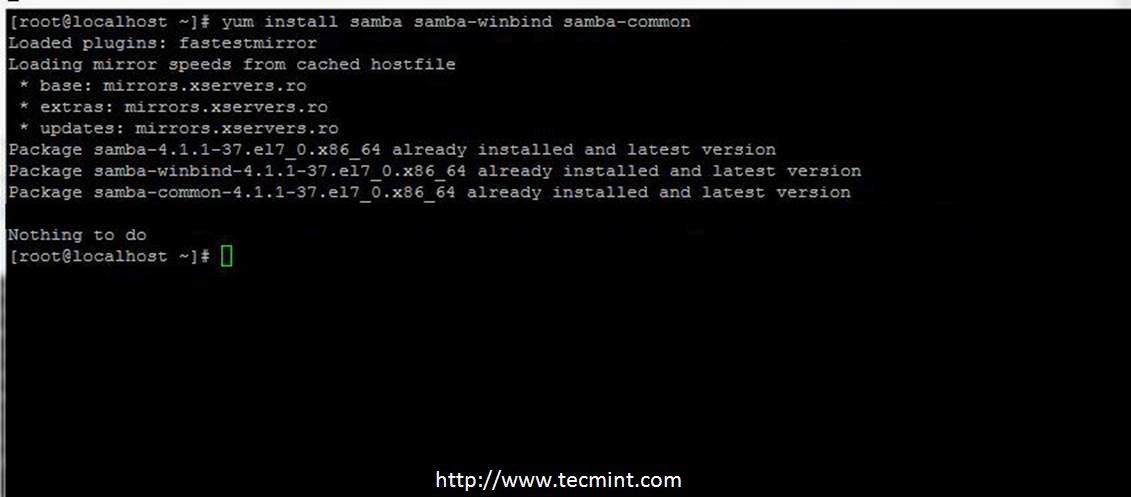
Install Samba on PXE
# mv /etc/samba/smb.conf /etc/samba/smb.conf.backup
# nano /etc/samba/smb.conf
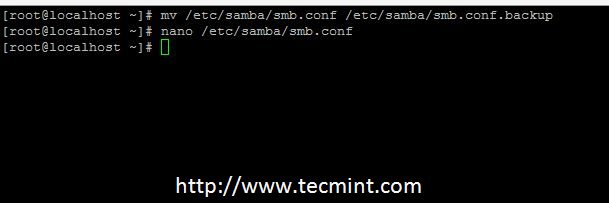
Backup Samba Configuration
[global]
        workgroup = PXESERVER
        server string = Samba Server Version %v
        log file = /var/log/samba/log.%m
        max log size = 50
        idmap config * : backend = tdb
        cups options = raw
        netbios name = pxe
        map to guest = bad user
        dns proxy = no
        public = yes
        ## For multiple installations the same time - not lock kernel
        kernel oplocks = no
        nt acl support = no
        security = user
        guest account = nobody

[install]
        comment = Windows 7 Image
        path = /windows
        read only = no
        browseable = yes
        public = yes
        printable = no
        guest ok = yes
        oplocks = no
        level2 oplocks = no
        locking = no
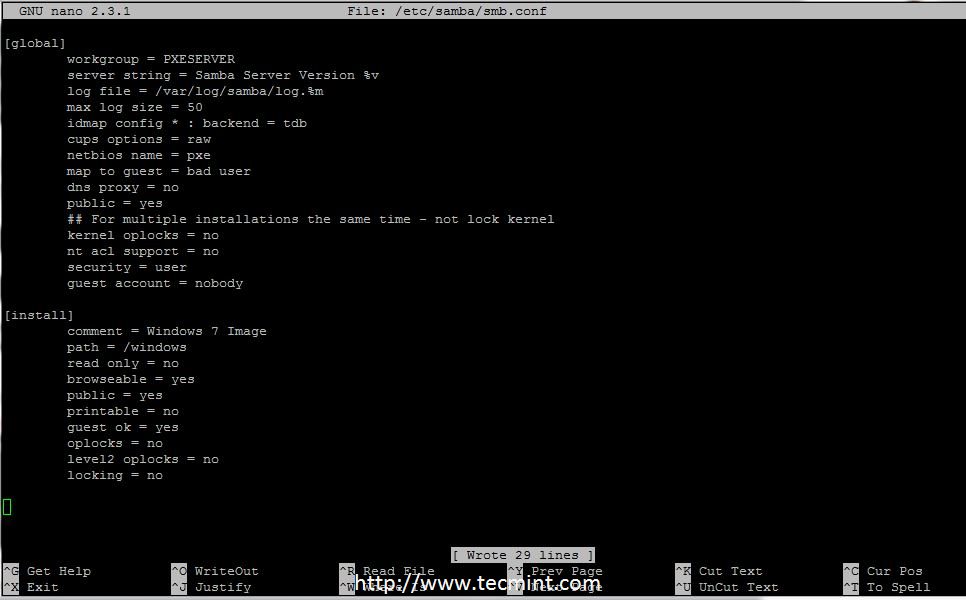
Configure Samba for PXE
4. After finishing editing main samba configuration file run testparm command in order to check and validate the file for eventual errors or misconfigurations.
# testparm
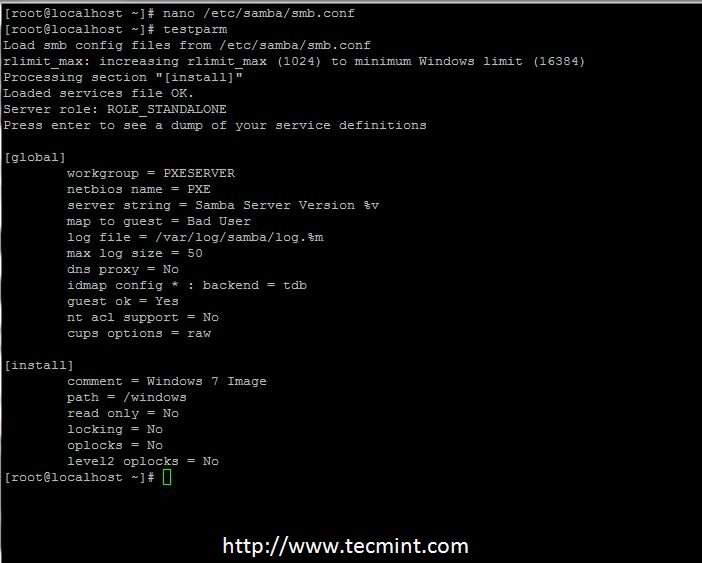
Check Samba Configuration
order to be fully accessed in case your system has enforced SELinux security.
# mkdir /windows
# semanage fcontext -a -t samba_share_t ‘/windows(/.*)?’
# restorecon -R -v /windows
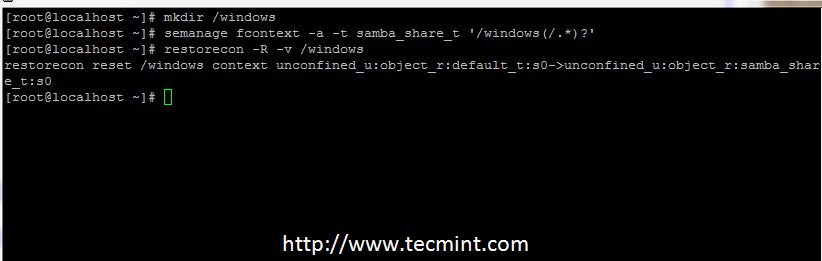
Add Samba Selinux Rules
Step 2: Deploy Windows 7 Installation Sources on PXE Server
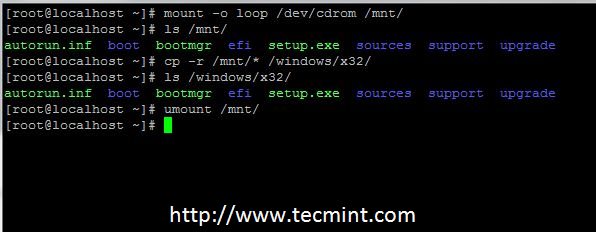
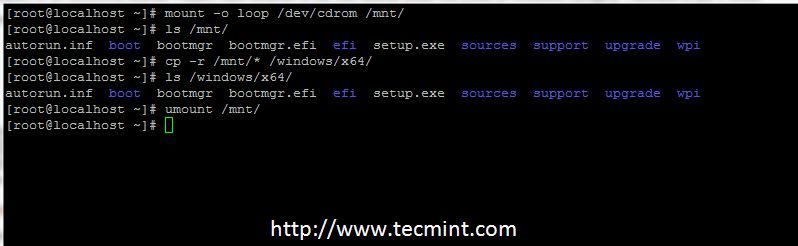
6. For this step both Windows 7 ISO DVD Images are needed. But before mounting and copy DVD content create two directories under /windows pathto separate Windows installation sources architectures.
# mkdir /windows/x32
# mkdir /windows/x64
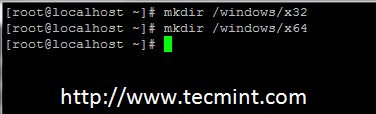
Create Windows Install Sources on PXE
# mount -o loop /dev/cdrom /mnt
# cp -rf  /mnt/*  /windows/x32/
# umount  /mnt
Mount Windows Install DVD on PXE
# mount -o loop /dev/cdrom /mnt
# cp -rf  /mnt/*  /windows/x64/
# umount  /mnt
Mount Windows 7 64 bit on PXE
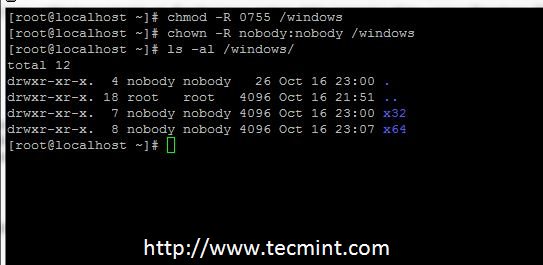
9. After both DVD’s images are copied, issue the following commands to setup the right owner and permissions in order to make the share readable and fully accessible without authentication.
# chmod -R 0755 /windows
# chown -R nobody:nobody /windows
Grant Permission Windows Install Sources
Step 3: Add Firewall Rules, Start and Enable Samba System-Wide
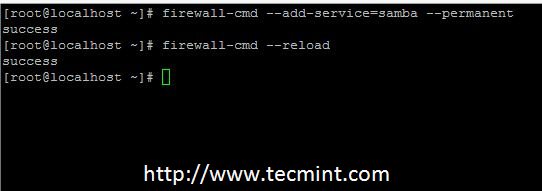
10. If you are using a Firewall on your PXE Server premises, add the following rule to Firewalld service to open Samba to outside connections.# firewall-cmd --add-service=samba --permanent # firewall-cmd --reload
Open Samba on Firewall
# systemctl restart smb
# systemctl enable smb
# systemctl restart winbind
# systemctl enable winbind
# systemctl restart nmb
# systemctl enable nmb
# systemctl status smb
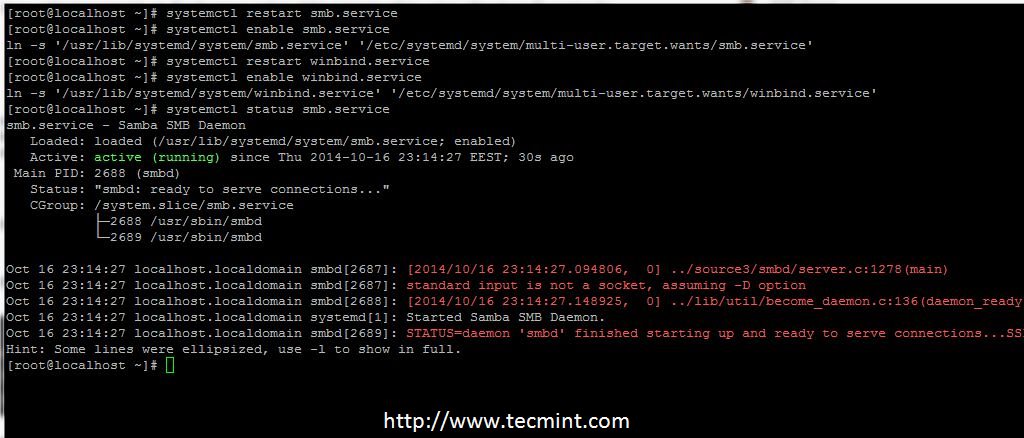
Enable Samba Systemwide
\\192.168.1.20\install
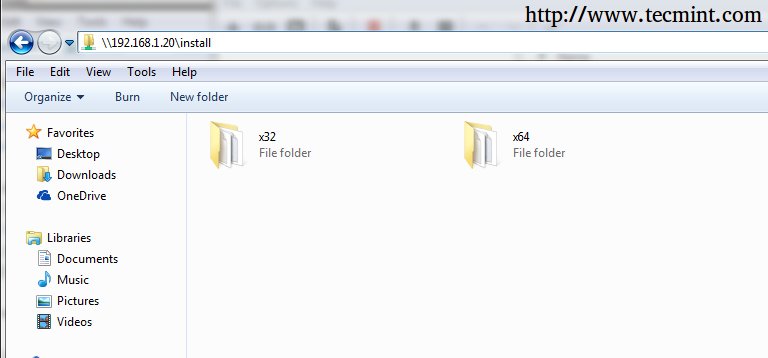
Check Samba Shares
Step 4: Configure PXE Server
13. Before editing PXE Menu configuration file, create a new directory named windows on TFTP server default system path. Under this directory you will later copy WinPE ISO image, created on the Windows 7 computer using Windows Automated Installation Kit program.# mkdir /var/lib/tftpboot/windows14. Now, open PXE Server default configuration file and add Windows Installation label to PXE menu, as described in the below menu excerpt.
# nano /var/lib/tftpboot/pxelinux.cfg/defaultWindows 7 menu label configuration.
label 9
menu label ^9) Install Windows 7 x32/x64
                KERNEL memdisk
                INITRD windows/winpe_x86.iso
                APPEND iso raw
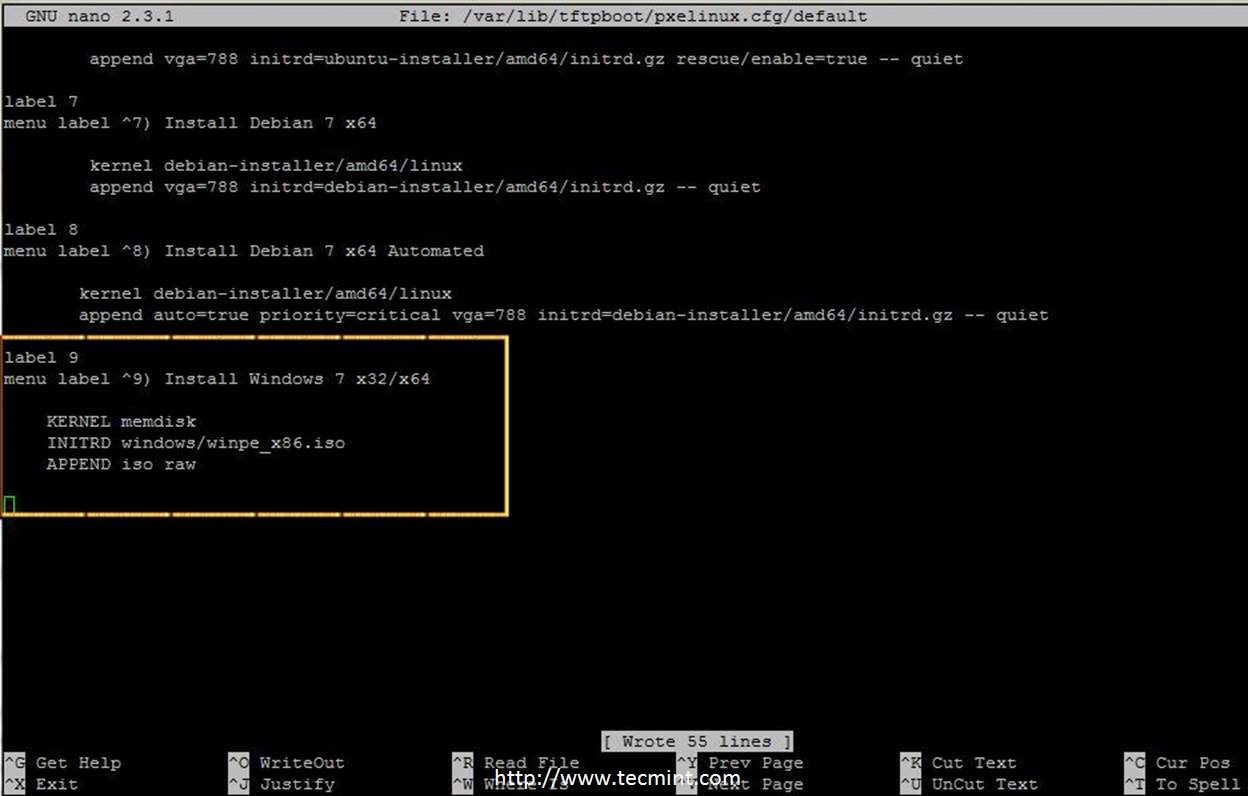
Add Windows 7 to PXE Menu
Further let’s continue with the procedure and move onto a Windows 7 Installation on PXE Network – Part 2 of this series
Installing Windows 7 over PXE Network Boot Server on RHEL/CentOS 7 using WinPE ISO Image – Part 2
Continuing the series regarding installing Windows 7 over RHEL/CentOS 7
PXE Network Boot, where in the first part I have only covered setting
up prerequisites on PXE Server, now in this article will be going to
discuss how to build WinPE ISO image with the help of Windows Automated Installation Kit on Windows and then move the build image to PXE Server TFTP default location to access and install Windows 7 over PXE network.


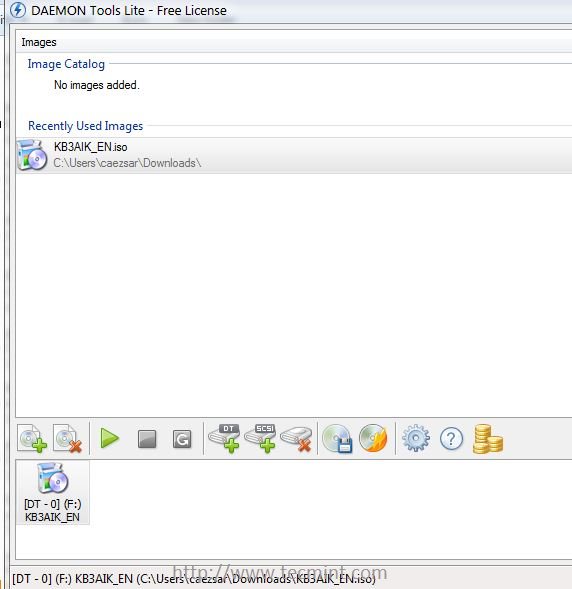
2. After AIK ISO image finishes downloading, mount the image using a Windows mount software (Daemon Tools Lite Free Edition will do the job) and install Windows Automated Installation Kit software.


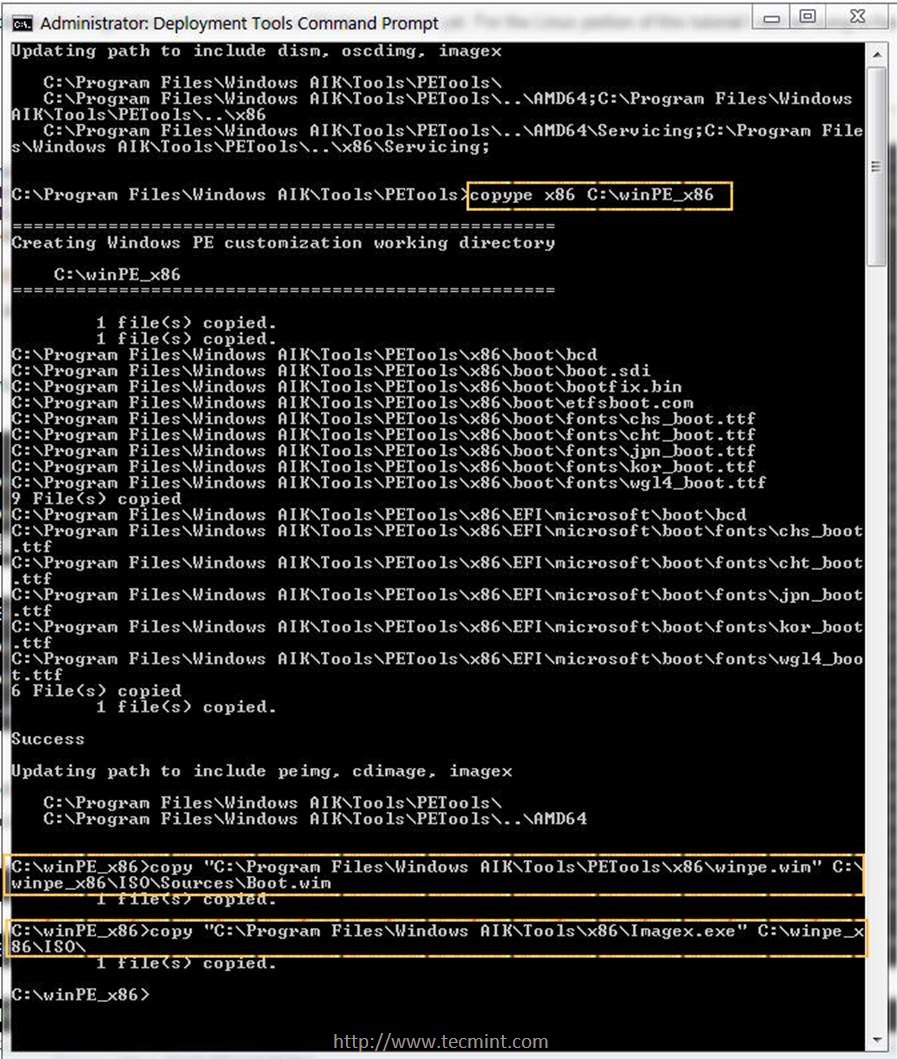
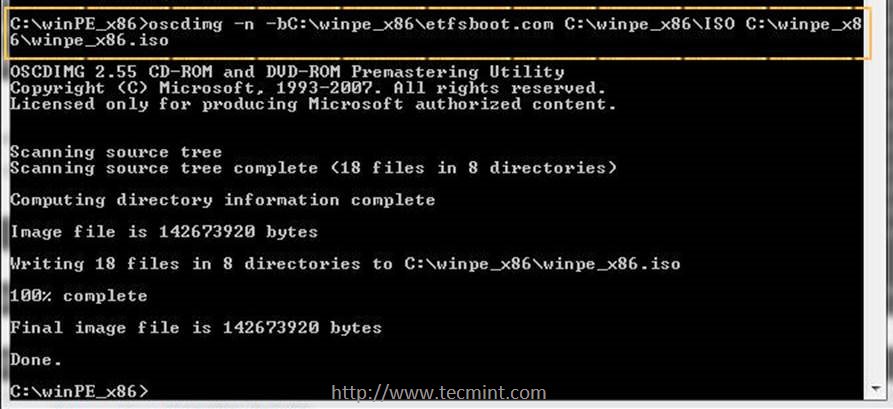
4. Now it’s time to build the Windows 7 Preinstallation Environment (WinPE) x86 boot image by issuing the following commands on Deployment Tools Command Prompt.


5. Although for this tutorial just the WinPE x86 Boot ISO Image is required, below you can find the commands to build PE Images for Windows 7 64-bit and Windows 8 architectures also.

7. After WinPE x86 ISO file is completely transferred to Samba “install” shared directory go back to PXE Server console and move this image from root’s /windows directory to TFTP windows directory path to complete the entire installation process.
After the first PXE prompt appears press F8 and Enter keys to continue and then select Install Windows 7 from PXE menu.

9. After WinPE image finishes loading, a customized minimal image of windows starts and a Command Prompt window will be displayed on screen.


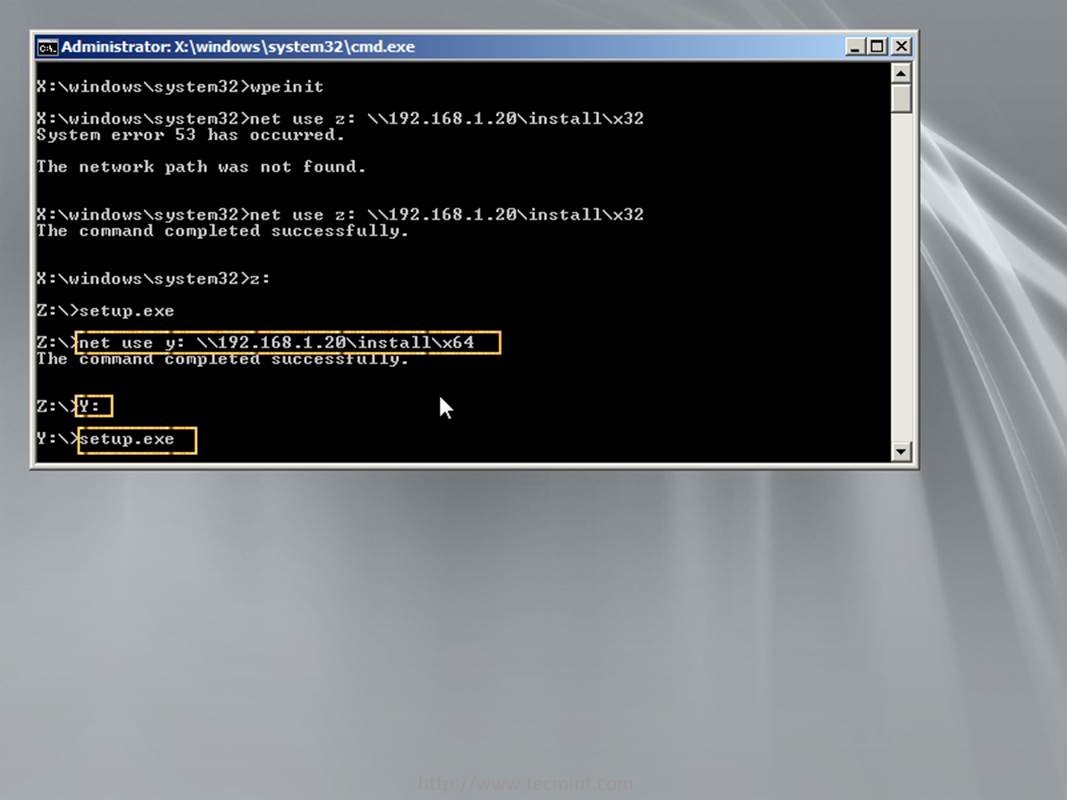
10. In order to install Windows 7 over a Network Share, in the Command Prompt window, map the Windows installation sources (use the architecture
path you want to install), configured on PXE Samba share directory, as a Network drive.
Then enter network drive share, by specifying the drive letter, and run setup.exe utility. Use the following commands to start the installation process (replace the samba network address location and network drive letter accordingly) and continue with the installation process as you normally do it from a local DVD media.


11. If you want to install the 64-bit architecture, map the specific 64-bit network path using a different letter and continue the installation procedure by following the same steps explained above.


12. In case the installation sources are configured with authentication use the following command switch to specify the username.

Thats all! Performing Windows installations over PXE and
network has a lot of advantages, such as cutting down the installation
time drastically, allowing the installation process to take place the
same time on multiple machines without the need to use a physical
installation media.
You can also setup multiple Windows Installation Sources (using Windows or Samba shares) on different machines over your network to avoid a bottleneck on RHEL/CentOS PXE Server, in case you install Windows on multiple machines the same time, and direct the network drive maps to use those specific network sources on installation process.

Install Windows 7 over PXE Boot in CentOS
Requirements
Step 1: Download and Install Windows Automated Installation Kit
1. On this second part, logon to a Windows 7 Operating System computer, go to Microsoft Download Center and download Windows Automated Installation Kit ISO image file by using the following link.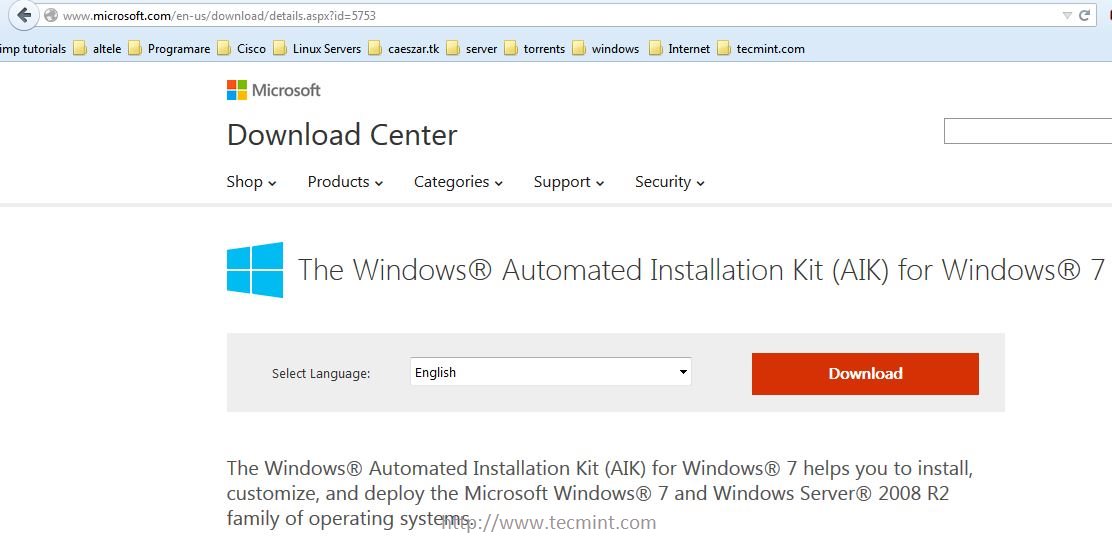
Download Windows Automated Installation Kit
Mount Windows Automated Installation Kit
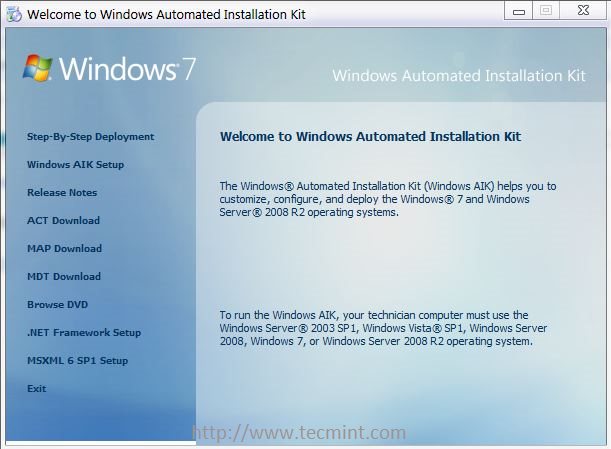
Welcome to Windows AIK
Step 2: Create WinPE ISO Image on Windows 7
3. After Windows AIK software is installed on your system go to Windows Start -> All Programs -> Microsoft Windows AIK -> right click on Deployment Tools Command Prompt and select Run as Administrator and a new Windows Shell console should open on your screen.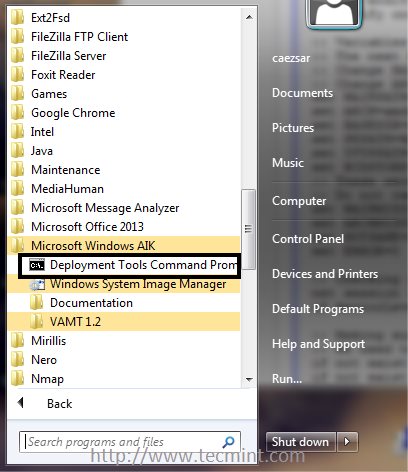
Create WinPE ISO Image
copype x86 C:\winPE_x86
copy "C:\Program Files\Windows AIK\Tools\PETools\x86\winpe.wim" C:\winpe_x86\ISO\Sources\Boot.wim
copy "C:\Program Files\Windows AIK\Tools\x86\Imagex.exe" C:\winpe_x86\ISO\
oscdimg -n -bC:\winpe_x86\etfsboot.com C:\winpe_x86\ISO C:\winpe_x86\winpe_x86.iso
Build WinPE Image
Copy WinPE ISO Image
To build WinPE Boot images for Windows 7 64-bit use the following commands:
copype amd64 C:\winPE_amd64
copy "C:\Program Files\Windows AIK\Tools\PETools\amd64\winpe.wim" C:\winpe_amd64\ISO\Sources\Boot.wim
copy "C:\Program Files\Windows AIK\Tools\amd64\Imagex.exe" C:\winpe_amd64\ISO\
oscdimg -n -bC:\winpe_amd64\etfsboot.com C:\winpe_amd64\ISO C:\winpe_amd64\winpe_amd64.iso
To build Windows 8 32-bit WinPE bootable images run the following commands:
copype x86 C:\Win8PE_x86
MakeWinPEMedia /ISO C:\Win8PE_x86 C:\Win8PE_x86\WinPE_x86.iso
To build Windows 8 64-bit WinPE bootable images run the following commands:
copype amd64 C:\Win8PE_amd64
MakeWinPEMedia /ISO C:\Win8PE_amd64 C:\Win8PE_amd64\Win8PE_amd64.iso
Step 3: Copy WinPE ISO Image to CentOS PXE Server
6. After Windows 7 Preinstallation Environment (WinPE) x86 boot image has been created, use Windows Explorer to copy winpe_x86.iso image located in C:\winpe_x86\ windows path to PXE Samba shared directory at \\192.168.1.20\install network location.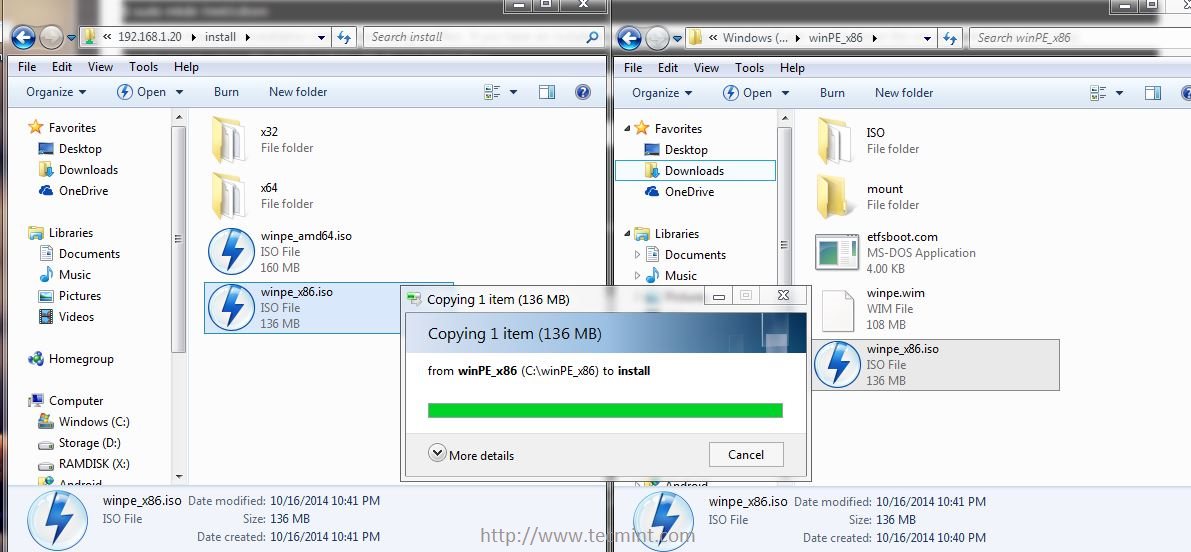
Copy WinPE ISO Image PXE Server
# mv /windows/winpe_x86.iso /var/lib/tftpboot/windows/
Step 4: Boot and Install Windows 7 over PXE Network on Client Side
8. In order to boot and install Windows 7 via network and PXE server, first instruct the clients machines to boot over network by modifying BIOS device boot order or hit a custom key during BIOS post to select a network boot device.After the first PXE prompt appears press F8 and Enter keys to continue and then select Install Windows 7 from PXE menu.
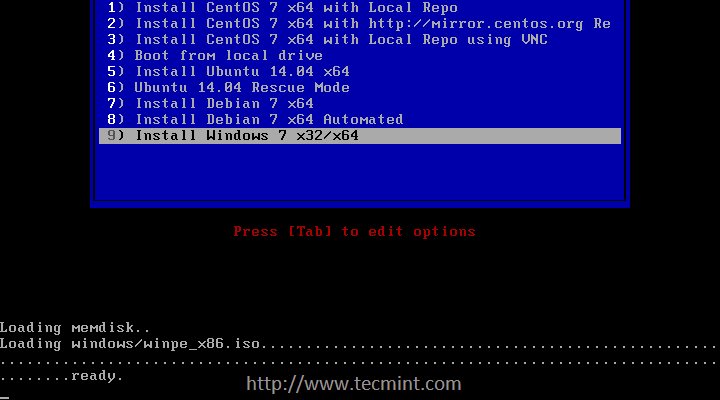
Select Windows 7 from PXE Menu
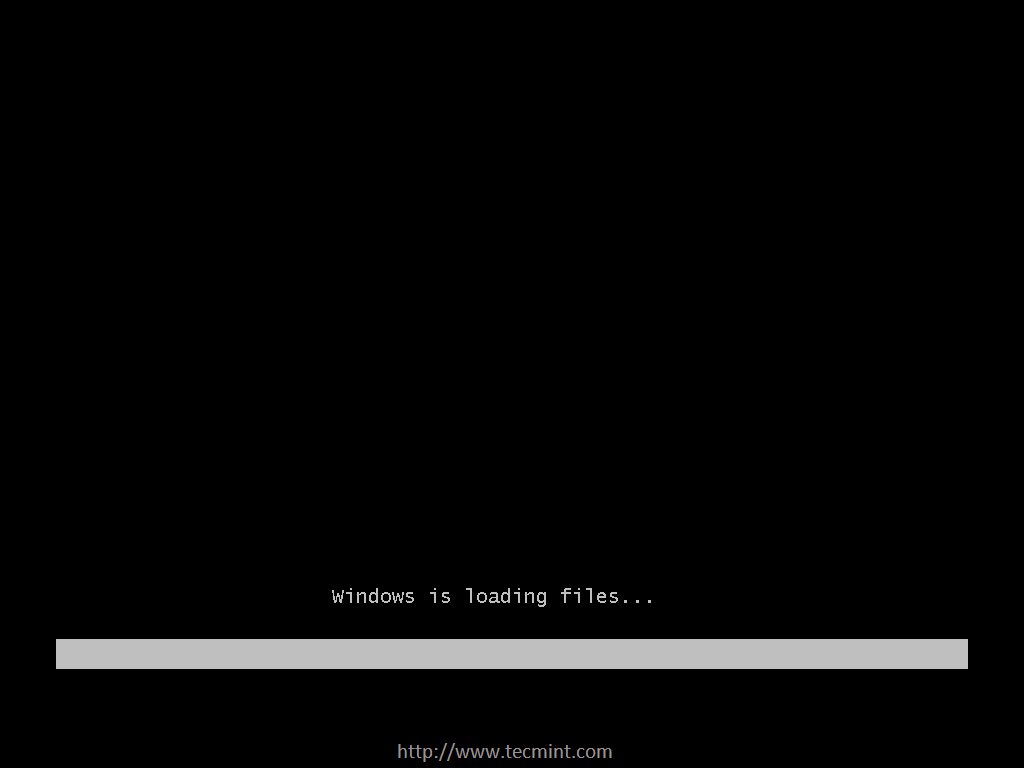
Loading Windows 7 over PXE Boot
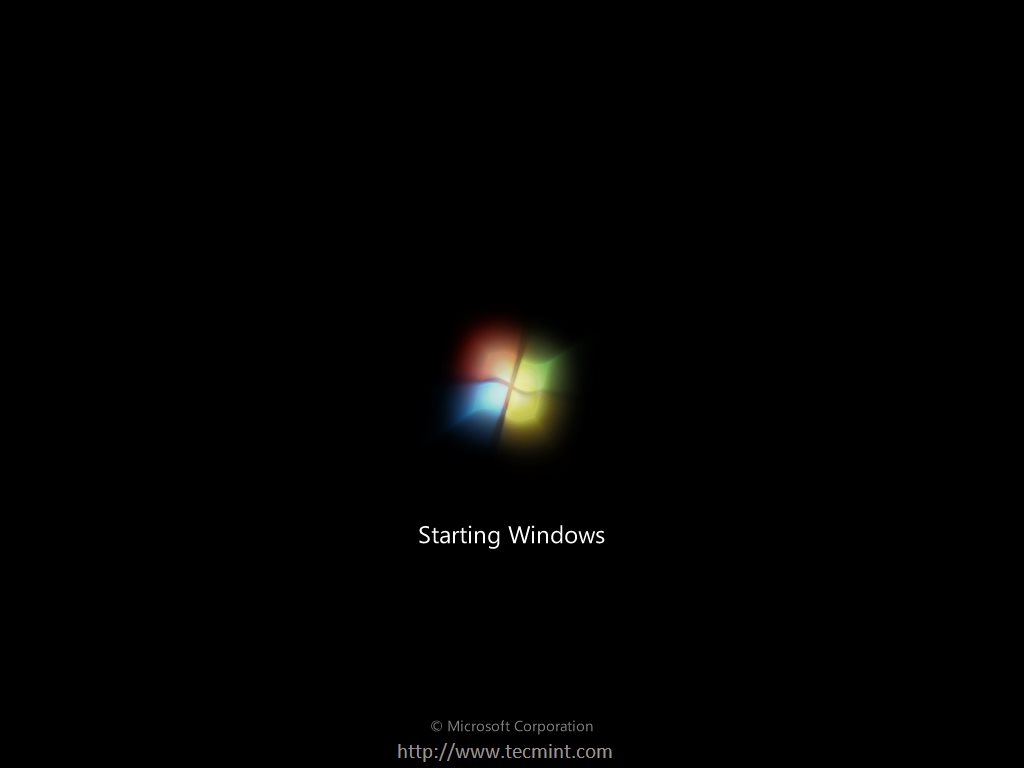
Starting Windows 7 over PXE Boot

Windows 7 Command Prompt
path you want to install), configured on PXE Samba share directory, as a Network drive.
Then enter network drive share, by specifying the drive letter, and run setup.exe utility. Use the following commands to start the installation process (replace the samba network address location and network drive letter accordingly) and continue with the installation process as you normally do it from a local DVD media.
net use z: \\192.168.1.20\install\x32
Z:
setup.exe

Enter Windows 7 Installation Source

Choose Windows 7 Language
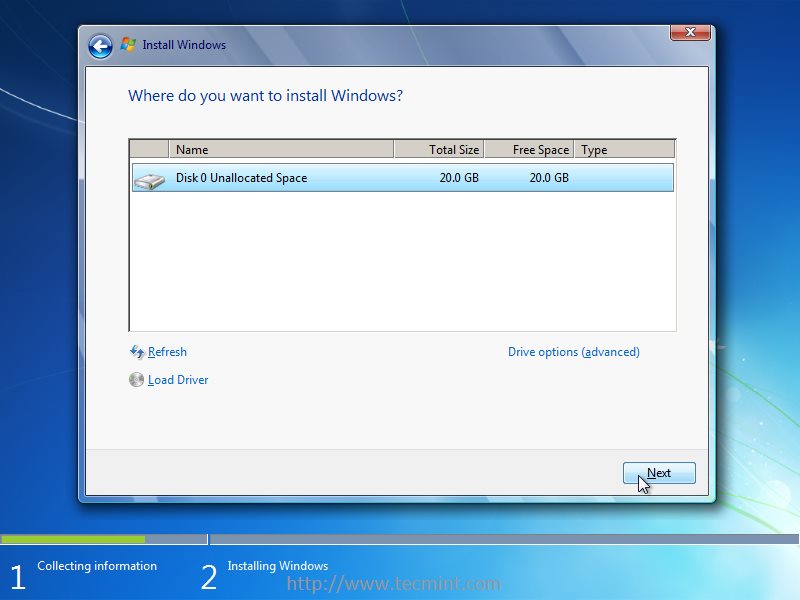
Select Drive to Install Windows 7
net use y : \\192.168.1.20\install\x64
Y:
setup.exe
Choose Windows 7 Install Source
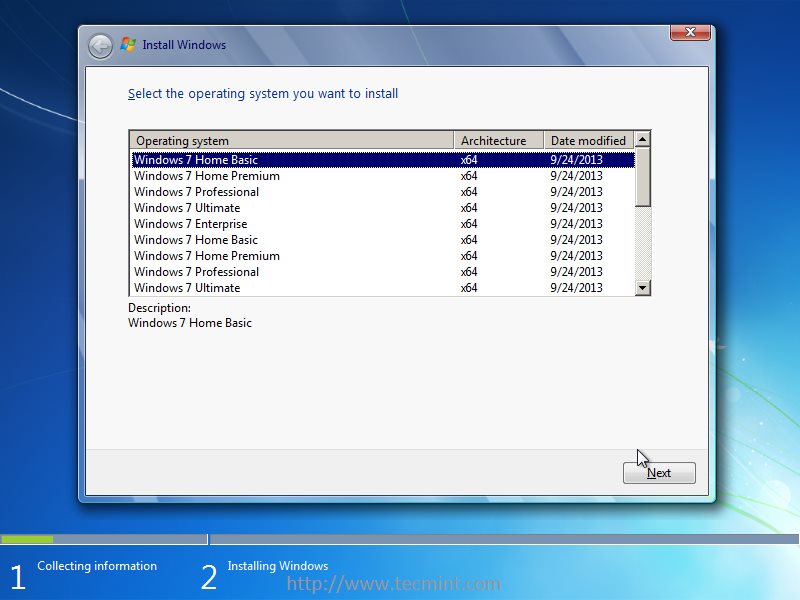
Select Windows 7 Home Basic
net use y : \\192.168.1.20\install\x64 /user:samba_username13. After both architectures installation sources had been mapped you can change between them by switching to the designated network drive letter as presented in the screenshot below.
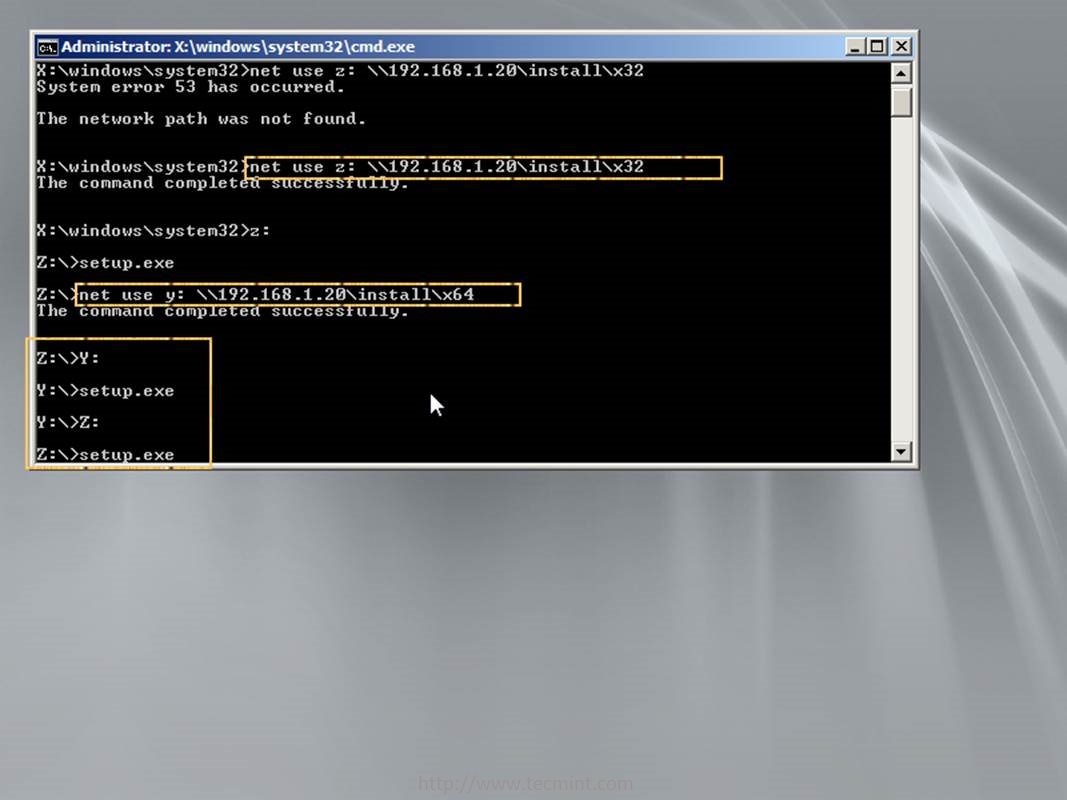
Change Network Installation Source
You can also setup multiple Windows Installation Sources (using Windows or Samba shares) on different machines over your network to avoid a bottleneck on RHEL/CentOS PXE Server, in case you install Windows on multiple machines the same time, and direct the network drive maps to use those specific network sources on installation process.
I Love your article. You cant visit my website
ReplyDeleteac market apk s
I am questioning that during this time you must deliver a try and this new app Amazing Slow Downer Apk : which is now maximum trending app inside the global.
ReplyDelete