Monday, September 19, 2016

Windows : How to Transfer your Windows 10 License to a New Computer

How to Transfer your Windows 10 License to a New Computer


Depending on the type of Windows 10 license you have installed, you might be able to transfer it to a new computer, if needed. Over the years, Microsoft has distributed its desktop operating system through different market channels. New computers will often have a preinstalled with an OEM license. There are many other channels that Microsoft distributes Windows, and these include; Retail, Volume License, Academic, and subgroups such as Upgrade licenses.
In 2015, Microsoft launched its latest version, Windows 10, offering the operating system to qualifying PC’s and devices running Windows 7 or Windows 8 for free, for a limited time. Microsoft continues to provide Windows 10 as a full retail product for computers without a qualifying license or for people who build PCs.

Determine if your Windows 10 License can be Transferred

Find out what type of license you have installed
Microsoft describes the Windows 10 free upgrade as a full version, not a trial. Contrary to these statements, Windows 10 free upgrade does have some restrictions.
  • If you upgraded from a retail copy of Windows 7, Windows 8 or 8.1, the Windows 10 license carries the retail rights from which it was derived.
  • If you upgraded from an OEM Windows 7, Windows 8 or 8.1 license, these are licenses that come preinstalled on a new computer from a manufacturer, and then your Windows 10 license maintains the OEM rights.
We discussed these nuances in our Windows 10 editions article; with the release of Windows 10 November Update, 1511, Microsoft made modifications to the channel license. Previously, you could identify the channel from which, the license was derived by issuing a particular Windows command. The November Update, now describes all licenses upgraded, whether full package or OEM as retail. Even though your free upgrade to Windows 10 from an OEM Windows 7 or Windows 8/8.1 is now identified as retail, in spirit, it is still an OEM license.
This affects the rights to what you can do with the license. If it’s retail, you can continue to make hardware modifications to your system such as changing the motherboard or move it to a different computer. For an OEM version, if you change the motherboard, automatically, your free upgrade will be invalidated; meaning, you will have to purchase a new full retail Windows 10 license.

Remove the License then Transfer to Another Computer

To move a full Windows 10 license, or the free upgrade from a retail version of Windows 7 or 8.1, the license can no longer be in active use on a PC. Windows 10 does not have a deactivation option. Instead, you have two choices:
  • Uninstall the product key – this is the closest to deactivating the Windows License. This method does not inform Microsoft Activation Servers, the license is no longer in use on the machine; it will avoid conflicts down the road if Microsoft Activation Servers were to detect the license in use on more than one system.
  • Format the computer – this method ensures the license is no longer in use on the computer. You can use the convenient Reset option in Windows 10 do this.

Uninstall Windows 10 Product Key

Press Windows key + X then click Command Prompt (Admin). At the command prompt, enter the following command: slmgr.vbs /upk.
This command uninstalls the product key, which frees the license for use elsewhere.
Move License UPK
You are now free to transfer your license to another computer. Since the release of theNovember Update, Microsoft made it more convenient to activate Windows 10, using just your Windows 8 or Windows 7 product key.
When prompted during setup for a product key, click I don’t have a product key. If you have afull version Windows 10 license bought at a store, you can enter the product key.
I dont have key
Select the Edition You’re Licensed for
Windows 7 Starter, Home Basic, Home Premium, Windows 8.1 Core: Windows 10 Home
Windows 7 Professional, Ultimate, Windows 8.1 Pro: Windows 10 Pro
I dont have key 2
Windows 10 setup, will prompt you again for a product key during the Out of Box Experience, click Do this later if you are using a Windows 7 or Windows 8/8.1 product key. If you have a full version Windows 10 license bought at a store, you can enter the product key.
 oobe 2

How to Reactivate the License

Once you arrive at the desktop, you will need to re-enter your product key. Press Windows key + X then click Command Prompt (Admin).
At the command prompt, enter the following command: slmgr.vbs /ipk xxxxx- xxxxx- xxxxx- xxxxx- xxxxx. Hit Enter on your keyboard; you will receive a confirmation the product key was updated. Close the command prompt and then proceed to reactivate by telephone or Contact Support.
Install Product Key
Because the Windows 10 license was previously in use on another computer, you will need to reactivate by telephone or use Contact Support. Press Windows key + R then typeslui.exe 4then hit Enter on your keyboard.
activate phone 1
The activation wizard will launch. Choose your country and click Next.
phone activate 2
Call the number on the Activation screen or launch Contact Support then explain your situation to the Microsoft Answer Tech; provide the Installation ID on screen.
reactivate 11
The agent will verify your product key, then provide a confirmation ID for reactivating Windows 10. Review our article for complete instructions how to get your license reactivated.
phone activation 3
A very exhausting procedure, I know, but it works smoothly especially with the new chat support option in Windows 10.

Sunday, September 18, 2016

Windows10: Get ISO image for Windows 10 build 9860 for a clean install

Get ISO image for Windows 10 build 9860 for a clean install


Microsoft offers Windows 10 build 9860 only via Windows Update or via the PC Settings app. It can only be installed from an existing installation of Windows 10 Technical Preview build 9841. For users who have recently decided to install Windows 10 after build 9860 has been released, it doubles the amount of work they have to do and a huge waste of their time - installing build 9841 first via the public ISO image and then updating it with a large 2 to 3 GB download which takes forever to install and can sometimes even fail to upgrade your OS. So for those who want to perform a clean install of Windows 10 build 9860, here are the instructions on how they can build a standalone ISO image themselves and install it.

To create the ISO image for build 9860,
  1. First, you need to get the ESD image file of Windows 10 build 9860. The actual links are as follows (via MDL):

    Windows 10 x64: 9860.0.141008-2044.fbl_release_clientpro_ret_x64fre_en-us_890f9c77dfdd9d3e7e9ac46e18fa7f4dd7b105d1.esd

    Windows 10 x86: 9860.0.141008-2044.fbl_release_clientpro_ret_x86fre_en-us_4268ed97873110ab801beb19b3f5016090623c7c.esd
  2. Now download the ESD Decrypter tool from HERE
  3. Extract the ESD Decrypter tool to any folder and put your ESD file in the same directory:
  4. Now right click the decrypt.cmd file and run it as administrator from the context menu.
  5. Type 4 at the command prompt to build the full ISO image:
  6. Wait for a few minutes and enjoy your ISO file!
That's it.

Wednesday, September 7, 2016

[Mac OS]: Mac After Install - Automated software install tool for OS X

Mac After Install - Automated software install tool for OS X

Many great applications are not yet available on the official app store and can be complicated for new users to install. 
This application provides a collection of some of the best free and open-source Mac OS X software and can be considered to be one of the top things to do after getting a new Mac or migrating from Windows.
Selecting and Installing all the extra software on a new Mac computer can be time consuming and confusing. I wanted to automate the process on new machines as well as simplify the installation for new users.
Mac After Install has evolved into being a handy tool for the automated download and install of software.
All comments and improvements are very welcome as this is purely a personal project at this point and must be considered a work in progress.
Mac After Install on GitHub
The source code is available on GitHub.

Features

  • Automated batch download and installation of software
  • Easy uninstall of any and all software installed
  • Create custom lists of software to install
  • Export software installation lists to share
  • Import software installation lists 
  • Create backup DMG of installed applications
  • Auto Updated list of selected default applications 

Default Software Selection:

The application will install the latest versions of all software listed below as well as inform you of available updates.
Google Chrome is arguably the best browser available
Firefox another top browser
Tor Browser for anonymous internet browsing
Thunderbird for email 
Vienna as a RSS and Atom Feed Reader
Telegram Messenger for private messaging
Skype offers text, voice and video chat
Jitsi all in one instant messenger
Adium all in one instant messenger
LibreOffice is the complete open source Office software replacement  
Scribus professional quality desktop publishing software
Google Drive will sync your Google Drive to your computer
DropBox will sync your DropBox cloud storage 
VLC will play any video file you can imagine  
Cementine for playing music files from anywhere 
KODI is a complete home media center experience
Spotify for your music streaming needs
Picasa to organize, edit, and share your photos
GIMP is powerful image editing software  
Darktable allows photographers to process RAW files
Inkscape is vector based illustration and graphics editor
Blender a complete 3D Animation Suite
Audacity for music and sound editing 
Handbrake to convert DVD's and videos for mobile devices
Burn for burning CD's and DVD's in various formats
KeePass to store all your passwords securely
FileZilla  for FTP file up- and downloads
Cyber Duck  for FTP and Cloud storage 
Transmission for Torrent downloads and uploads
Keka adds missing file compression and decompression
Synkron great for file and folder synchronisation
BlueGriffon is a web designer and editor.
Brackets for web development started by Adobe 
Komodo Edit is a amazing code editor
Sublime Text another amazing code editor
Atom a hackable text editor by GitHub
For more information on these programs visit the software selection page


Requirements:

  • Mac OS X 64bit, 10.6 or later


Installation:

  • Download the Mac After Install DMG file from the link provided at the bottom of this page or from our GitHub project download page.
  • To allow the install of the software go to: System Preferences > Privacy & Security > General. Then click on the lock in the bottom right-hand corner to unlock the options. Then select "Allow apps downloaded from: Anywhere"
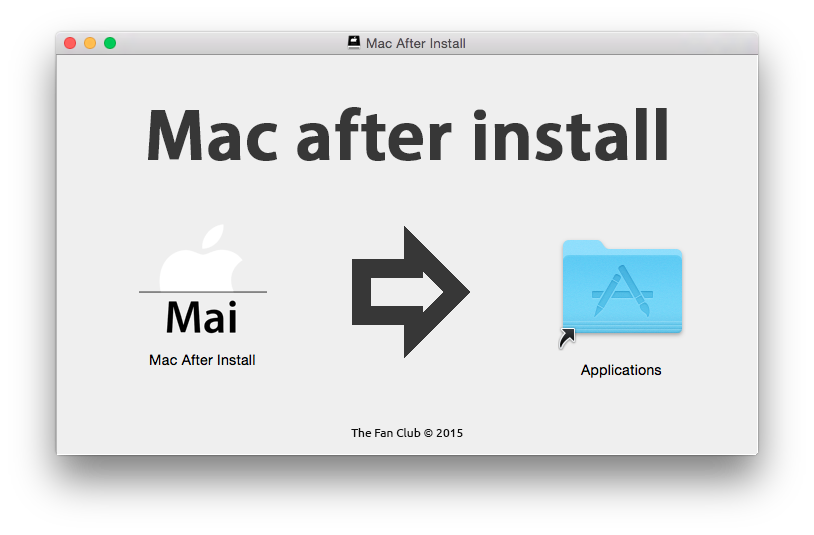
  • Double click on the downloaded DMG file and drag the Mac After Install app to the Applications folder to install.
  • Once installed open Mac After install from your Applications folder.
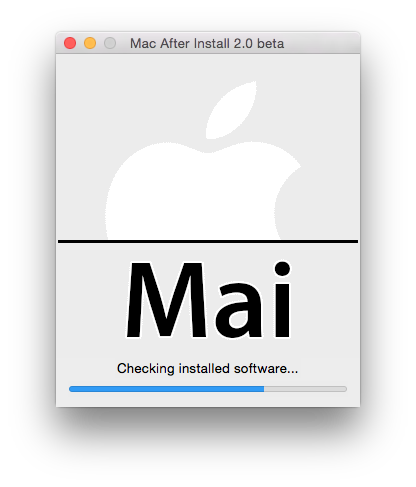
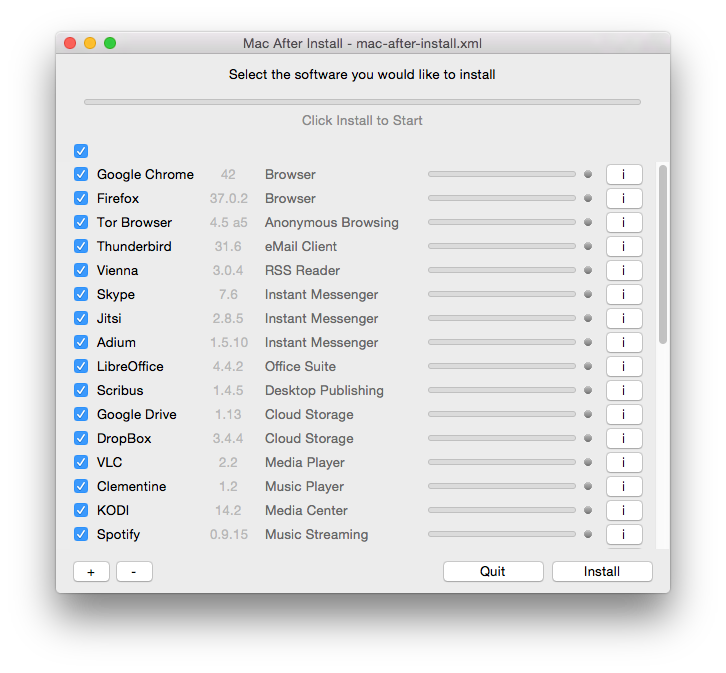
  • Follow the on-screen instructions (see screenshots below)


Using Mac After Install

1. Installing Software

  • Start Mac After Install from your applications folder .
  • Follow the on screen instructions.
  • Select the software you would like to install and click Install Now to begin.
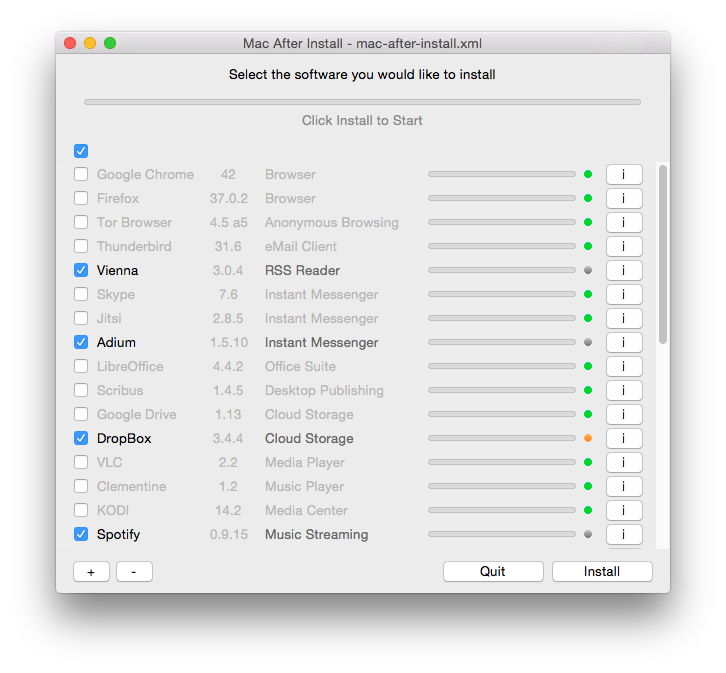
  • Software that has already been installed will be selected as well, if updates are available for the newer versions.
  • If you wanted to re-install a item, simply select the application. It will be re-install.
  • Software marked with an orange dot will be updated or re-installed.
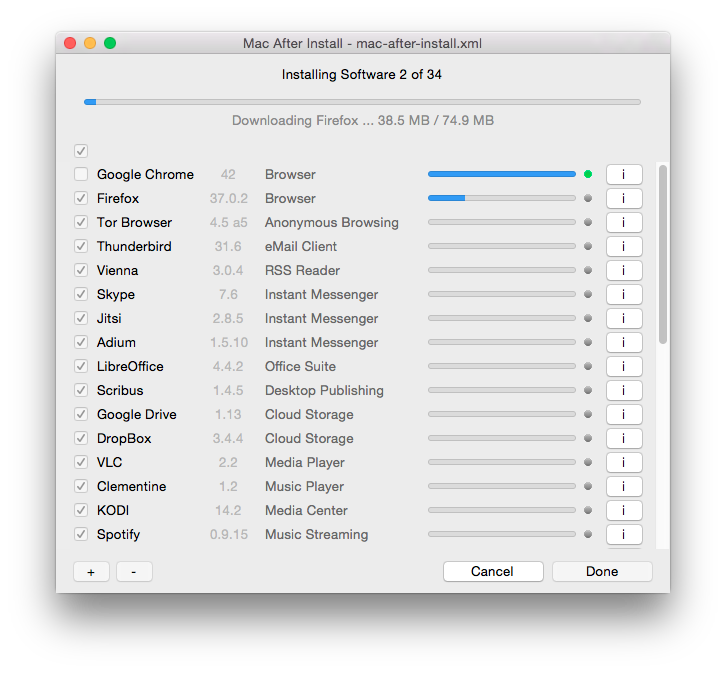
  • Once you have started the install process be very patient as the installation will take a while to complete
  • Once an application has been installed successfully it will be marked with green dot as shown below.
  • If there is a problem with the install of an application, it will be marked with a red dot.
  • It is not a good idea to stop or interrupt the install process once it has begun.
  • if you would like to create a single compressed backup DMG of all the downloaded applications select Create Backup DMG from the Software menu. Software > Create Backup DMG.
  • The backup file will be created in your Downloads folder named Mac-After-Install-YYYY-MM-DD.dmg


2. Auto Update List 

  • When Mac After Install is started it checks for updates to the default software selection list. You can choose not to have the list updated by un-checking Auto Update List in the Software menu. Software > Auto Update List.


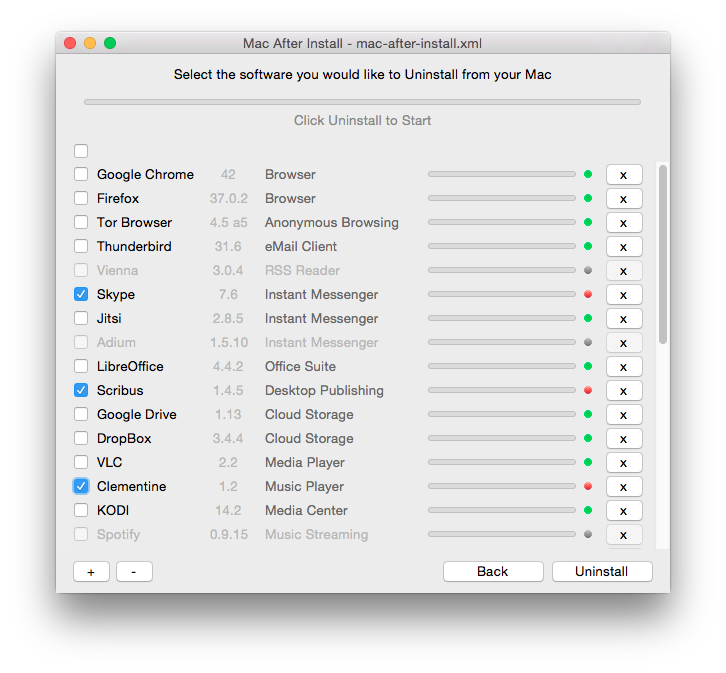
3. Uninstalling software installed with Mac After Install

  • You can uninstall any or all software installed with Mac After Install easily.
  • From the application Software menu select Uninstall Software : Software > Uninstall Software
  • To uninstall individual applications click on the "x" to uninstall the application.
  • To uninstall multiple applications select the items you would like to remove and click Uninstall.
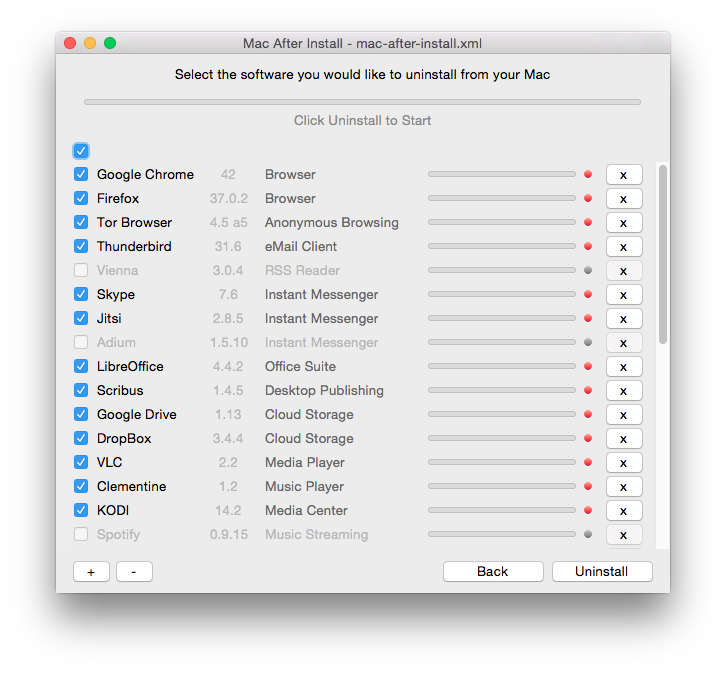
  • Selected items will be marked by a red dot.
  • To Uninstall all software installed with Mac After Install simply click on the the select all check-box and click the Uninstallbutton.

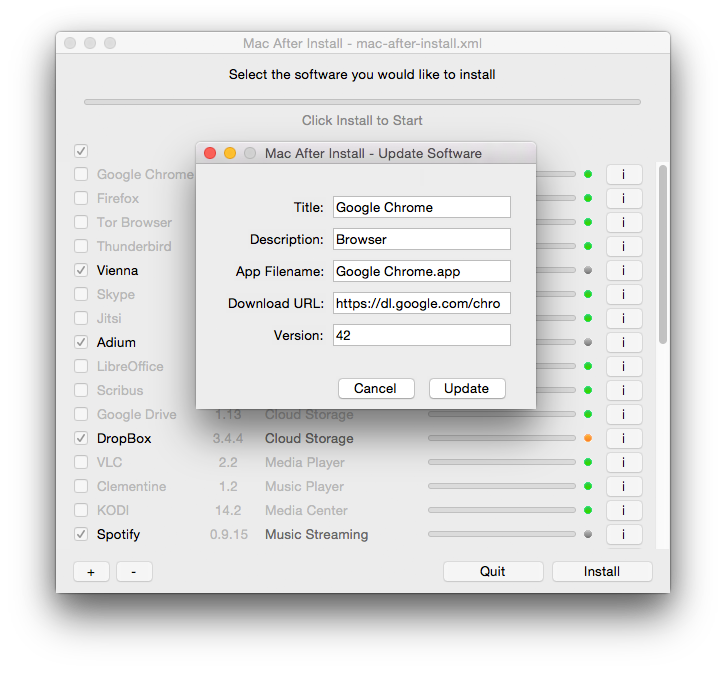
4. View and edit details of each application on the list

  • You can get information about each application by clicking on the "i" Info button.
  • To edit and update the item simply change the relevant item and click Update.

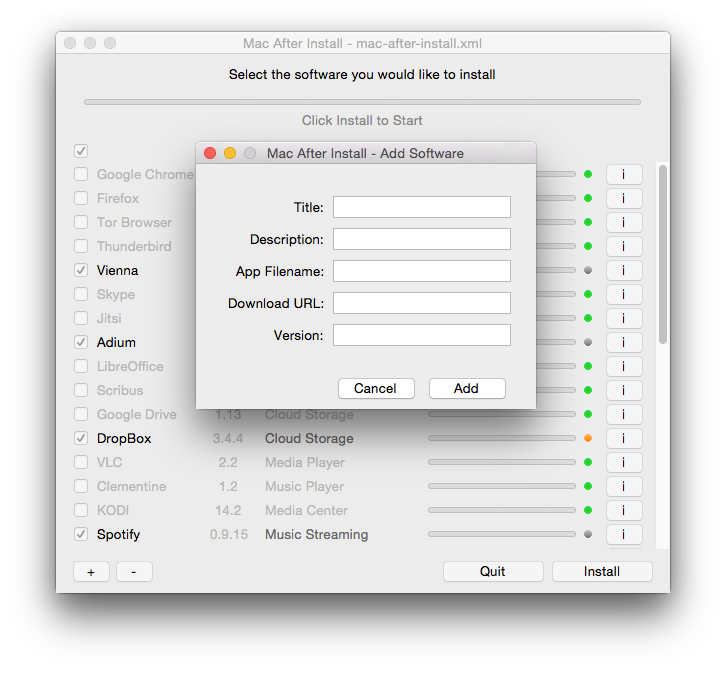
5. Add a new application to the list

  • You can add a new application to the list by clicking on the "+" Add button, or from the the application Software menu by selecting Add to List. Software > Add to List
  • To add a new item simply add the relevant information and click Add.
  • App Filename : Must be the name as it appears in the Applications folder after it is installed. This can be a .app file or a normal folder name in some cases.
  • Download URL : Must be a link to the download file. Supported formats include: .dmg .bz .tgz .tar .gz .bz2 .zip
  • Version : This is the version of the version being downloaded. Use format x.x.x for version numbers.

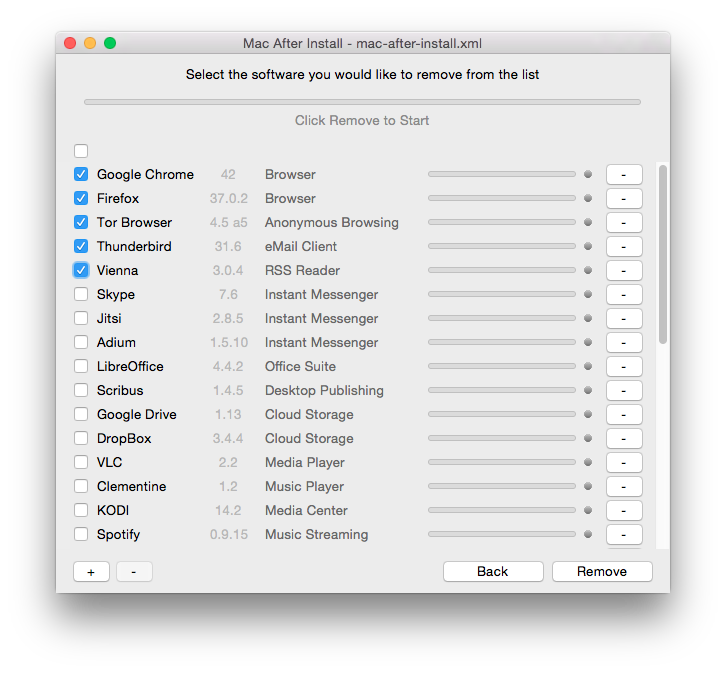
6. Remove applications from the list

  • You can remove an application from the list by clicking on the "-" Remove button, or from the the application Software menu by selecting Remove from List : Software > Remove from List
  • To remove individual applications click on the "-" to remove the application from the list.
  • To remove multiple applications select the items you would like to remove from the list and click Remove.

7. Import and Export lists to .mai or .xml format

  • You can create and edit custom lists of software and export the list in .mai or .xml format for sharing with other Mac After Install users.
  • To import a list select Open from the File Menu : File > Open or double click on a .mai list file to open it with Mac After Install.
  • To save a list select Save or Save As from the File Menu : File > Save and select the filename and folder you would like to save the list to.


Download: 

AttachmentSize
File Mac After Install 2.4.dmg3.51 MB

[Mac OS]: NTFS write - Enable native OS X Read & Write support for NTFS formatted storage media

NTFS write - Enable native OS X Read & Write support for NTFS formatted storage media

NTFS write is an application that allows you to activate read and write support for NTFS hard drives or storage media on Mac OS X.
NTFS write on GitHub
Open Source project. Code available on GitHub

Features

  • Automatically detects when attaching NTFS formatted media.
  • Uses OS X native NTFS support. 
  • No 3rd party drivers needed.

Requirements

  • Mac OS X 10.11 El Capitan tested but should work on 10.9 or later.

Instructions - Mac OS X

  • Download NTFS write DMG installation file from the link provided at the bottom of this page or from our GitHub project download page.
  • To allow the install of the software go to: System Preferences > Privacy & Security > General. Then click on the lock in the bottom right-hand corner to unlock the options. Then select "Allow apps downloaded from: Anywhere"
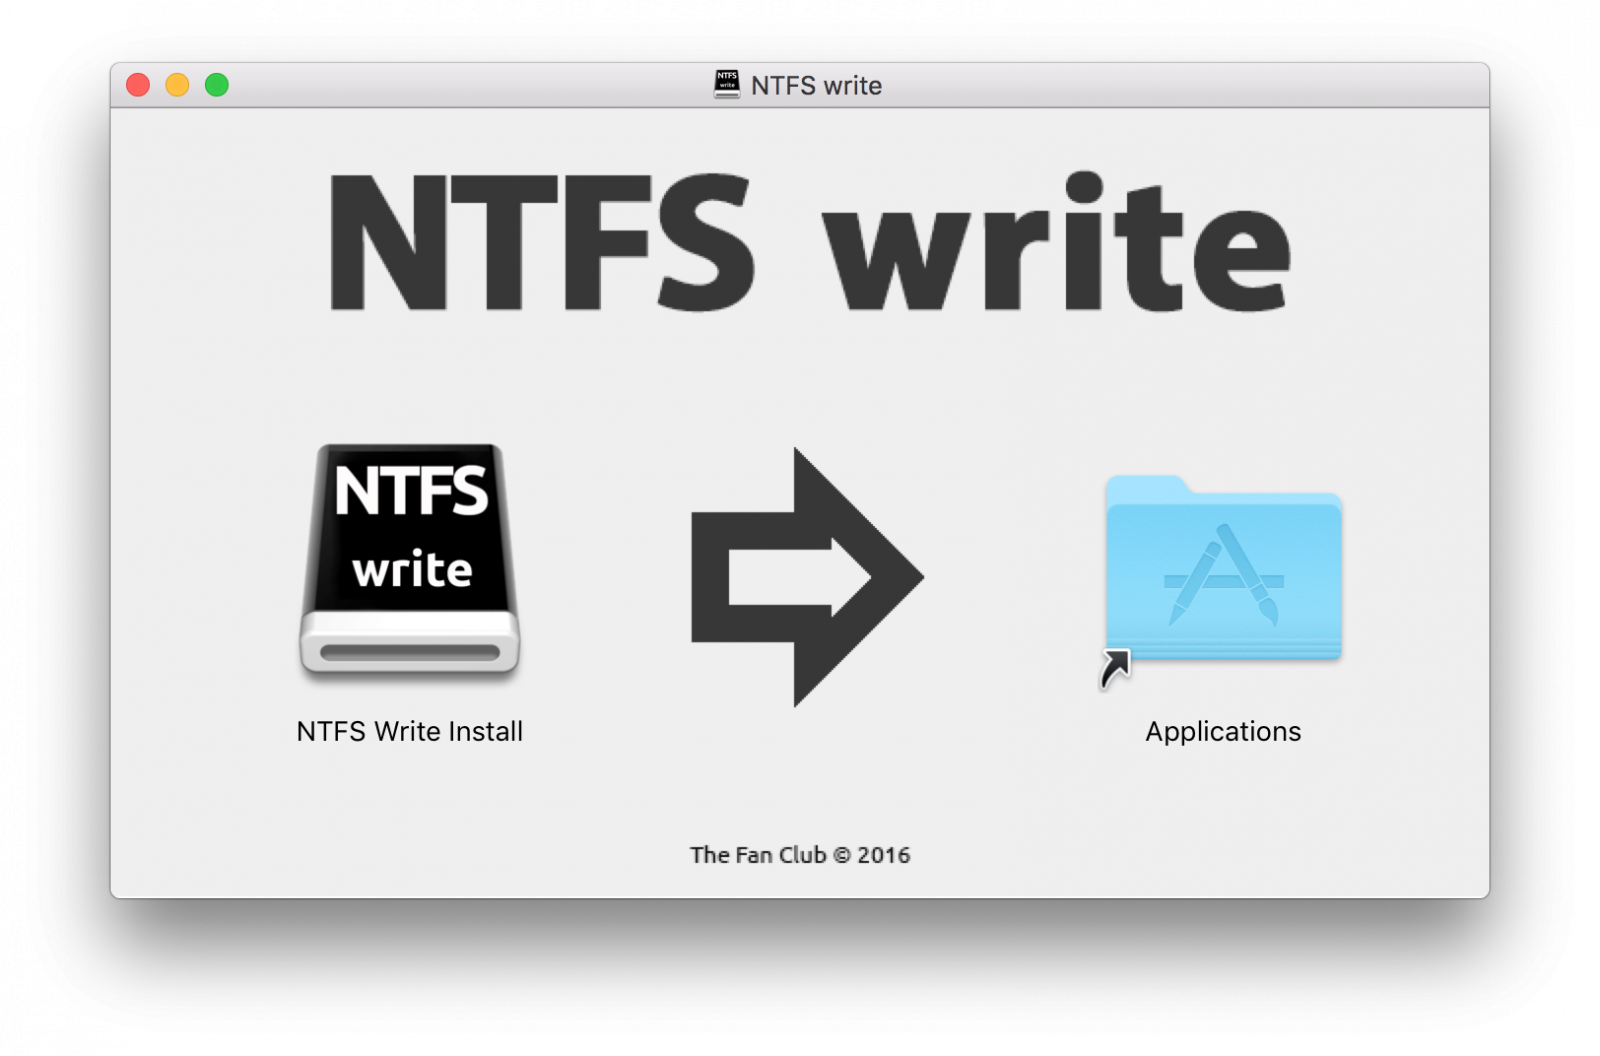
  • Double click on the DMG file to open and drag the NTFS Write Install icon to the Applications folder as shown below.  
  • Select NTFS Write Install from your Applications folder to start the installation.


Mac OS X User Guide

Installation

  • Start NTFS write from your Applications Folder or simply double click on the installer icon.
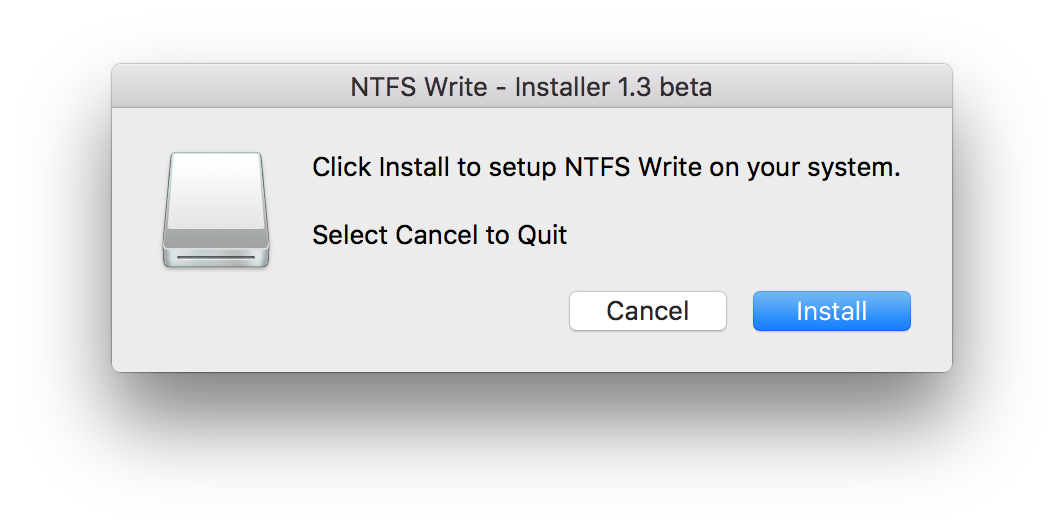
  • You will be asked to enter your password to start. 
  • Select Install
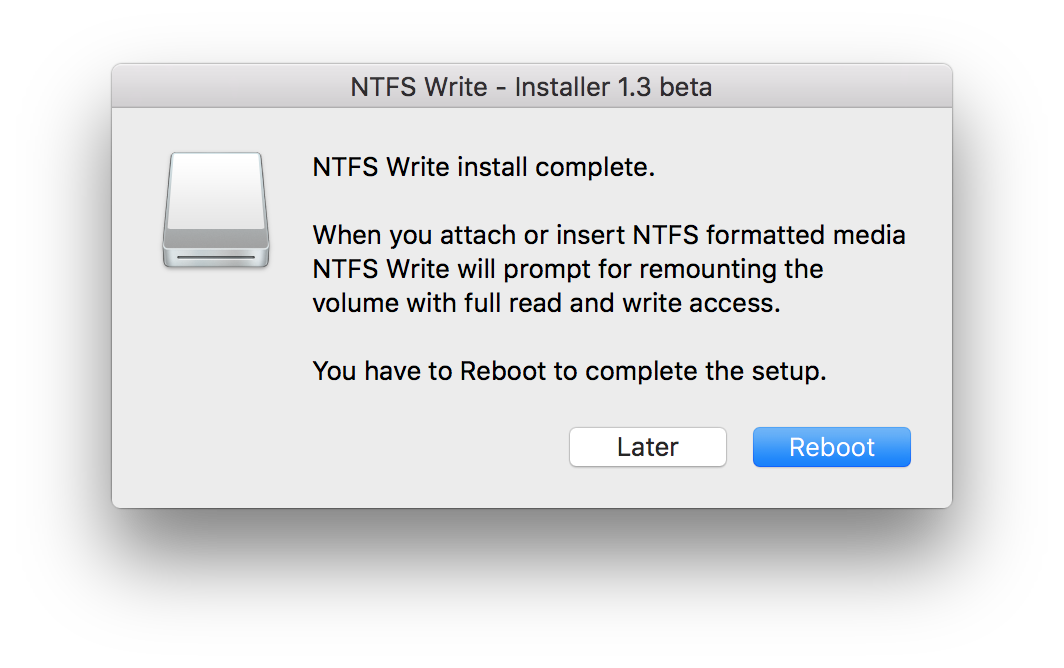
  • After the installation is complete, reboot/restart your computer. 
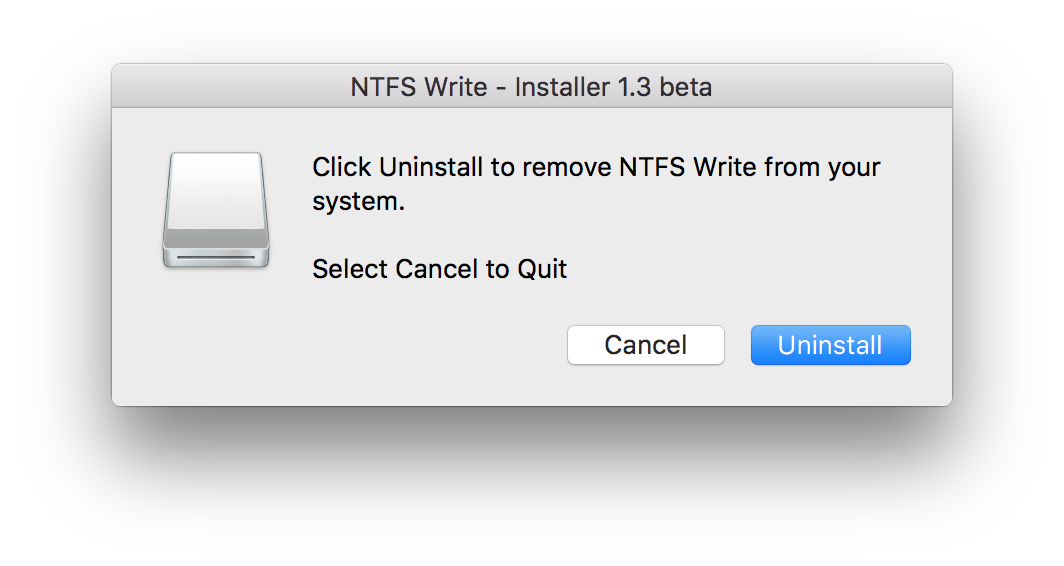
  • To Uninstall NTFS Write simply launch the NTFS Write Install application again and you will be prompted to un-install the program.

Usage

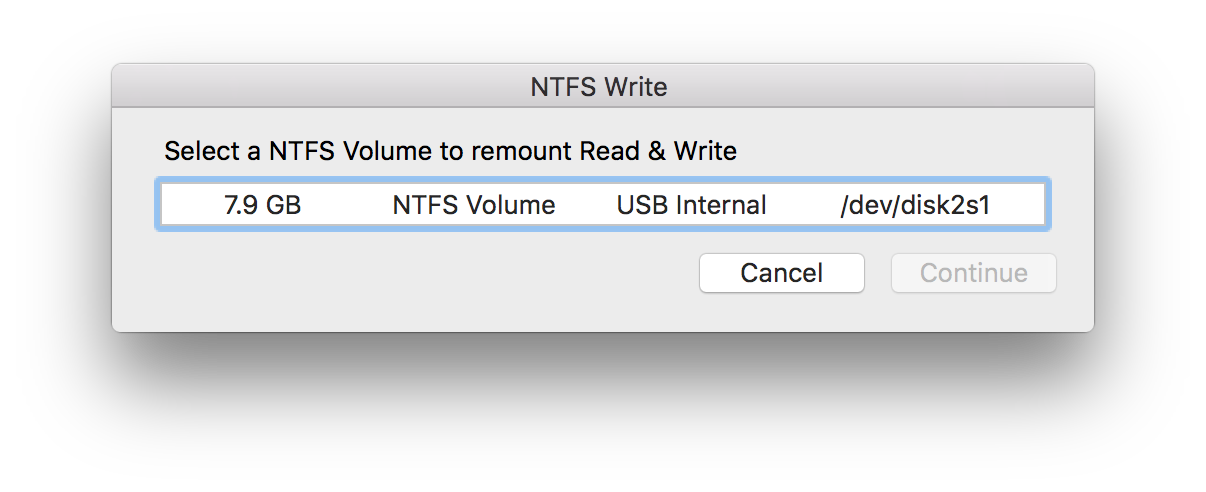
  • Attaching any NTFS formatted storage media that can be remounted in read & write mode, will be auto-detected and theNTFS Write window below will automatically appear. 
  • NOTE : Sometimes the dialog does not appear when attaching a NTFS volume the first time, simply eject and re-attach the NTFS media. 
  • You can then select the disk volume you would like to activate read and write support for and remount.
  • The Volume will be unmounted and remounted with full write access support enabled.
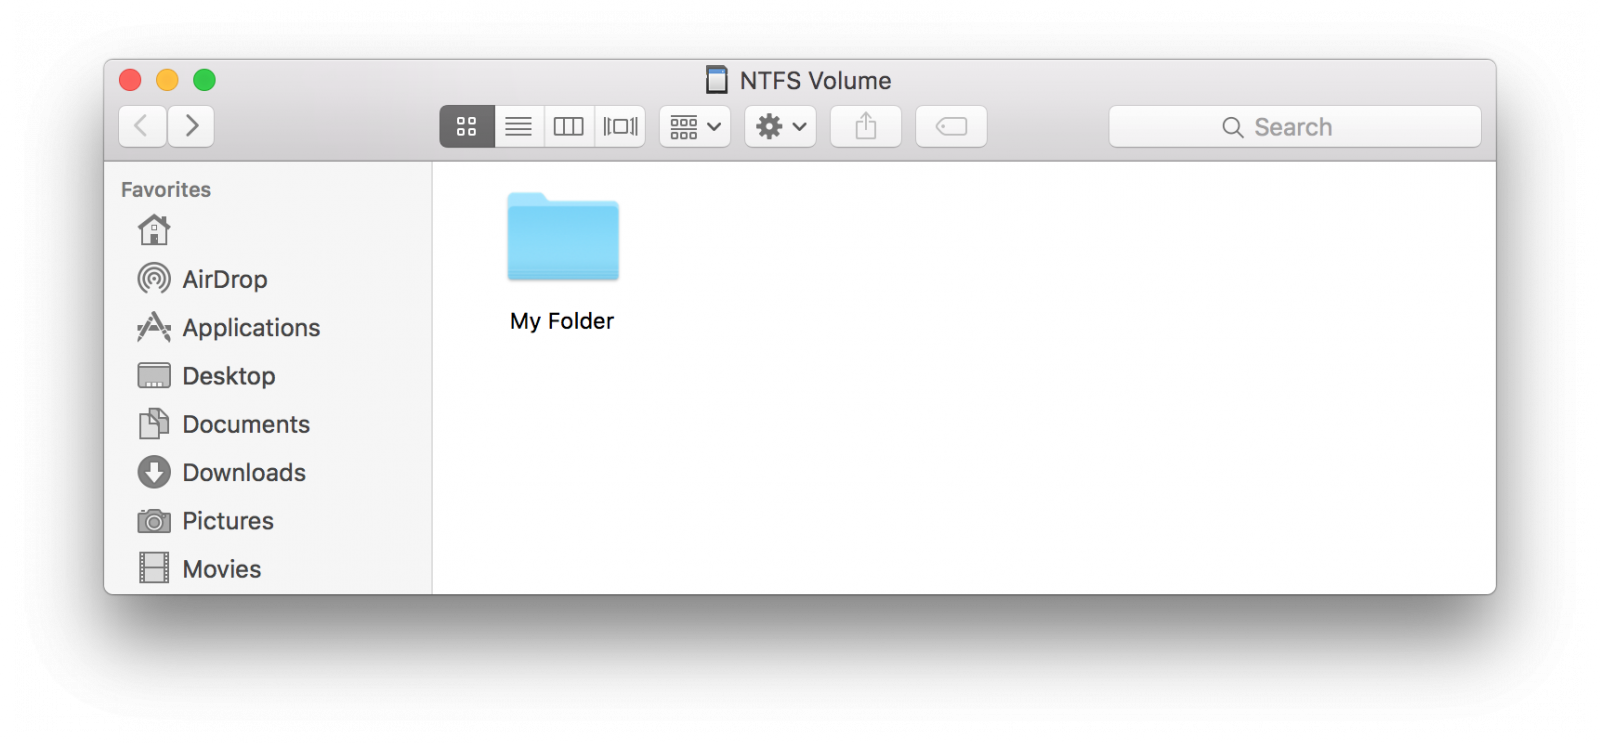
  • The Volume will open in Finder if successfully remounted.
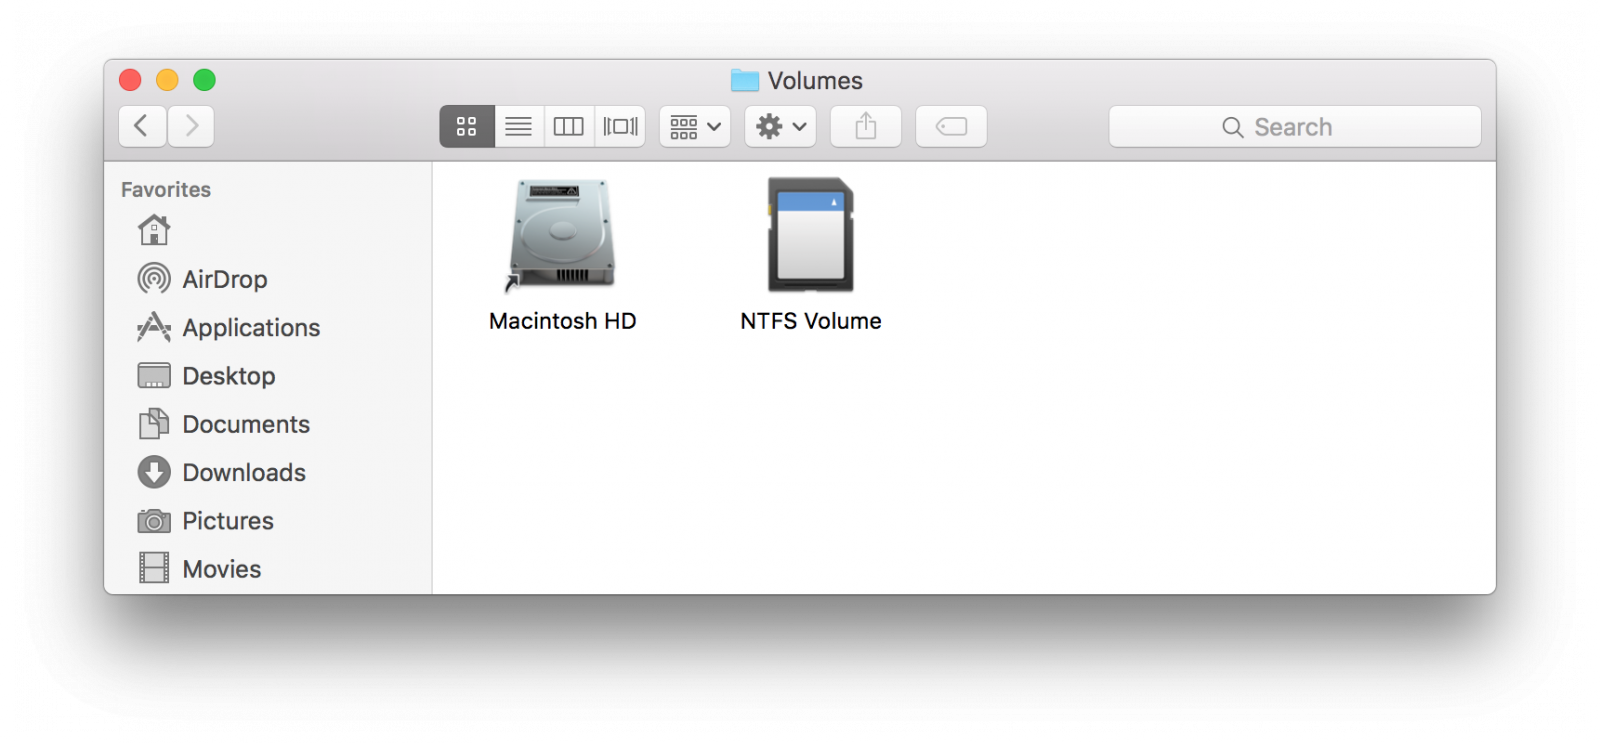
  • NOTE: The storage volume is mounted by the system and not the user. This means the normal shortcut in the Devices menu in the Finder sidebar will not appear after remount. The media can be found at /Volumes/<Drive Name>
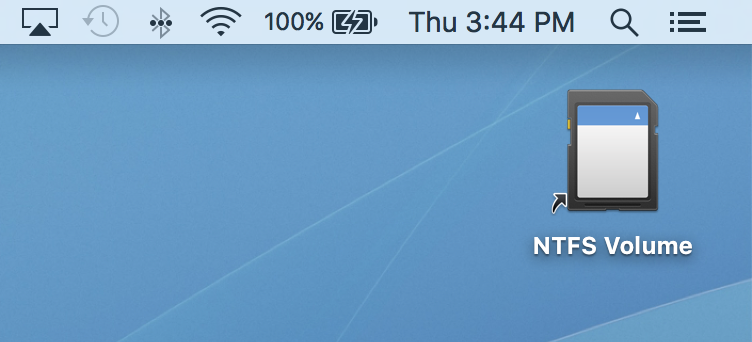
  • NTFS write will also add a Desktop shortcut to your storage volume.

Note

  • Mac OS X does not officially support NTFS write mode and some advise against this.
  • Certain NTFS media cannot be mounted in read write mode due to being incorrectly unmounted or due to errors. Running Check Disk on Windows is needed to repair NTFS filesystem errors.
  • Some files show up as grayed out and cannot be changed. This is due to Apple extended attributes causing this issue. Refer to xattr documentation for more information.  


Download: 

AttachmentSize
File NTFS write - version 1.5.dmg3.19 MB