Showing posts with label MAC. Show all posts

Wednesday, September 7, 2016

[Mac OS]: Mac After Install - Automated software install tool for OS X

Mac After Install - Automated software install tool for OS X

Many great applications are not yet available on the official app store and can be complicated for new users to install. 
This application provides a collection of some of the best free and open-source Mac OS X software and can be considered to be one of the top things to do after getting a new Mac or migrating from Windows.
Selecting and Installing all the extra software on a new Mac computer can be time consuming and confusing. I wanted to automate the process on new machines as well as simplify the installation for new users.
Mac After Install has evolved into being a handy tool for the automated download and install of software.
All comments and improvements are very welcome as this is purely a personal project at this point and must be considered a work in progress.
Mac After Install on GitHub
The source code is available on GitHub.

Features

  • Automated batch download and installation of software
  • Easy uninstall of any and all software installed
  • Create custom lists of software to install
  • Export software installation lists to share
  • Import software installation lists 
  • Create backup DMG of installed applications
  • Auto Updated list of selected default applications 

Default Software Selection:

The application will install the latest versions of all software listed below as well as inform you of available updates.
Google Chrome is arguably the best browser available
Firefox another top browser
Tor Browser for anonymous internet browsing
Thunderbird for email 
Vienna as a RSS and Atom Feed Reader
Telegram Messenger for private messaging
Skype offers text, voice and video chat
Jitsi all in one instant messenger
Adium all in one instant messenger
LibreOffice is the complete open source Office software replacement  
Scribus professional quality desktop publishing software
Google Drive will sync your Google Drive to your computer
DropBox will sync your DropBox cloud storage 
VLC will play any video file you can imagine  
Cementine for playing music files from anywhere 
KODI is a complete home media center experience
Spotify for your music streaming needs
Picasa to organize, edit, and share your photos
GIMP is powerful image editing software  
Darktable allows photographers to process RAW files
Inkscape is vector based illustration and graphics editor
Blender a complete 3D Animation Suite
Audacity for music and sound editing 
Handbrake to convert DVD's and videos for mobile devices
Burn for burning CD's and DVD's in various formats
KeePass to store all your passwords securely
FileZilla  for FTP file up- and downloads
Cyber Duck  for FTP and Cloud storage 
Transmission for Torrent downloads and uploads
Keka adds missing file compression and decompression
Synkron great for file and folder synchronisation
BlueGriffon is a web designer and editor.
Brackets for web development started by Adobe 
Komodo Edit is a amazing code editor
Sublime Text another amazing code editor
Atom a hackable text editor by GitHub
For more information on these programs visit the software selection page


Requirements:

  • Mac OS X 64bit, 10.6 or later


Installation:

  • Download the Mac After Install DMG file from the link provided at the bottom of this page or from our GitHub project download page.
  • To allow the install of the software go to: System Preferences > Privacy & Security > General. Then click on the lock in the bottom right-hand corner to unlock the options. Then select "Allow apps downloaded from: Anywhere"
  • Double click on the downloaded DMG file and drag the Mac After Install app to the Applications folder to install.
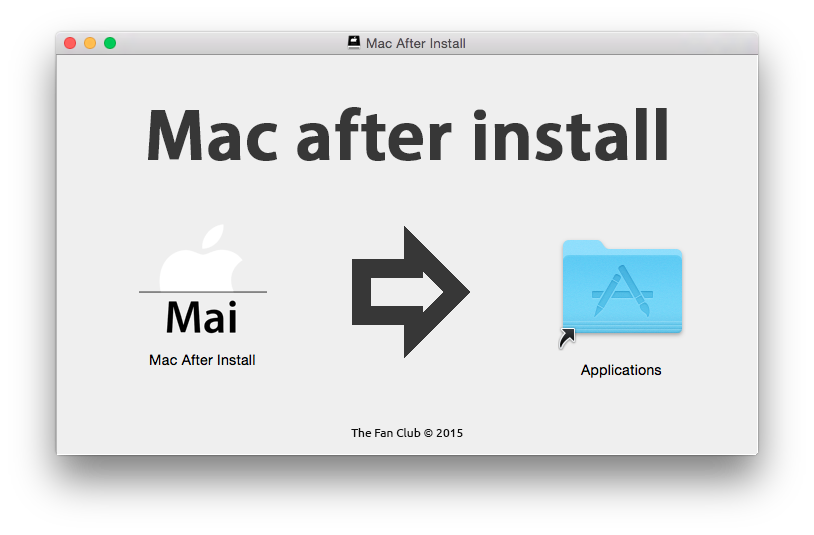
  • Once installed open Mac After install from your Applications folder.
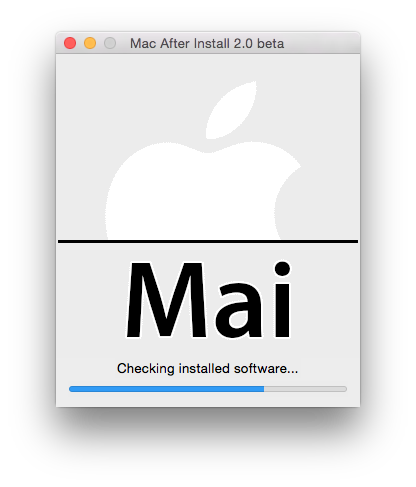
  • Follow the on-screen instructions (see screenshots below)


Using Mac After Install

1. Installing Software

  • Start Mac After Install from your applications folder .
  • Follow the on screen instructions.
  • Select the software you would like to install and click Install Now to begin.
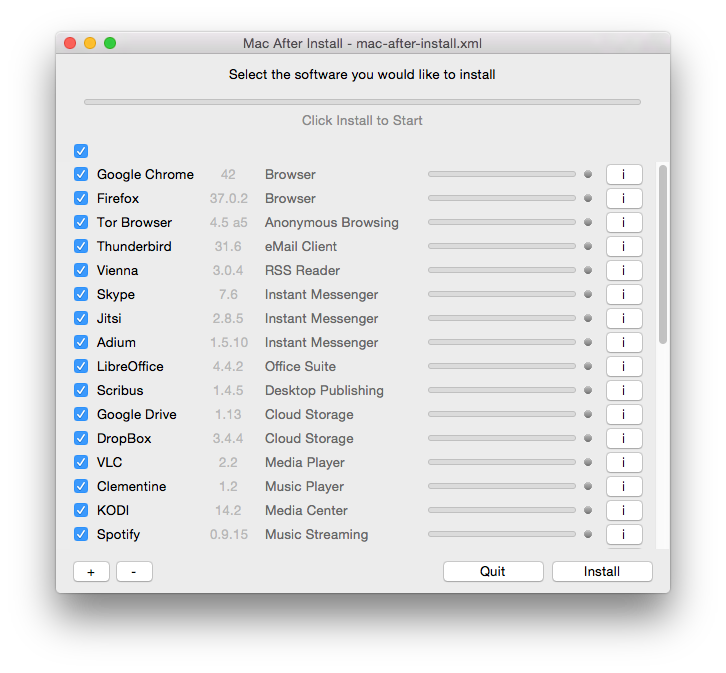
  • Software that has already been installed will be selected as well, if updates are available for the newer versions.
  • If you wanted to re-install a item, simply select the application. It will be re-install.
  • Software marked with an orange dot will be updated or re-installed.
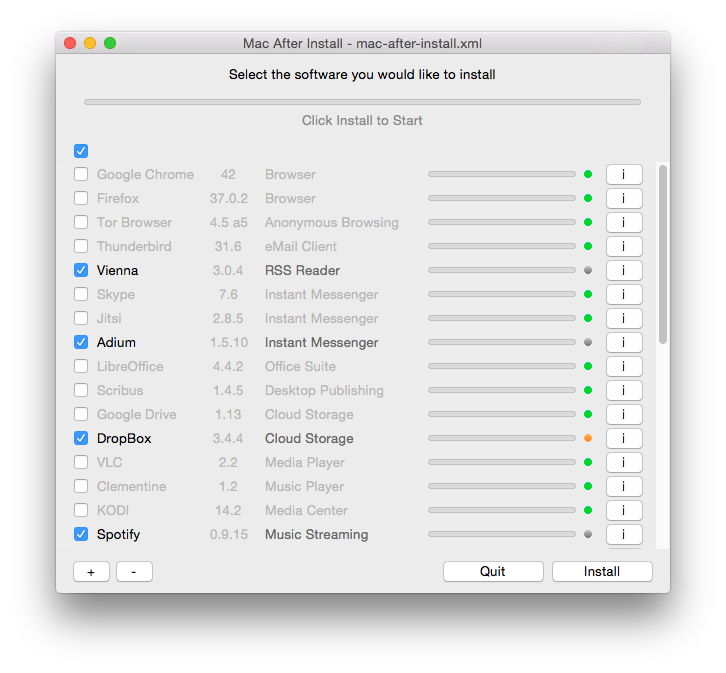
  • Once you have started the install process be very patient as the installation will take a while to complete
  • Once an application has been installed successfully it will be marked with green dot as shown below.
  • If there is a problem with the install of an application, it will be marked with a red dot.
  • It is not a good idea to stop or interrupt the install process once it has begun.
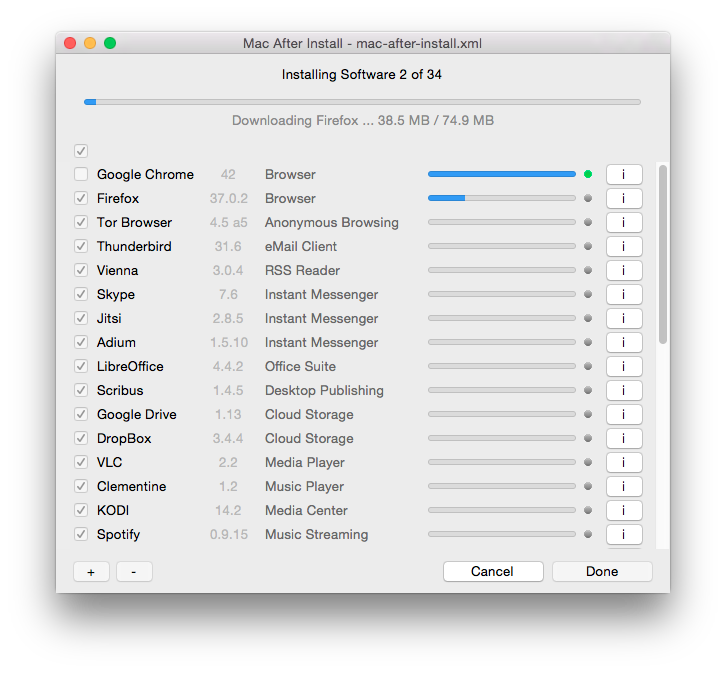
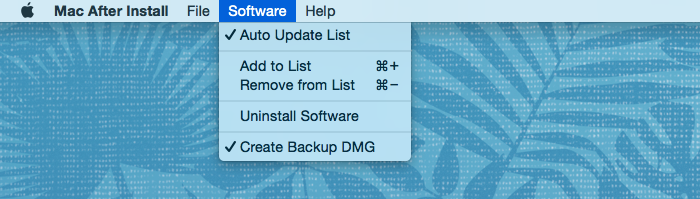
  • if you would like to create a single compressed backup DMG of all the downloaded applications select Create Backup DMG from the Software menu. Software > Create Backup DMG.
  • The backup file will be created in your Downloads folder named Mac-After-Install-YYYY-MM-DD.dmg


2. Auto Update List 

  • When Mac After Install is started it checks for updates to the default software selection list. You can choose not to have the list updated by un-checking Auto Update List in the Software menu. Software > Auto Update List.
 

3. Uninstalling software installed with Mac After Install

  • You can uninstall any or all software installed with Mac After Install easily.
  • From the application Software menu select Uninstall Software : Software > Uninstall Software
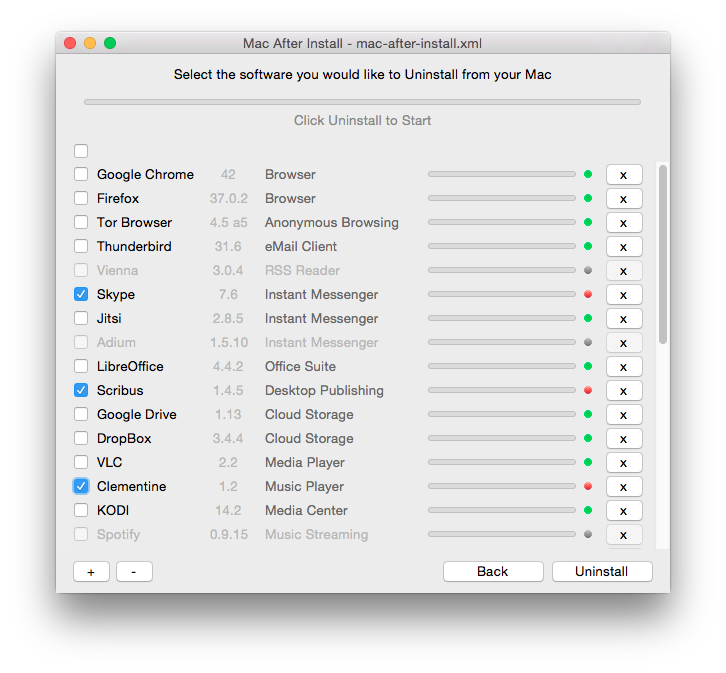
  • To uninstall individual applications click on the "x" to uninstall the application.
  • To uninstall multiple applications select the items you would like to remove and click Uninstall.
  • Selected items will be marked by a red dot.
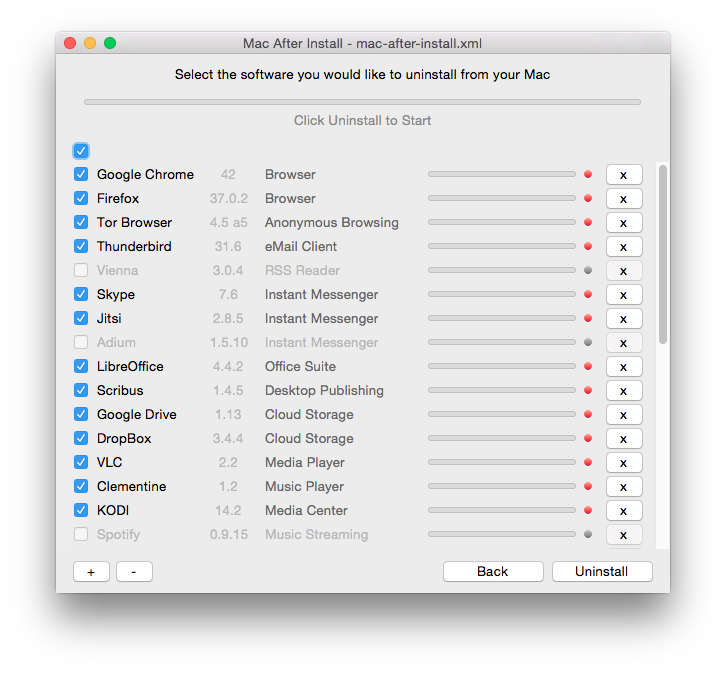
  • To Uninstall all software installed with Mac After Install simply click on the the select all check-box and click the Uninstallbutton.
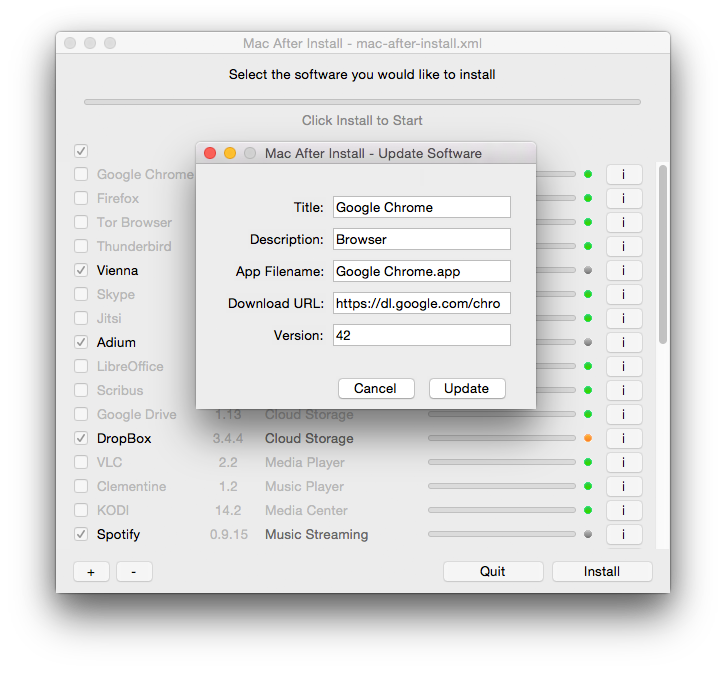
4. View and edit details of each application on the list

  • You can get information about each application by clicking on the "i" Info button.
  • To edit and update the item simply change the relevant item and click Update.
5. Add a new application to the list

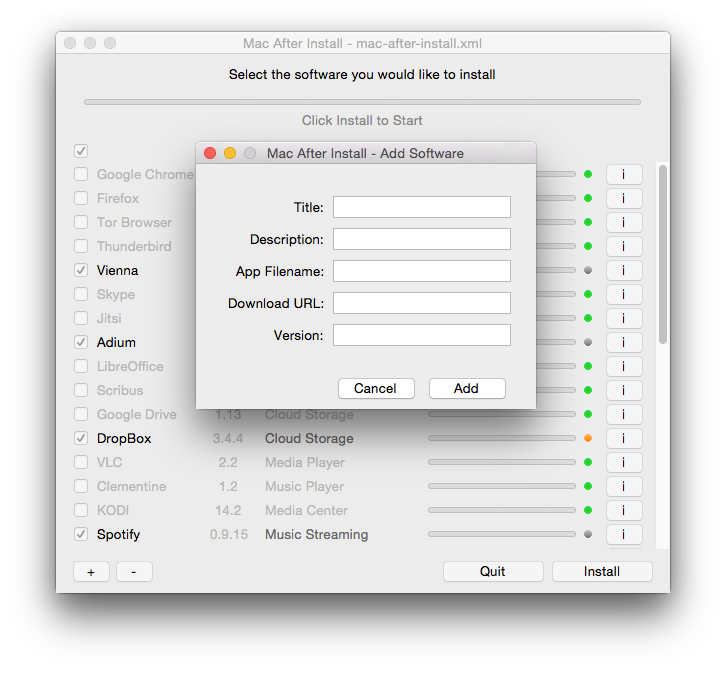
  • You can add a new application to the list by clicking on the "+" Add button, or from the the application Software menu by selecting Add to List. Software > Add to List
  • To add a new item simply add the relevant information and click Add.
  • App Filename : Must be the name as it appears in the Applications folder after it is installed. This can be a .app file or a normal folder name in some cases.
  • Download URL : Must be a link to the download file. Supported formats include: .dmg .bz .tgz .tar .gz .bz2 .zip
  • Version : This is the version of the version being downloaded. Use format x.x.x for version numbers.
6. Remove applications from the list

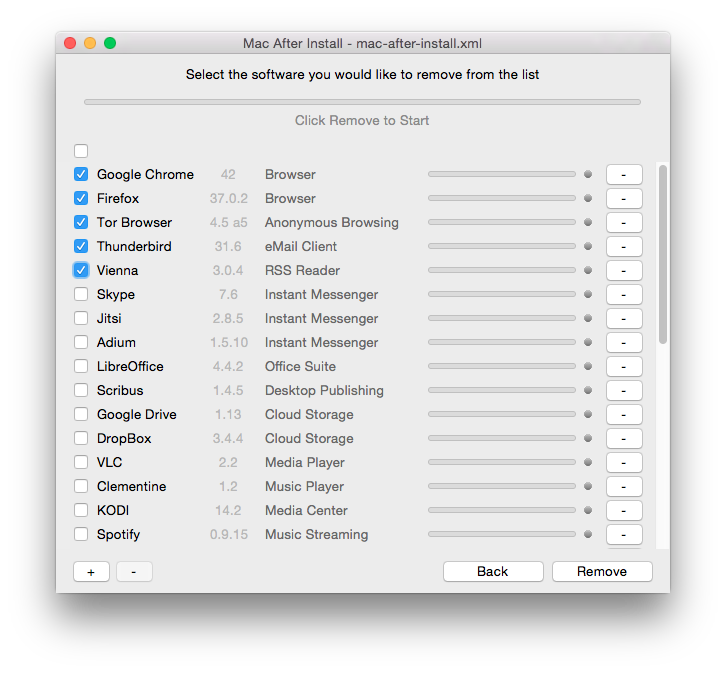
  • You can remove an application from the list by clicking on the "-" Remove button, or from the the application Software menu by selecting Remove from List : Software > Remove from List
  • To remove individual applications click on the "-" to remove the application from the list.
  • To remove multiple applications select the items you would like to remove from the list and click Remove.
7. Import and Export lists to .mai or .xml format

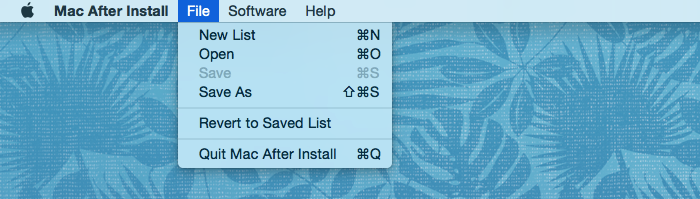
  • You can create and edit custom lists of software and export the list in .mai or .xml format for sharing with other Mac After Install users.
  • To import a list select Open from the File Menu : File > Open or double click on a .mai list file to open it with Mac After Install.
  • To save a list select Save or Save As from the File Menu : File > Save and select the filename and folder you would like to save the list to.


Download: 

AttachmentSize
File Mac After Install 2.4.dmg3.51 MB

[Mac OS]: NTFS write - Enable native OS X Read & Write support for NTFS formatted storage media

NTFS write - Enable native OS X Read & Write support for NTFS formatted storage media

NTFS write is an application that allows you to activate read and write support for NTFS hard drives or storage media on Mac OS X.
NTFS write on GitHub
Open Source project. Code available on GitHub

Features

  • Automatically detects when attaching NTFS formatted media.
  • Uses OS X native NTFS support. 
  • No 3rd party drivers needed.

Requirements

  • Mac OS X 10.11 El Capitan tested but should work on 10.9 or later.

Instructions - Mac OS X

  • Download NTFS write DMG installation file from the link provided at the bottom of this page or from our GitHub project download page.
  • To allow the install of the software go to: System Preferences > Privacy & Security > General. Then click on the lock in the bottom right-hand corner to unlock the options. Then select "Allow apps downloaded from: Anywhere"
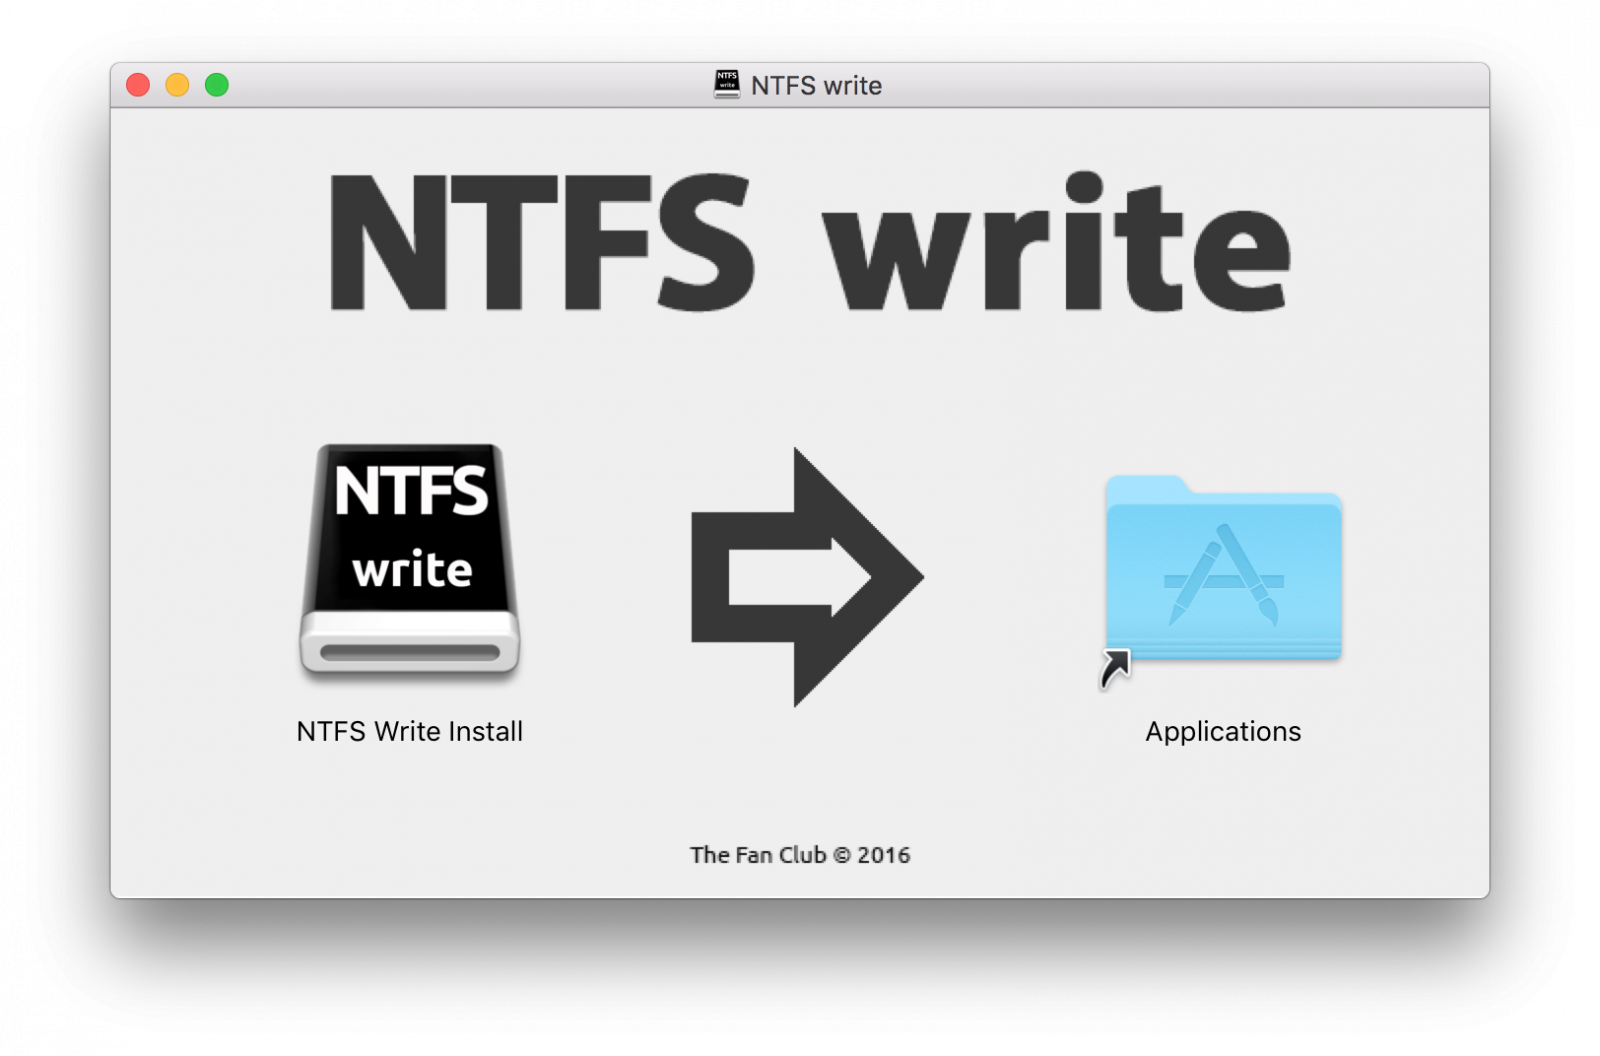
  • Double click on the DMG file to open and drag the NTFS Write Install icon to the Applications folder as shown below.  
  • Select NTFS Write Install from your Applications folder to start the installation.


Mac OS X User Guide

Installation

  • Start NTFS write from your Applications Folder or simply double click on the installer icon.
  • You will be asked to enter your password to start. 
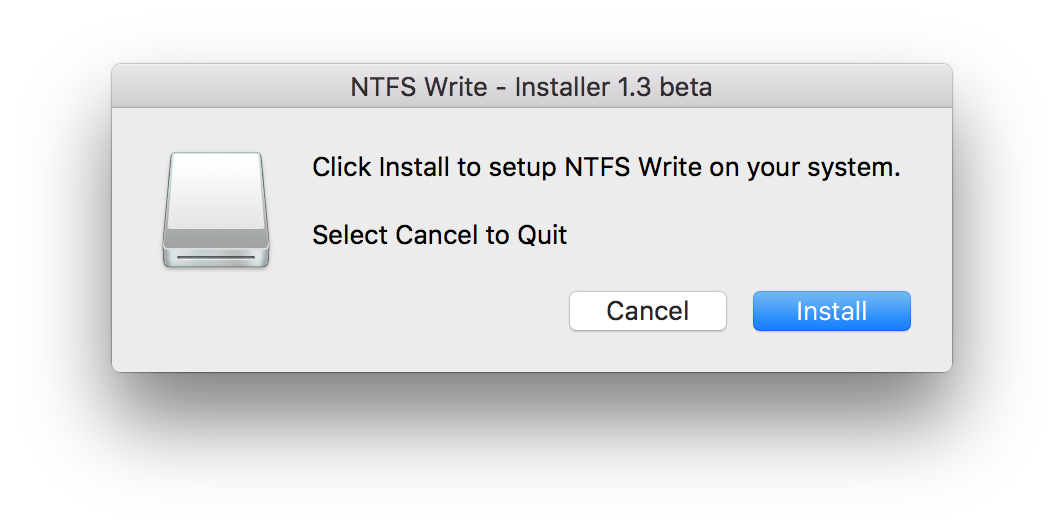
  • Select Install
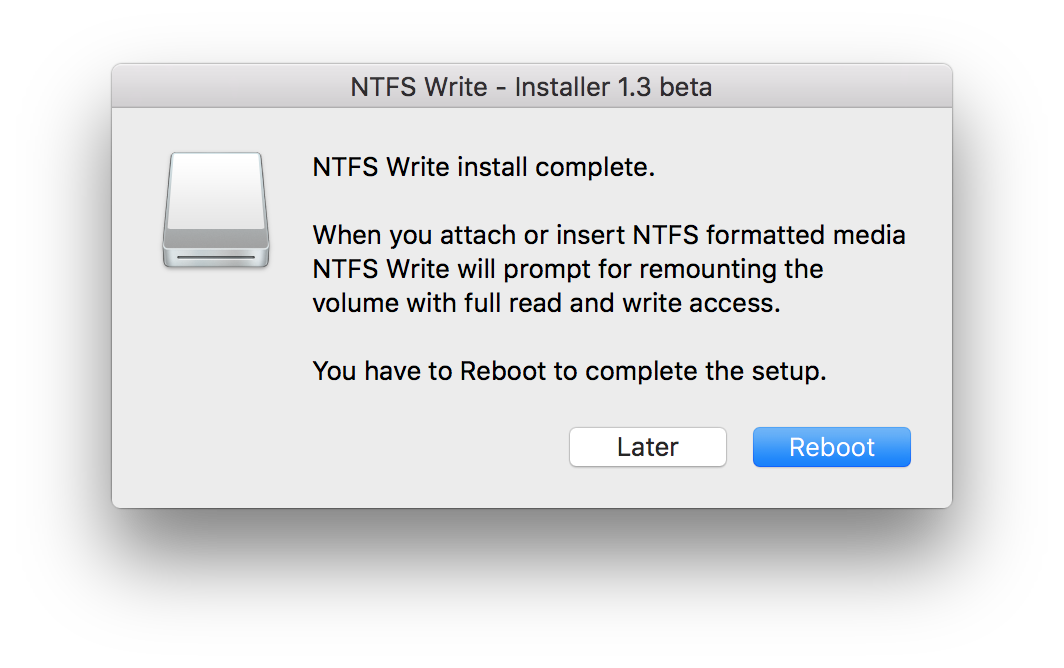
  • After the installation is complete, reboot/restart your computer. 
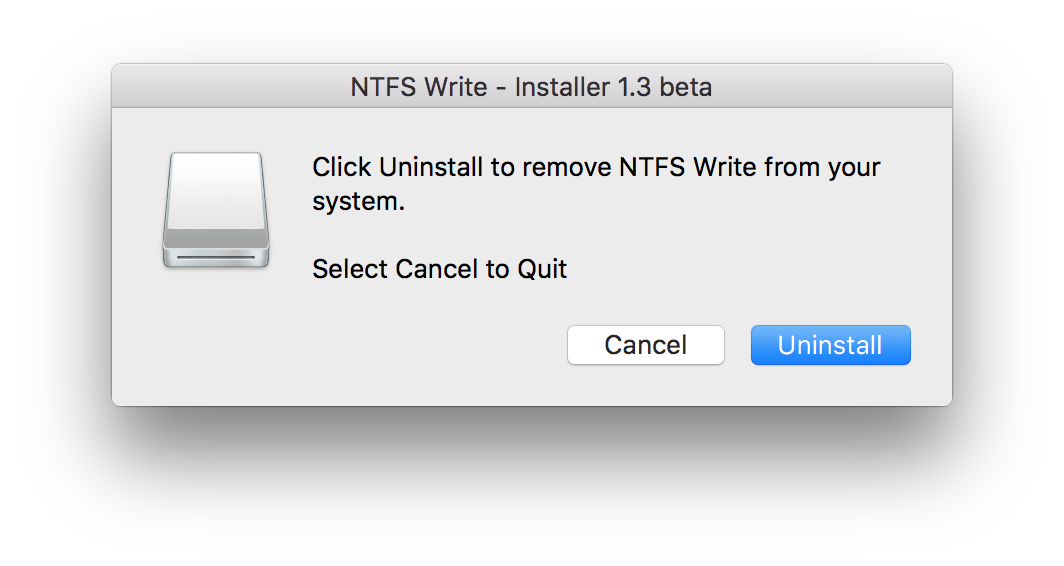
  • To Uninstall NTFS Write simply launch the NTFS Write Install application again and you will be prompted to un-install the program.

Usage

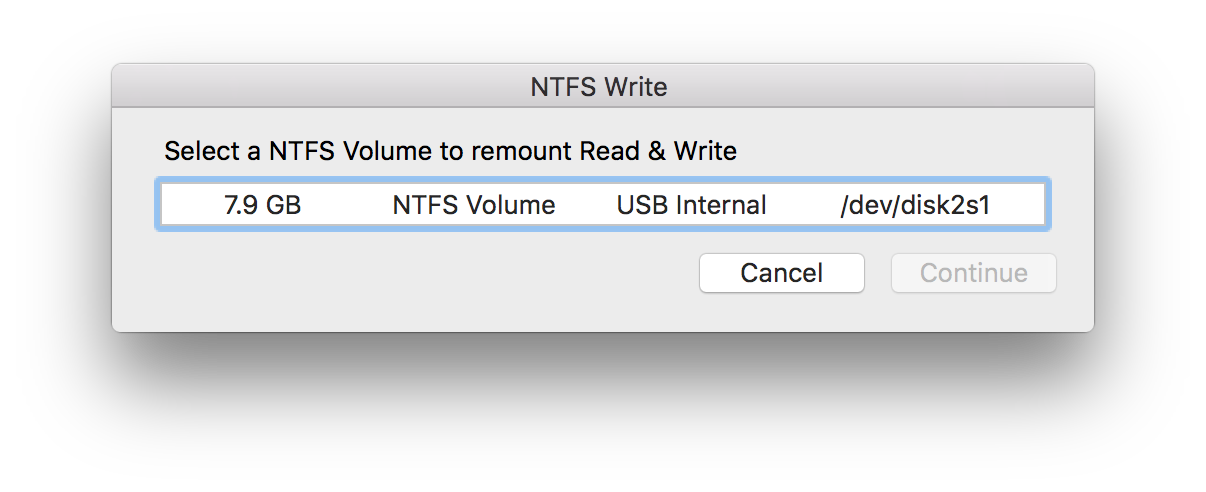
  • Attaching any NTFS formatted storage media that can be remounted in read & write mode, will be auto-detected and theNTFS Write window below will automatically appear. 
  • NOTE : Sometimes the dialog does not appear when attaching a NTFS volume the first time, simply eject and re-attach the NTFS media. 
  • You can then select the disk volume you would like to activate read and write support for and remount.
  • The Volume will be unmounted and remounted with full write access support enabled.
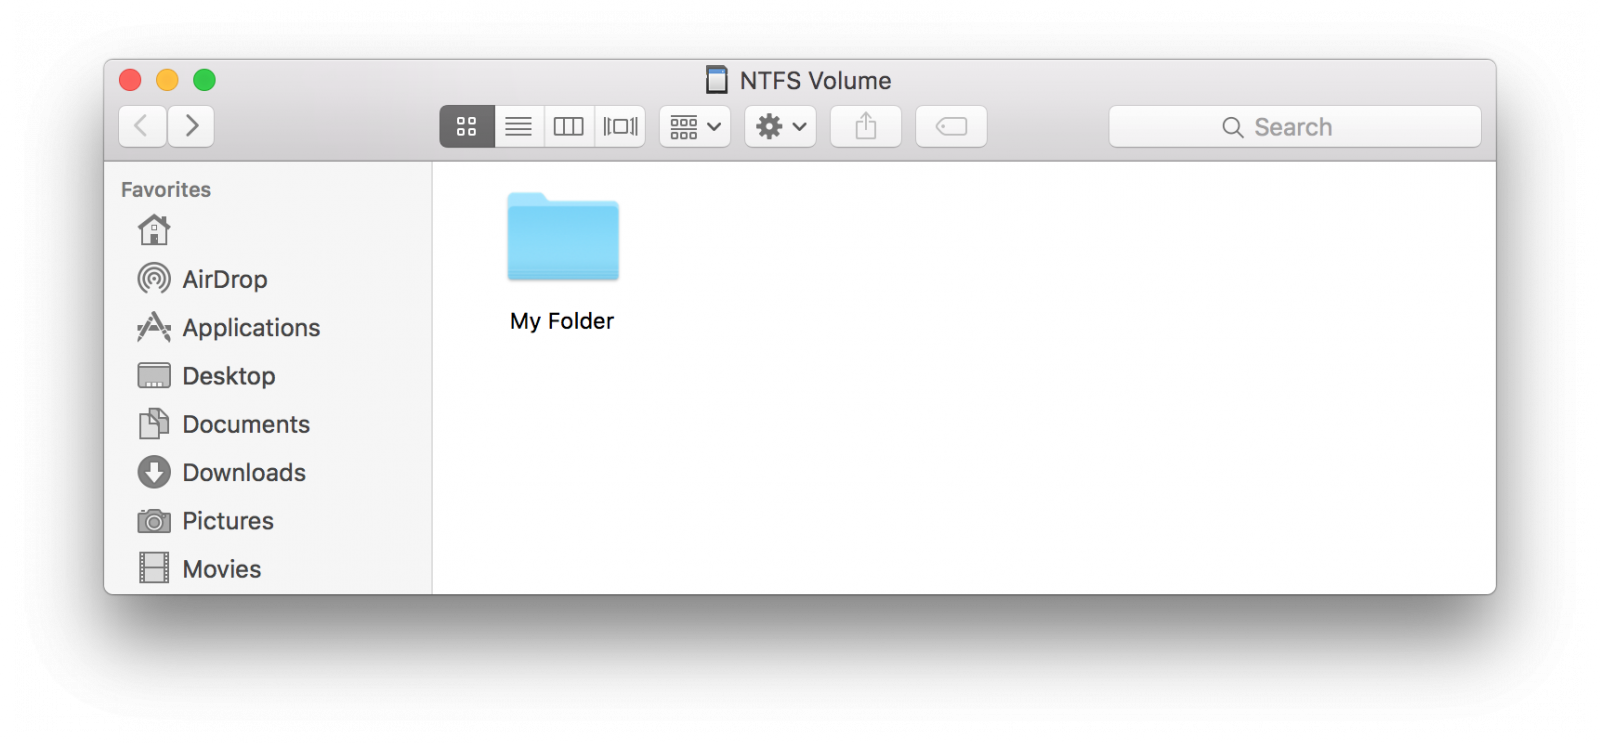
  • The Volume will open in Finder if successfully remounted.
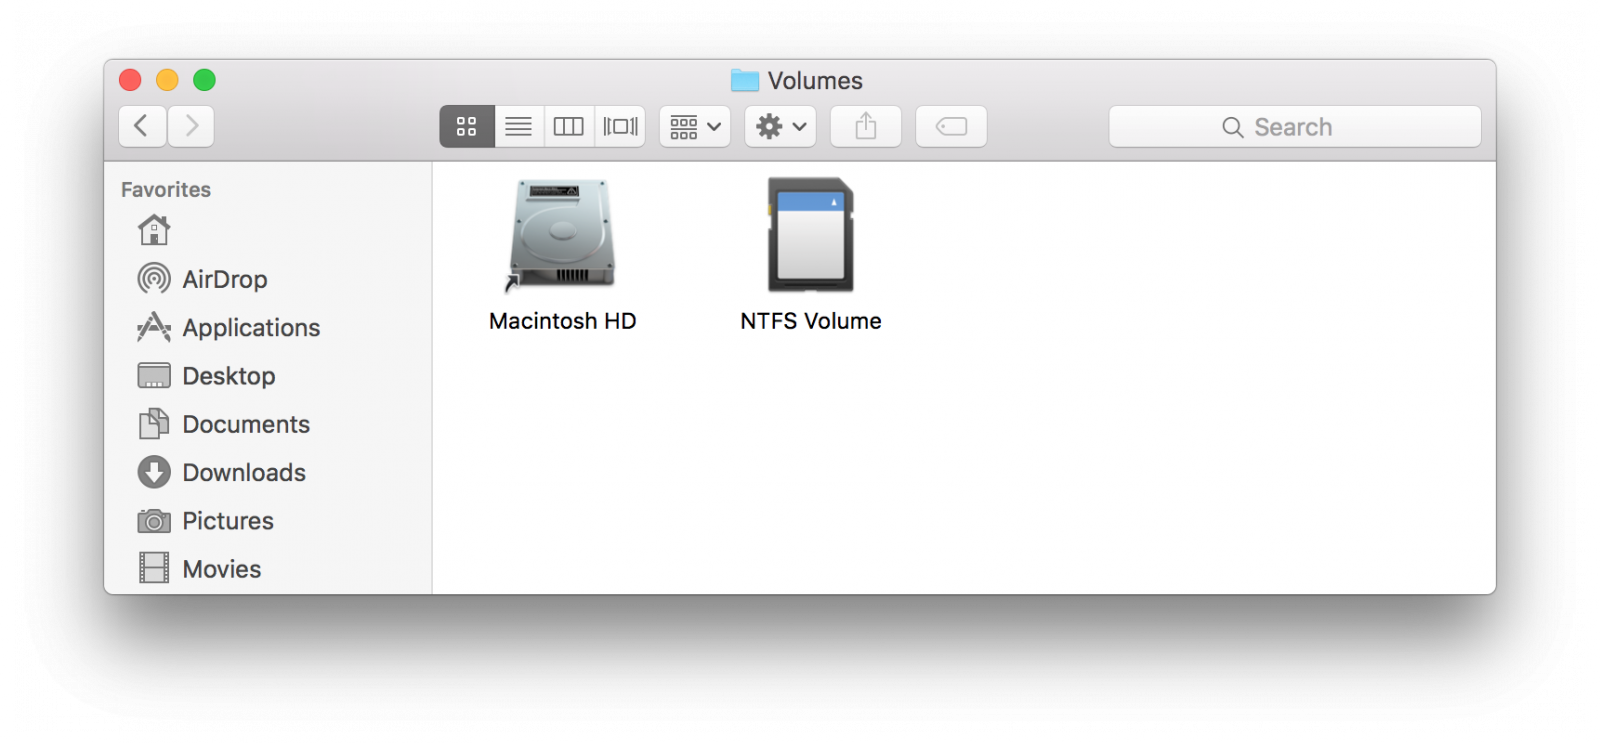
  • NOTE: The storage volume is mounted by the system and not the user. This means the normal shortcut in the Devices menu in the Finder sidebar will not appear after remount. The media can be found at /Volumes/<Drive Name>
  • NTFS write will also add a Desktop shortcut to your storage volume.

Note

  • Mac OS X does not officially support NTFS write mode and some advise against this.
  • Certain NTFS media cannot be mounted in read write mode due to being incorrectly unmounted or due to errors. Running Check Disk on Windows is needed to repair NTFS filesystem errors.
  • Some files show up as grayed out and cannot be changed. This is due to Apple extended attributes causing this issue. Refer to xattr documentation for more information.  


Download: 

AttachmentSize
File NTFS write - version 1.5.dmg3.19 MB

Wednesday, September 23, 2015

[MAC]: How to Install Ubuntu 14.04 on a Macbook Air

How to Install Ubuntu 14.04 on a Macbook Air

How to Install Ubuntu Linux on Macbook Air. This is model MacbookAir3,1 made in 2010. This may seem like a lot of steps, but you really only have to do it once. Once your OS is installed you just open the computer and start using it.

1. Obtain Ubuntu image and burn to DVD
http://cdimage.ubuntu.com/releases/14...
ubuntu-14.04.2-desktop-amd64+mac.iso
This image is adjusted to work properly on Mac systems. 

2. Backup data

3. Boot DVD from external drive. Start while holding C 

4. Erase SSD using gParted
- go to System / Administration / Partition Editor 
- choose Device / Create Partition Table... 
- choose "msdos" for the type of partition table 

5. Install Ubuntu without WiFi

6. Enable WiFi

7. select nVidia driver and reboot, to eliminate graphic glitches and crashes
- search for “drivers” to find Additional Drivers utility
- if no drivers show, use Ubuntu Software Center to activate nVidia restriced source
- select proprietary driver and click Apply, then exit
- sudo nvidia-xconfig
- reboot
- Upon logging in immediately run NVIDIA X Server Settings, select X Server Display Configuration, and click Save to X Configuration File. 


Optional Optimizing Steps

1. disable Apport to prevent “System Program Problem Detected” popups
sudo gedit /etc/default/apport

2. Enable TRIM wear leveling on ext4 
As of Ubuntu 14.04, scheduled TRIM is enabled by default for Intel, SAMSUNG, OCZ, Patriot and Sandisk SSDs. If you have another brand, you can disable the vendor check by editing the file /etc/cron.weekly/fstrim and add –no-model-check
sudo gedit /etc/cron.weekly/fstrim

3. Fix brightness keys
sudo gedit /etc/X11/xorg.conf
Add Option line to Device section: Option "RegistryDwords" "EnableBrightnessControl=1" 

4. Avoid long EFI wait “white screen” before GRUB
Boot from a Mac OSX USB device, then click Utilities/Terminal, and enter: 
sudo bless --device /dev/disk0s1 --setBoot --legacy 
Assuming that the bootloader is on sda1, otherwise /dev/disk0s2 if it's on sda2, etc. 

5. Turn off password lock when screen dims
- Settings / Brightness & Lock
- dim after 10 minutes
- lock off

6. Settings / Mouse & Touchpad / Tap to Click

Friday, February 13, 2015

[Windows]: How to Convert a Mac-Formatted Drive to a Windows Drive

How to Convert a Mac-Formatted Drive to a Windows Drive

mac-hard-drive-with-apple-logo
Macs format drives with Apple’s HFS+ file system, which Windows won’t recognize or access without third-party software. Macs may also create a protected EFI partition on these drives that you can’t delete with the usual disk-partitioning tools.
Some drives are even sold as “Mac-formatted drives” — this just means they come with the Mac HFS+ file system instead of NTFS or FAT32. Macs can read NTFS drives, and can read and write to FAT32 drives.

Back Up the Drive’s Data First

First, back up the data on the Mac-formatted drive if you have anything important on it. This process won’t actually convert the file system. Instead, we’ll just be wiping the drive and starting over from scratch. Any files on the drive will be erased.
If you have a Mac lying around, you can plug the drive into a Mac and back up the files. If you only have Windows systems available, you can use HFSExplorer to copy files from the drive onto your Windows system drive or another drive. HFSExplorer unfortunately requires you install Java to use it, but it’s the only free option here. You’ll probably want to uninstall Java when you’re done.
restore-files-from-time-machine-backup-drive-on-windows

Erase the Mac Partitions, Including the EFI System Partition

First, open the Windows Disk Management tool. Press Windows Key + R to open the Run dialog, type diskmgmt.msc into the box, and press Enter to open it. This tool allows you to manage the partitions on drives connected to your computer — internal ones or external ones connected via USB.
open-disk-management-tool
Locate the Mac drive in the list of disks. Be sure you’ve identified the Mac drive — if you accidentally delete partitions from another drive, you could damage your Windows installation or lose your files.
If you’re lucky, you can just right-click each partition on the Mac drive and select Delete Volume to remove the partitions. You can then right-click in the empty space and select New Simple Volume to create a partition and format it with the Windows NTFS or FAT32 file systems.
delete-mac-partition-in-disk-management
The Mac drive may have an “EFI System Partition” on it. This partition is marked as protected, so you can’t just right-click and delete it — the delete option will be disabled.
To erase this partition, we’ll have to wipe the entire disk. This process erases everything on the disk, including its files and all its partitions. First, note the number of the disk in the disk management window. For example, in the screenshot below, the Mac-formatted drive is Disk 2.
can't-delete-mac-efi-system-partition-in-disk-management
Next, open a Command Prompt window as administrator. To do this on Windows 8 or Windows 7, press the Windows key once, type cmd , and press Ctrl+Shift+Enter.
open-command-prompt-as-administrator
Type diskpart into the Command Prompt window and press Enter.
command-prompt-diskpart-command
Type list disk at the DISKPART prompt and press Enter to view a list of disks connected to your computer. Identify the number of your Mac disk in the list. It should be the same as the number of the disk in the Disk Management window.
Be sure to double-check this — you could accidentally wipe the wrong drive if you select the wrong disk here.
diskpart-list-disk-command
Type select disk # and press Enter to select the Mac disk, replacing # with the number of the Mac disk. For example, here we’d type select disk 2.
select-disk-in-dispart
Finally, type clean and press Enter. This command erases the entire selected disk, including all its files and partitions — whether they’re protected or not. You’ll have an empty, uninitialized disk after you do this.
clean-disk-and-erase-protected-mac-efi-system-partition-with-diskpart
Close the Command Prompt window when you see a message saying “DiskPart succeeded in cleaning the disk.”

Create an NTFS or FAT32 Partition

You can now open the Disk Management window again. If you’ve left it open, you may have to click Action > Rescan Disks to update the data.
Locate the Mac disk in the list. It will be completely empty and display a message saying “Not Initialized.” Right-click it and select Initialize Disk.
initialize-disk-with-disk-management-tool
Select the MBR or GPT partition table format and click OK to create a partition table for the disk.
create-mbr-or-gpt-partition-table
Right-click in the unallocated space on the initialized disk and select New Simple Volume. Use the wizard to create a partition with the NTFS or FAT32 file system. The drive will now be formatted for use by Windows systems. There will be no space wasted by protected Mac partitions.
create-new-windows-ntfs-or-fat32-formatted-volume

Some Mac functions require an HFS+ formatted drive. For example, Time Machine can only back up to HFS+ formatted drives.

[MAC]: How to Install Windows on a Mac With Boot Camp

How to Install Windows on a Mac With Boot Camp


Thanks to the switch from PowerPC to Intel many years ago, a Mac is just another PC. Macs come with Mac OS X, but you can easily install Windows on them with Apple’s built-in Boot Camp feature.
Boot Camp installs Windows in a dual-boot configuration. You’ll know what to expect if you’ve ever installed Linux alongside Windows. Both operating systems will be installed, but you can only use one at a time.

Do You Actually Need to Use Boot Camp?

Before we proceed with the details on how to install Windows in Boot Camp, you should first stop and think about whether or not that is the best choice for your needs, because there are also a couple of drawbacks to consider.
When you use Boot Camp to install Windows on your Mac, you’ll need to re-partition your drive, which is going to take up quite a bit of your available drive space. Since storage on a Mac is fairly expensive, it’s something you should really think about. In addition, to actually use Windows, you’ll need to reboot, and if you want to use OS X again, you’ll need to reboot yet again. The benefit of Boot Camp, of course, is that you’re running Windows directly on the hardware, so it’ll be a lot faster than a virtual machine.
If all you need to do is run a few Windows applications on your Mac, and those applications aren’t games or something that requires a lot of resources, you might consider using a virtual machine like Parallels (there’s a free trial), VMware Fusion, or VirtualBox to run that software instead. The vast majority of the time you don’t actually need to use Boot Camp, and you’d be better off using a virtual machine.
Note: we don’t often recommend paid software, but in the case of Parallels Desktop, it’s something we use at How-To Geek every single day for testing software and running Windows. The integration with OS X is amazingly well done, and the speed blows away Virtualbox. In the long run, the price is well worth it.
You can even use Parallels to load your Boot Camp partition as a virtual machine while you are in OS X, giving you the best of both worlds.

What You’ll Need

You’ll need a non-Enterprise, 64-bit copy of Windows 8.1, Windows 8, or Windows 7 for this. This applies to Macs made in the last several years — if you have an older Mac from 2009 or earlier, you won’t be able to install Windows 8. Check Apple’s detailed system requirements for more information.
Windows doesn’t come with Mac OS X, so you’ll need a full version of Windows — not an upgrade version — to install it on your Mac. You can download Windows installation media for free if you already have a product key, but you’ll need to purchase a copy of Windows if you don’t. You’ll need the installation media in ISO file or DVD form.
You’ll also need a USB drive at least 8 GB in size. This will be used to install Windows and the appropriate drivers on your Mac.
Apple recommends backing up your files before partitioning or installing Windows. It’s always good to have backups before doing something that could potentially be destructive. If you make a mistake or the partitioning process fails due to a bug, you could lose your files. If you’re careful, this shouldn’t happen.

How to Install Windows on Your Mac

You’ll use the Boot Camp Assistant application that comes on your Mac for this. Open it by pressing Command + Space, typing Boot Camp, and pressing Enter.
The Boot Camp Assistant will copy the Windows installation files from an ISO file or physical disc to a USB drive. Windows will install itself on your Mac from this USB drive. The latest Windows drivers will also be downloaded from Apple and placed on this drive, and they’ll install automatically after you install Windows. This application will also guide you through the process of resizing your Mac’s existing system partition and creating a Windows partition.
First, select what you want to do. You should probably leave all these options checked. However, if you already have a Boot Camp USB drive or you’ve already partitioned your Mac, you can uncheck these options to speed the process up. This is useful if you’re installing Windows on multiple Macs and you’ve already created a USB drive.
install-windows-with-boot-camp-on-a-mac
Next, point your Mac at the ISO file or USB drive. Insert a USB flash drive and select it. This drive will be erased, so be sure you have backups of any important files stored on it.
create-bootable-usb-drive-for-windows-on-mac
The screen will read “Copying Windows files” as your Mac creates the Windows installer drive it will need. This process may take quite a while, depending on the speed of your drive. It’s normal for the progress bar to appear stuck in one position — just be patient.
boot-camp-copying-windows-filesAfter your Mac finishes creating a USB installation drive, you’ll see the Create a Partition screen. You can now divide your Mac’s system drive into two separatepartitions — one for Mac OS X and one for Windows. How you should allocate the space depends on how much space you want for your Windows system and how much space you want for your OS X system. If you have multiple hard disks in your Mac, you can use one specifically for Windows.
If you want to resize your partitions after this process, you’ll need to use a third-party tool. Boot Camp Assistant can’t help you with that.
create-a-partition-for-windows-on-a-mac-with-bootcamp
Click the Install button and Boot Camp Assistant will resize your Mac OS X partition and create the new partition for Windows. Your Mac will then restart and boot the Windows installer from the USB drive. Go through the installer and install Windows on your Mac like you’d install it on any other PC.
Select the partition labeled BOOTCAMP when you reach the Where do you want to install Windows? screen. Click the Format option to format the partition as NTFS, and then click Continue.
Warning: Triple-check that you’re formatting the right partition. You’ll wipe your Mac OS X system if you format the wrong partition.
select-and-format-boot-camp-partition-while-installing-windows-on-a-mac
Windows will now finish installing normally. The Boot Camp installer will appear after you finish installing Windows, installing the hardware drivers and utilities you’ll need in your Windows system.
After the Boot Camp installer finishes, you’re free to remove the USB drive and do whatever you want with it. If you don’t plan to install Windows on another Mac, you can format the drive and place your personal files on it again.

The Boot Camp Control Panel

You’ll find Apple’s Boot Camp Control Panel running in your system tray after installing Windows. Click the up arrow in your system tray to view more icons, click the Boot Camp icon, and select Boot Camp Control Panel to open it.
open-boot-camp-control-panel-on-windows
This control panel allows you to choose the default operating system your Mac boots to, as well as tweak keyboard and trackpad settings.
select-default-operating-system-with-boot-camp-on-mac
While in Windows, the Mac’s Command key functions as the Windows key, while the Option key functions as the Alt key.

How to Remove Windows From Your Mac

If you want to remove Windows from your Mac and free up space, reboot into Mac OS X and open the Boot Camp Assistant again. You’ll see the Remove Windows 7 or later version option here if Windows is currently installed.
uninstall-or-remove-windows-from-mac
Boot Camp Assistant will automatically remove Windows and expand the Mac OS X partition for you, reclaiming all of that space.
Warning: This will delete all the files on your Windows partition, so be sure you have backup copies first!
delete-windows-boot-camp-partition

Windows should work just fine on your Mac hardware. These aren’t the PowerPC days anymore — your Mac has standard hardware components. In fact, many of the hardware drivers provided by Apple are the same ones you’d get on a typical Windows PC.